
How to Remove Your Harley Street 750 Battery: A Step-by-Step Guide from Experience
 Jake Miller
18 min read
Jake Miller
18 min read
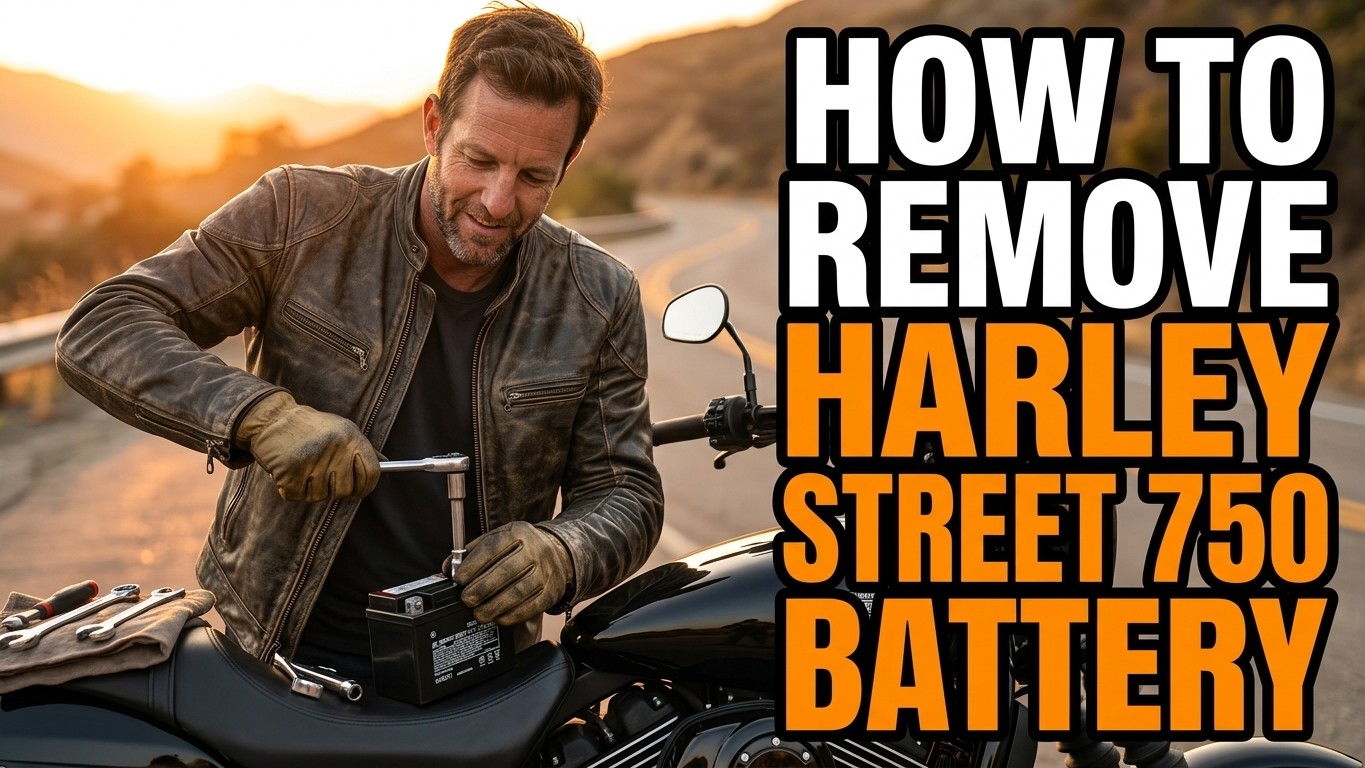
Why I’ve Removed My Street 750 Battery More Times Than I Can Count
I’ve owned my Harley-Davidson Street 750 for three years now, and I’ve probably pulled the battery out at least a dozen times. Whether it’s for winter storage, replacing a dead cell, or troubleshooting electrical gremlins, knowing how to remove your battery properly is an essential skill every Street 750 owner should master.
The first time I attempted this, I fumbled around for nearly an hour, second-guessing every move. Now I can have it out in under five minutes. In this guide, I’ll share everything I’ve learned through trial and error so you can do it right the first time.
- Always disconnect the negative terminal first to prevent shorts and electrical damage
- You’ll need basic tools: 10mm socket/wrench, 8mm wrench, and about 15 minutes of time
- Remove the left side cover and seat to access the battery compartment on the Street 750
- Keep terminals clean and apply dielectric grease during reinstallation for better connections
- A battery tender during storage will save you hundreds in premature replacements
What You’ll Need Before Starting
I’ve learned the hard way that having everything ready before you start makes the job infinitely easier. Nothing’s worse than getting halfway through and realizing you’re missing a crucial tool.
Essential Tools and Materials
Here’s what I keep in my toolbox specifically for battery maintenance. A 10mm socket wrench or combination wrench is your primary tool for the terminal bolts. An 8mm wrench or socket handles the battery hold-down bracket, though some model years might vary slightly.
I also recommend having a clean rag or shop towel handy. Batteries can accumulate grime and corrosion, and you don’t want that stuff on your hands or bike paint.
A pair of rubber gloves isn’t mandatory, but I wear them every time. Batteries contain sulfuric acid, and even a small amount of corrosion on the terminals can irritate your skin. Plus, they keep your hands clean.
Optional But Helpful Items
A battery terminal cleaner brush has saved me countless headaches. These inexpensive tools have a wire brush designed specifically for cleaning post-style terminals and are worth every penny.
I also keep a small container of dielectric grease in my garage. Applying a thin layer to the terminals during reinstallation prevents corrosion and ensures solid electrical connections. This simple step has extended the life of my batteries significantly.
If you’re removing the battery for storage or testing, you’ll want a battery tender or trickle charger on hand. I use mine religiously during Chicago winters, and my batteries consistently last 4-5 years instead of the typical 2-3.
Safety First: What I Always Do Before Touching the Battery
I’ll be honest—I skipped some safety steps when I was younger and more careless. After one close call with a spark that could’ve been much worse, I became religious about following proper procedures.
Turn Everything Off
This seems obvious, but make absolutely sure your ignition is off and the key is removed. I also make it a habit to check that no accessories are drawing power. The Street 750 doesn’t have many electrical draws compared to touring bikes, but better safe than sorry.
Let your bike cool down if you’ve been riding. I once grabbed a hot battery terminal right after a summer ride and learned that lesson the painful way. Give it at least 30 minutes to cool off.
Work in a Well-Ventilated Area
Batteries emit hydrogen gas, especially when charging or being disconnected under load. While the risk is low with proper procedures, I always work in my open garage rather than a closed space. Hydrogen is extremely flammable, and it’s not worth the risk.
Remove any jewelry—rings, watches, bracelets. Metal jewelry can create a short circuit if it touches both terminals simultaneously. I’ve seen photos of severe burns from this mistake, and they’re not pretty.
Accessing the Battery Compartment on the Street 750
The Street 750’s battery location is fairly accessible compared to some Harley models, but there’s a specific sequence I follow to make the job easier.
Removing the Left Side Cover
The battery sits under the left side cover on the Street 750. Start by locating the two fasteners on the underside of the cover. On my 2015 model, these are simple push-pin style fasteners, though Harley changed the design slightly in later years.
I gently pull the bottom of the side cover away from the bike first, then work my way up. There are plastic tabs that slot into grommets on the frame, and forcing them can cause cracks. Ask me how I know.
Once the cover is loose, lift it straight up and away. Set it somewhere safe where it won’t get scratched or stepped on. I use a clean towel on my workbench.
Dealing with the Seat (If Necessary)
Depending on your exact model year and any modifications, you might need to remove or loosen the seat for better access. On most Street 750s, you can reach everything with just the side cover removed.
If you do need seat removal, there’s typically a bolt under the rear fender and the seat lifts up from the back. I’ve only had to do this once when I was installing additional wiring.
The Correct Sequence for Disconnecting Battery Terminals
This is where proper technique really matters. Getting this wrong can damage your bike’s electrical system or even cause injury. I’m going to walk you through exactly how I do it every single time.
Always Disconnect Negative First
The negative terminal always comes off first. This is the single most important rule of battery removal. The negative terminal is connected to the frame and engine, which means it’s connected to literally every metal part of your motorcycle.
If you remove the positive terminal first and your wrench accidentally touches the frame, you’ve just created a direct short circuit. I’ve seen this happen, and it results in spectacular sparks, potential damage to the bike’s ECU, and possibly a destroyed wrench.
On the Street 750, the negative terminal is marked with a minus sign (-) and typically has a black cable. Using your 10mm wrench, loosen the nut on the terminal clamp. You don’t need to remove the nut completely—just loosen it enough that you can wiggle the cable free.
Removing the Negative Cable
Once the nut is loose, carefully wiggle the cable terminal back and forth while pulling upward. If it’s stuck due to corrosion, don’t force it. I use a small flathead screwdriver to gently pry under the terminal clamp, being careful not to damage anything.
After the negative cable is free, tuck it away from the battery. I usually tuck it beside the frame where it can’t accidentally swing back and touch the negative post. This step is crucial for the next part.
Now Remove the Positive Terminal
With the negative safely disconnected, you can now remove the positive terminal. This one is marked with a plus sign (+) and usually has a red cable. Use the same technique: loosen the 10mm nut, wiggle the terminal free, and move the cable away from the battery.
I’m always extra careful with the positive cable. Even though the negative is disconnected, I avoid letting the positive terminal or cable touch any metal parts of the bike. It’s just a good habit that prevents accidents.
Removing the Battery Hold-Down and Extracting the Battery
With both terminals disconnected, you’re ready to physically remove the battery from its tray. The Street 750 uses a simple but effective hold-down system.
The Hold-Down Bracket
Look at the front of the battery—you’ll see a metal bracket that spans across it. This bracket is held in place by a single bolt that threads into the battery tray. On my bike, this requires an 8mm socket or wrench.
Loosen and remove this bolt completely. Keep track of it—I learned to put small parts in a magnetic tray after I dropped one and spent 20 minutes searching my garage floor.
Once the bolt is out, the bracket should lift straight up and away. Some brackets have rubber cushions on them; make sure these don’t fall off and get lost.
Lifting the Battery Out
Now comes the actual removal. Street 750 batteries are relatively compact but still weigh around 8-10 pounds depending on the type. I grasp the battery firmly with both hands, making sure I have a good grip.
Lift straight up. The battery should come out easily, but sometimes the rubber tray liner creates a bit of suction. If it feels stuck, wiggle it gently side to side as you lift—don’t force it at an angle.
One important note: Try to keep the battery level as you remove it. Tipping a conventional lead-acid battery too far can cause acid to leak from the vents. AGM batteries are more forgiving, but I still practice good habits regardless.
Inspecting and Cleaning While You’re in There
Since I have everything disassembled anyway, I always take a few extra minutes to inspect and clean. This preventive maintenance has saved me from problems down the road.
Checking the Battery Tray
Look at the battery tray for any signs of corrosion, acid damage, or moisture. The Street 750’s battery compartment is fairly well-protected, but I’ve still found dampness in there after particularly wet rides.
If there’s any corrosion, I clean it with a mixture of baking soda and water. This neutralizes battery acid and makes cleanup easier. A small brush or old toothbrush works perfectly for scrubbing.
Make sure the rubber tray liner is in good condition and properly seated. This protects your battery from vibration damage and helps prevent electrical shorts.
Terminal and Cable Inspection
While the cables are off, I inspect them closely. Look for fraying, cracks in the insulation, or signs of corrosion creeping up into the cable strands. Any of these issues mean it’s time for replacement.
The terminal clamps themselves should be tight and undamaged. If they’re loose or cracked, replace them. Quality terminals are cheap insurance against electrical problems.
I use my wire brush to clean both the cable terminals and the battery posts until they’re shiny. This ensures the best possible electrical connection when I reinstall everything. It only takes a minute and makes a noticeable difference in starting performance.
What to Do with the Removed Battery
Now that your battery is out, you have several options depending on why you removed it in the first place.
Testing Battery Health
If you removed the battery to test it, I recommend using a multimeter to check voltage. A fully charged 12-volt battery should read between 12.6 and 12.8 volts when at rest. Anything below 12.4 volts indicates a discharged battery that needs charging.
I also perform a load test whenever I have the battery out. Most auto parts stores will do this for free if you don’t have a load tester. This test reveals the battery’s ability to hold voltage under load, which is more telling than just checking resting voltage.
Charging and Maintenance
If you’re storing your bike for an extended period, I strongly recommend keeping the battery on a tender. I use a Battery Tender brand maintainer, though there are many good options available.
These devices monitor battery voltage and provide just enough charge to maintain optimal levels without overcharging. I’ve extended battery life by years using this approach during winter storage.
For a discharged battery that needs a full charge, use a standard battery charger appropriate for your battery type. AGM batteries require different charging parameters than conventional flooded batteries, so check your battery’s specifications.
Battery Replacement
If testing reveals your battery is toast, now’s the time to replace it. The Street 750 uses a pretty standard size—most are YTX14 or equivalent AGM batteries. I’ve had good experiences with both Yuasa and Odyssey brands.
When buying a new battery, pay attention to whether it’s conventional or AGM (Absorbed Glass Mat). AGM batteries cost more but offer better performance, longer life, and zero maintenance. They’re worth the extra investment in my opinion.
Reinstallation: Putting Everything Back Together
Reinstalling the battery is essentially the removal process in reverse, but with a few important details to get right.
Preparing the Battery
Before putting the battery back in, I always check that it’s fully charged. A new battery should be charged before installation, and a removed battery should be topped off if it sat for any length of time.
If I cleaned the terminals earlier, I apply a thin layer of dielectric grease to the battery posts. This prevents corrosion and ensures good conductivity. Don’t overdo it—a little goes a long way.
Setting the Battery in the Tray
Lower the battery straight down into the tray, making sure it’s seated properly and the terminals are oriented correctly. The positive terminal should be toward the front of the bike, with the negative to the rear. This should match how the cables are positioned.
Make sure the battery sits flat in the tray and isn’t tilted or rocking. The rubber liner should cushion it evenly on all sides.
Reinstalling the Hold-Down
Place the hold-down bracket back across the battery, lining up the bolt hole. Thread the bolt in by hand first to make sure it’s not cross-threaded, then snug it down with your wrench.
Don’t overtighten this bolt. It just needs to be tight enough to hold the battery securely—you’re not trying to crush it. I tighten until the battery doesn’t move when I try to wiggle it, then give it maybe another quarter turn.
Connecting the Terminals in the Right Order
Terminal connection order is just as important as removal order, but reversed. Always connect the positive terminal first, then the negative.
Positive Terminal Connection
Take the positive (red) cable and slide the terminal clamp over the positive battery post. Make sure it’s fully seated—the terminal should be flush against the battery top.
Hold the terminal in place and tighten the nut with your 10mm wrench. I tighten until it’s snug and the terminal can’t rotate on the post, but I don’t reef on it. Over-tightening can damage the lead post.
Negative Terminal Connection
Now connect the negative (black) cable the same way. Slide it over the negative post, ensure it’s fully seated, and tighten the nut.
This is the moment when you might see a tiny spark as you make the final connection—that’s normal. The bike’s electrical system is drawing a tiny amount of current. If you see large sparks or smoke, something is wrong and you need to disconnect immediately and investigate.
Final Terminal Check
After both terminals are connected, I always try to wiggle them. They should be rock solid with no movement. If a terminal is loose, it’ll cause starting problems and can create heat that melts the terminal or damages the battery post.
If you used dielectric grease on the posts, you can also apply a small amount to the outside of the terminals now. This provides an extra layer of protection against the elements.
Buttoning Everything Back Up
With the battery secured and connected, it’s time to replace all the covers and verify everything is working.
Replacing the Side Cover
Take your left side cover and align it with the mounting points on the frame. I start at the top, fitting the plastic tabs into their grommets, then work my way down.
The bottom fasteners should snap or screw in securely. Make sure the cover sits flush and doesn’t have any gaps. A poorly seated cover can vibrate loose while riding.
If your cover won’t fit properly, double-check that no wires are pinched behind it. I’ve forgotten this step before and had to remove the cover again to tuck everything in correctly.
Testing Your Work
Before I call the job done, I always turn the key to the accessory position and verify that the lights and dash come on. Then I thumb the starter and make sure the engine cranks and starts normally.
Listen for any unusual sounds or notice any warning lights on the dash. Everything should function exactly as it did before you removed the battery. If something seems off, investigate before riding.
Common Mistakes I’ve Made (So You Don’t Have To)
Over the years, I’ve made pretty much every mistake possible with battery removal. Here are the big ones worth avoiding.
Removing Positive First
I’ll admit it—the first time I removed a motorcycle battery, I took the positive off first because it was easier to reach. When my wrench touched the frame, I got a spectacular shower of sparks and nearly dropped the wrench.
This can damage your bike’s ECU, blow fuses, or even weld your wrench to the frame. Always, always disconnect negative first. There’s no exception to this rule.
Not Cleaning the Terminals
For years, I’d just disconnect the battery and reconnect it without cleaning anything. Then I started wondering why my batteries only lasted two years when they were supposed to last four or five.
Corrosion creates resistance, which makes your charging system work harder and can prevent proper battery charging. Spending two minutes with a wire brush has literally doubled my battery lifespan.
Over-Tightening Everything
When I was younger, I figured tighter was better. I’d crank down terminal bolts and hold-down brackets as hard as I could. This actually caused problems—I cracked a battery case once and stripped the threads on a terminal clamp.
Hand-tight plus a quarter turn is plenty for most motorcycle battery connections. If the terminal doesn’t move when you try to twist it, it’s tight enough.
Ignoring Battery Maintenance
The biggest mistake I made for years was treating the battery like a “set it and forget it” component. I’d install it, ride all season, then store the bike with the battery connected and wonder why it was dead come spring.
Regular maintenance—checking voltage monthly, keeping terminals clean, using a tender during storage—has saved me hundreds of dollars in premature battery replacements.
Troubleshooting Common Issues During Battery Removal
Sometimes things don’t go smoothly. Here are solutions to problems I’ve encountered over the years.
Corroded Terminals Won’t Come Off
If your terminals are so corroded that they’re stuck to the battery posts, don’t force them. I spray penetrating oil around the terminal clamp and let it sit for a few minutes.
Then I use a battery terminal puller if I have one, or very carefully pry under the terminal with a flat screwdriver while pulling upward. The key is even pressure—you want to break the corrosion bond without damaging the terminal or post.
Stripped Terminal Bolts
If someone over-tightened the terminal bolts before you, they might be stripped. I’ve dealt with this twice on used bikes I’ve purchased. Your options are to replace the terminal clamp entirely or carefully use vice grips to remove the damaged bolt.
For reinstallation, I always replace stripped bolts with new ones. They’re cheap and it’s not worth risking a loose connection.
Battery Seems Stuck in the Tray
Sometimes the rubber tray liner creates a suction effect, or corrosion at the base makes removal difficult. I gently rock the battery side to side while lifting upward. If it’s really stuck, I’ll carefully use a plastic pry tool to break the seal.
Never use a metal tool to pry directly against the battery case—you can crack it or create a short circuit if you touch both terminals.
When to Call a Professional Instead
I’m a strong believer in DIY maintenance, but there are times when professional help is the smarter choice.
If you’re uncomfortable working with electrical systems or don’t have the right tools, taking your Street 750 to a dealer is perfectly reasonable. Most shops charge less than an hour of labor for battery service, and it’s worth it for peace of mind.
If you’ve found significant corrosion inside the battery compartment or damage to the wiring harness, a professional can properly assess and repair the damage. Electrical problems have a way of cascading if not addressed correctly.
For warranty concerns, using a dealer ensures your service is documented. If your bike is still under warranty, check whether DIY battery removal affects coverage before proceeding.
My Final Thoughts on Street 750 Battery Removal
Learning how to properly remove and reinstall my Street 750’s battery has been one of the most valuable maintenance skills I’ve developed. It’s given me the confidence to handle winter storage properly, troubleshoot electrical issues, and perform routine maintenance without relying on a dealer.
The job itself is straightforward once you understand the proper sequence and safety precautions. Taking your time, using the right tools, and following the negative-first, positive-last rule will keep you safe and protect your bike’s electrical system.
I encourage every Street 750 owner to master this skill. It’s not just about saving money on dealer service—it’s about understanding your motorcycle better and being self-sufficient when problems arise. The first time you pull your battery for winter storage and successfully reinstall it come spring, you’ll feel a real sense of accomplishment.
Take care of your battery, and it’ll take care of you. Regular maintenance, proper storage practices, and clean connections have given me reliable starting and electrical performance year after year. Now you have all the knowledge I wish someone had shared with me when I first started working on my Street 750.
Frequently Asked Questions
Do I need to disconnect both terminals when removing a Street 750 battery?
Yes, always disconnect the negative terminal first, then the positive. This prevents electrical shorts and protects your bike’s electronics.
How often should I remove and charge my Harley Street 750 battery?
If you store your bike for more than two weeks, I recommend removing and maintaining the battery with a trickle charger to extend its lifespan.
Can I damage my Street 750 by removing the battery incorrectly?
Yes. Disconnecting the positive terminal first or touching both terminals simultaneously can cause shorts, damage electronics, or even cause sparks and injury.
What size wrench do I need to remove the Street 750 battery terminals?
You’ll need a 10mm socket or wrench for the terminal bolts and possibly an 8mm for the hold-down bracket, depending on your model year.

Related Articles

How Long Does It Take to Charge a Car Battery While Driving? A Rider’s Complete Guide
Discover how long it takes to charge your car battery while driving. I share real-world charging times, factors that affect…
Jake Miller
13 min read

How Long to Charge a Car Battery at 2 Amps: My Complete Charging Guide
Discover exactly how long it takes to charge a car battery at 2 amps. I'll share my real-world experience, charging…
Jake Miller
12 min read

Can a Weak Battery Really Cause Transmission Problems? What I Learned the Hard Way
Discover how a weak motorcycle battery can trigger transmission issues. I explain the connection, symptoms I've experienced, and how to…
Jake Miller
12 min read