
Pod Filter Upgrades for Motorcycles: What I Learned About Power, Sound, and Tuning
 Jake Miller
10 min read
Jake Miller
10 min read
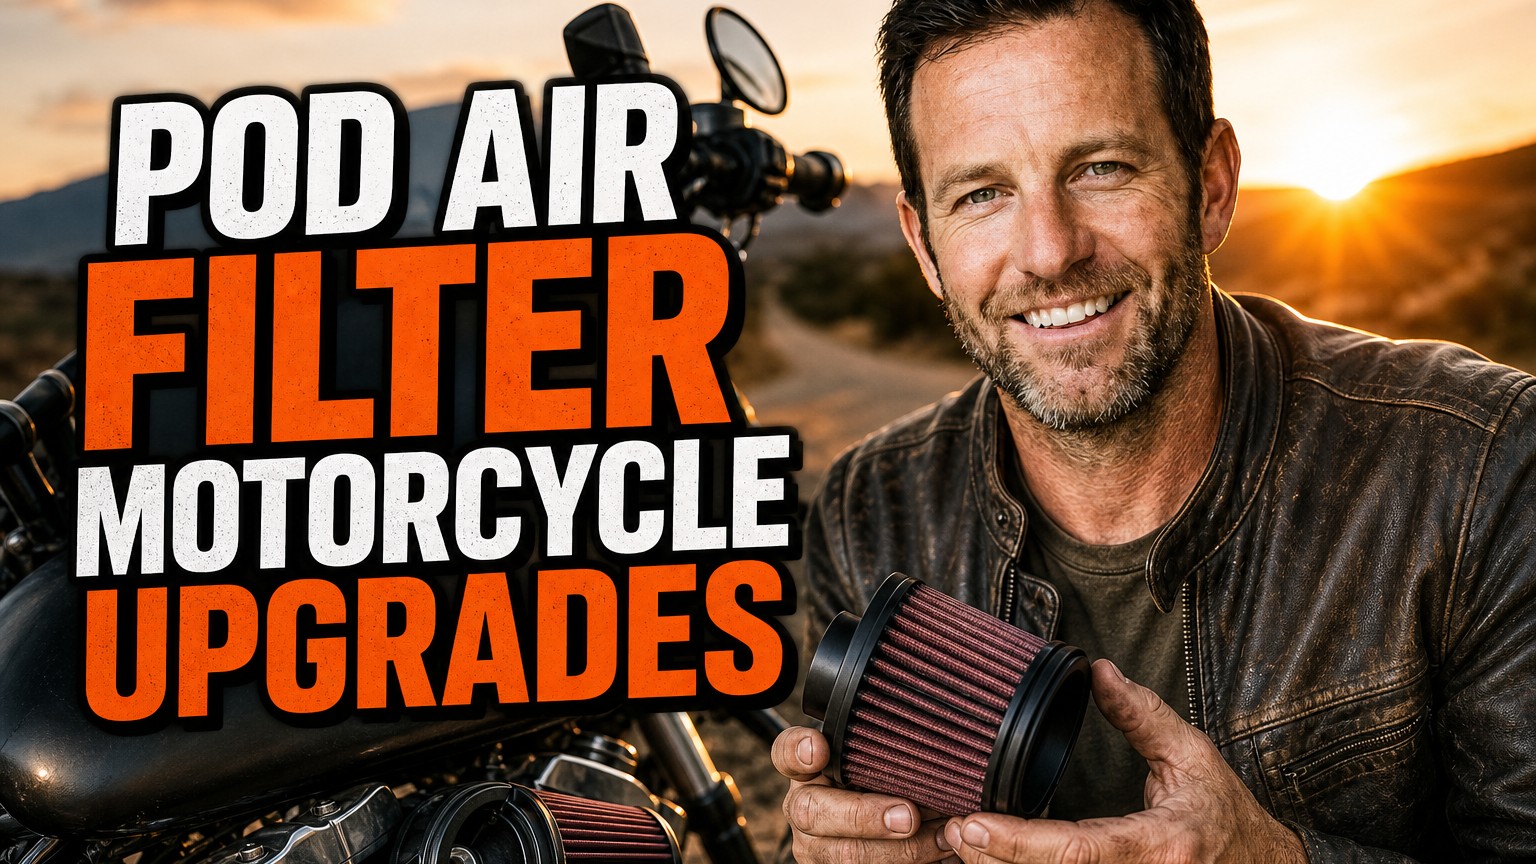
I still remember the first time I pulled the airbox off one of my older bikes and bolted on a little cone of foam and mesh. It looked tiny, sounded wonderful, and I was convinced I’d just unlocked a dozen extra horsepower. The truth was a bit more nuanced, and I learned it the hard way.
Over the years I’ve tried pod filters on carbureted street bikes, a dual-sport, and a couple of vintage air-cooled machines. Some swaps were brilliant. Others left me with a lean, popping, miserable bike until I sorted out the tuning.
In this guide, I’ll share what I’ve learned about pod air filter motorcycle upgrades: what they do, what they don’t, and how to get the most from them without hurting your engine.
- A pod filter improves airflow and sound, but it almost always requires re-jetting on a carbureted bike.
- Expect better throttle response and a more aggressive intake note, not a huge horsepower jump on its own.
- Air-cooled engines are especially sensitive to lean mixtures, so tune carefully and use quality oil.
- Clean and re-oil the filter regularly, and think twice if you ride in dust or heavy rain.
What a Pod Filter Actually Does
A pod filter is a small, exposed air filter that attaches directly to the carburetor’s intake mouth. It replaces the stock airbox, the intake tube, and the stock filter element. That’s it.
The idea is simple. By removing the restrictive airbox, the engine can pull in more air with less effort. More air means you can add more fuel, and in theory that means more power.
Why Stock Airboxes Are So Restrictive
Manufacturers design airboxes around a long list of priorities. They want quiet operation, emissions compliance, water protection, and consistent performance across a huge range of conditions. Maximum airflow is far down that list.
That’s why a stock airbox often feels a bit muffled. A pod filter strips away that compromise, which is exactly why the bike wakes up when you open the throttle.
Pod Filters vs. Other Intake Options
Pod filters are not the only option. Some riders prefer a high-flow drop-in element that keeps the stock airbox. Others go for a full aftermarket intake kit with a velocity stack.
In my experience, the pod is the cheapest and simplest route. It’s also the one that demands the most attention to tuning, which I’ll get into shortly.
The Real Benefits I’ve Noticed
I’m going to be honest here. The benefits are real, but they’re often smaller than the marketing suggests. Here’s what I’ve actually felt on the road.
Sharper Throttle Response
This is my favorite change. With a properly jetted pod filter, the bike feels more eager. Twist the grip and the engine responds almost instantly.
On my old naked bike, the mid-range snap improved noticeably. It felt lighter and more alive, even though the dyno gain was modest.
A Better Intake Sound
Pod filters make a distinct, raspy growl under load. For many riders, that sound is the main reason to do the upgrade. It adds character, especially on single-cylinder and V-twin engines.
Just keep in mind that more intake noise can also mean more noise complaints from neighbors. I’ve learned to be considerate with early morning starts.
Weight Savings and Easier Access
Removing the airbox frees up space and sheds a little weight. It also makes carburetor access much simpler. Tuning, cleaning, and adjusting become a quicker job.
On a few of my projects, this alone made the swap worthwhile. Anyone who has wrestled with a cramped airbox knows exactly what I mean.
The Catch: Jetting Is Not Optional
Here’s where many riders go wrong. They bolt on the pod, enjoy the sound, and ride away. Within a few weeks the engine is hot, surging, or backfiring on deceleration.
A pod filter leans out your air-fuel mixture. The engine gets more air, but the carburetor is still delivering the same amount of fuel. That imbalance is bad news.
Signs Your Bike Is Running Lean
I watch for a few classic symptoms after any intake change. If you notice any of these, stop and re-tune before you ride further.
- Popping or backfiring on deceleration
- Hesitation or surging at steady throttle
- Hard hot starts or a rough idle
- Light-colored spark plugs, often white or pale gray
- An engine that runs noticeably hotter than usual
How I Approach Re-Jetting
I start with a jet kit if one is available for my model. Most reputable kits include main jets, needles, and instructions. They save a lot of guesswork.
Then I test, read the spark plugs, and adjust. A good plug reading is a tan or light chocolate color. It’s slow work, but it pays off.
Pilot, Needle, and Main Jets
Each jet circuit controls a different part of the throttle range. The pilot handles idle and low throttle, the needle covers the midrange, and the main jet takes over near wide open.
Many riders only swap the main jet and wonder why the bike still stumbles off idle. You usually have to address all three circuits for a smooth result.
Why Air-Cooled Engines Need Extra Care
Air-cooled engines rely on a slightly rich mixture to stay cool. Fuel actually helps carry heat out of the combustion chamber. Lean them out and temperatures climb quickly.
That’s why I’m especially cautious when fitting a pod to an air-cooled single or twin. A little too lean on a hot day can mean scored cylinders or worse.
Oil Matters More Than You Think
Once you increase airflow and heat potential, oil quality becomes even more important. I’ve found that choosing the best oil for air cooled motorcycle engines gives me a bigger safety margin, especially in summer traffic.
If you want a deeper comparison, this roundup of the best oil for air cooled motorcycle engines top picks for performance is a handy reference. It helped me narrow down viscosity and additive choices.
Four-Stroke Considerations
For modern four-strokes, I match oil to the manufacturer’s spec, then lean toward a quality synthetic. If you’re unsure where to begin, I’d look at the best motor oil for 4 stroke motorcycle options before you commit.
Good oil won’t fix a bad tune. But it does protect the engine while you dial things in, and that’s valuable.
Pod Filters on Two-Stroke Bikes
Two-strokes are even more sensitive to intake changes. A lean two-stroke can seize in seconds. I treat any intake swap on a two-stroke with real respect.
Fuel and oil quality are part of the equation too. For premix or oil-injected machines, I always check out the best 2 cycle oil for air cooled motorcycle engines before I tune.
Vintage Two-Strokes Deserve a Gentle Touch
If you ride a classic, the stakes are higher because parts are harder to replace. I’ve seen too many beautiful old engines ruined by a rushed tune.
For those machines, I recommend reading up on the best 2 cycle oil for air cooled vintage motorcycle engines. Older engines have different tolerances and lubrication needs than modern ones.
Choosing the Right Pod Filter
Not all pods are created equal. Shopping on price alone is tempting, but a poor-quality filter can let in dirt or flow inconsistently. I’ve been burned by this once.
Foam, Cotton, or Mesh
Most pods use oiled foam or oiled cotton gauze. Foam is forgiving and cheap, and it filters well in dusty conditions. Cotton gauze flows slightly better but needs careful oiling.
For a street bike, I usually go with a quality foam pod. For track days or dry weather riding, cotton is a reasonable choice.
Sizing and Fitment
Get the diameter right. The pod’s mounting neck must match your carburetor’s intake mouth. A sloppy fit lets unfiltered air sneak in around the edges.
I always measure twice and buy a filter designed for my carb model whenever possible. It makes the install much less stressful.
Rain Covers and Sock Protection
Exposed pods hate water. Even a little spray can soak the element and choke the engine. A rain sock or filter cover is cheap insurance.
On my dual-sport, I carry a spare cover in the tool bag. It has saved me more than once on wet trails.
My Step-by-Step Installation Approach
Installing a pod is straightforward, but I like to be methodical. Here’s how I usually do it.
- Prep the bike. Let the engine cool, disconnect the battery if needed, and gather basic tools.
- Remove the airbox. Take out the intake boot, filter element, and any related breather hoses.
- Handle the breather lines. Route crankcase breather hoses properly, ideally into a small catch can or filter.
- Fit the pod. Slide it onto the carb mouth and secure it with the clamp.
- Install new jets. Swap jets and the needle, then reset the idle and mixture screws.
- Test ride carefully. Start gently, check for lean symptoms, and inspect the plugs.
A Mistake I Made Once
On one early project, I forgot to reroute a breather hose. Oil vapor ended up coating the carb and the pod. It was a messy lesson in paying attention to the small details.
Now I always plan the breather setup before I turn a wrench. It saves cleanup and keeps the filter working properly.
Maintenance Tips to Keep Things Healthy
Pods need more attention than stock airboxes. They sit out in the open, collect dust, and take whatever the road throws at them. A little routine care goes a long way.
Cleaning and Re-Oiling
I clean my pods every 3,000 to 5,000 miles on the street, and more often off-road. Use a dedicated filter cleaner, let the element dry fully, then apply filter oil evenly.
Don’t over-oil. Excess oil can drip into the carb and throw off your mixture. A light, even coat works best.
Inspect After Every Weather Change
Humidity, temperature, and altitude all affect how your bike runs. A pod filter setup is more sensitive to these changes than a stock intake.
If the bike suddenly feels different after a cold snap or a mountain trip, I check the plugs and mixture. It’s a small habit that prevents big problems.
Is a Pod Filter Right for You?
Here’s my honest take. A pod filter is a great upgrade for riders who enjoy tinkering, want a more engaging sound, and are willing to tune. It’s also a fun, affordable way to learn how your carburetor really works.
If you want a plug-and-play improvement with zero fuss, though, it might not be the right choice. A good high-flow drop-in filter can be a calmer option.
Who Should Skip It
I’d steer away from pod filters if you commute daily in heavy rain, ride on dusty roads constantly, or aren’t comfortable adjusting jets. You can still make it work, but the maintenance burden grows.
I’d also be cautious on fuel-injected bikes. Many need an ECU reflash or fuel controller, which adds cost and complexity.
Who Will Love It
If you ride an older carbureted bike, love hands-on projects, and want a bit more personality, a pod can be wonderful. That’s exactly how I felt after my first successful tune.
The key is patience. Take your time, read your plugs, and don’t be afraid to adjust.
Final Thoughts From My Garage
Done right, pod air filter motorcycle upgrades can transform how a bike feels and sounds. Done carelessly, they can cook an engine. The difference comes down to tuning, quality parts, and regular maintenance.
My advice is simple. Buy a quality pod, budget for jets, protect the engine with good oil, and ride conservatively until you’ve confirmed the tune is right.
If you take those steps, you’ll end up with a livelier, louder, and more rewarding machine. I know I did, and I’d happily do it again.
Frequently Asked Questions
Do I need to re-jet my carburetor after installing a pod filter?
Almost always, yes. A pod filter flows far more air than a stock airbox, which leans out the mixture. Larger main jets, a taller needle position, or a re-tuned pilot circuit keep the engine from running hot or lean.
Will a pod filter add horsepower to my motorcycle?
On its own, a pod filter rarely adds much. The gains come from pairing it with proper jetting and often a freer exhaust. Expect modest improvements in throttle response and top-end pull, not a dramatic jump.
Are pod filters bad for engine life?
They can be if you skip tuning or maintenance. A lean mixture and exposed filter elements that let in dust can increase wear. With correct jetting, regular cleaning, and sensible riding conditions, most riders see no problems.
How often should I clean or re-oil a pod filter?
For street riding, I clean and re-oil mine every 3,000 to 5,000 miles. In dusty or wet conditions, check it much more often. A dirty filter restricts airflow and can change your mixture.

Related Articles
7 Best Batteries for Motorcycles I’ve Tested and Trust in 2026
I've tested dozens of motorcycle batteries to find the best performers. From AGM to lithium, here are my top picks…
Jake Miller
15 min read

The Perfect Battery for Your Harley Davidson Softail: A Rider’s Complete Guide
Discover the perfect battery for your Harley Davidson Softail. I've tested multiple options and share real-world performance data, maintenance tips,…
Jake Miller
14 min read

The Best Battery for Your Harley Davidson: My Complete Guide After Years of Testing
Discover which battery truly performs best for Harley Davidson motorcycles. Real rider experience with AGM, lithium, and OEM options to…
Jake Miller
12 min read