
Best Paint for Motorcycle Tank: What Actually Survives Fuel, Heat and Hard Riding
 Jake Miller
14 min read
Jake Miller
14 min read
Hook: A motorcycle tank is the first thing everyone looks at and the first thing fuel, belt buckles and sun attack. If you’re new to painting parts yourself, start with my pillar guide to the best spray paint for motorcycle projects and then come back here for the tank-specific details.
- A tank needs a paint system, not a single can: metal prep, primer, colour coat and a fuel-resistant clear coat.
- The clear coat is the most important layer. Many ordinary enamels and lacquers soften or stain when they meet petrol. A properly cured 2K clear is the most reliable protection I know of.
- The same advice applies to a gas tank, fuel tank or petrol tank. The words differ by country; the paint chemistry doesn’t.
- Spray paint can work well on a tank if you prep patiently, spray thin coats and respect the cure time. It’s a weekend project, not a ten-minute job.
- Never paint a tank you haven’t checked inside. Rust, old sealer or leaks should be sorted first (see my guide to tank sealers).
- Mask and protect the filler area, and wipe fuel spills immediately, even on a fuel-resistant finish.
- Let it cure fully before you fill it. This is the step most riders rush, and it’s the one that ruins good paint.
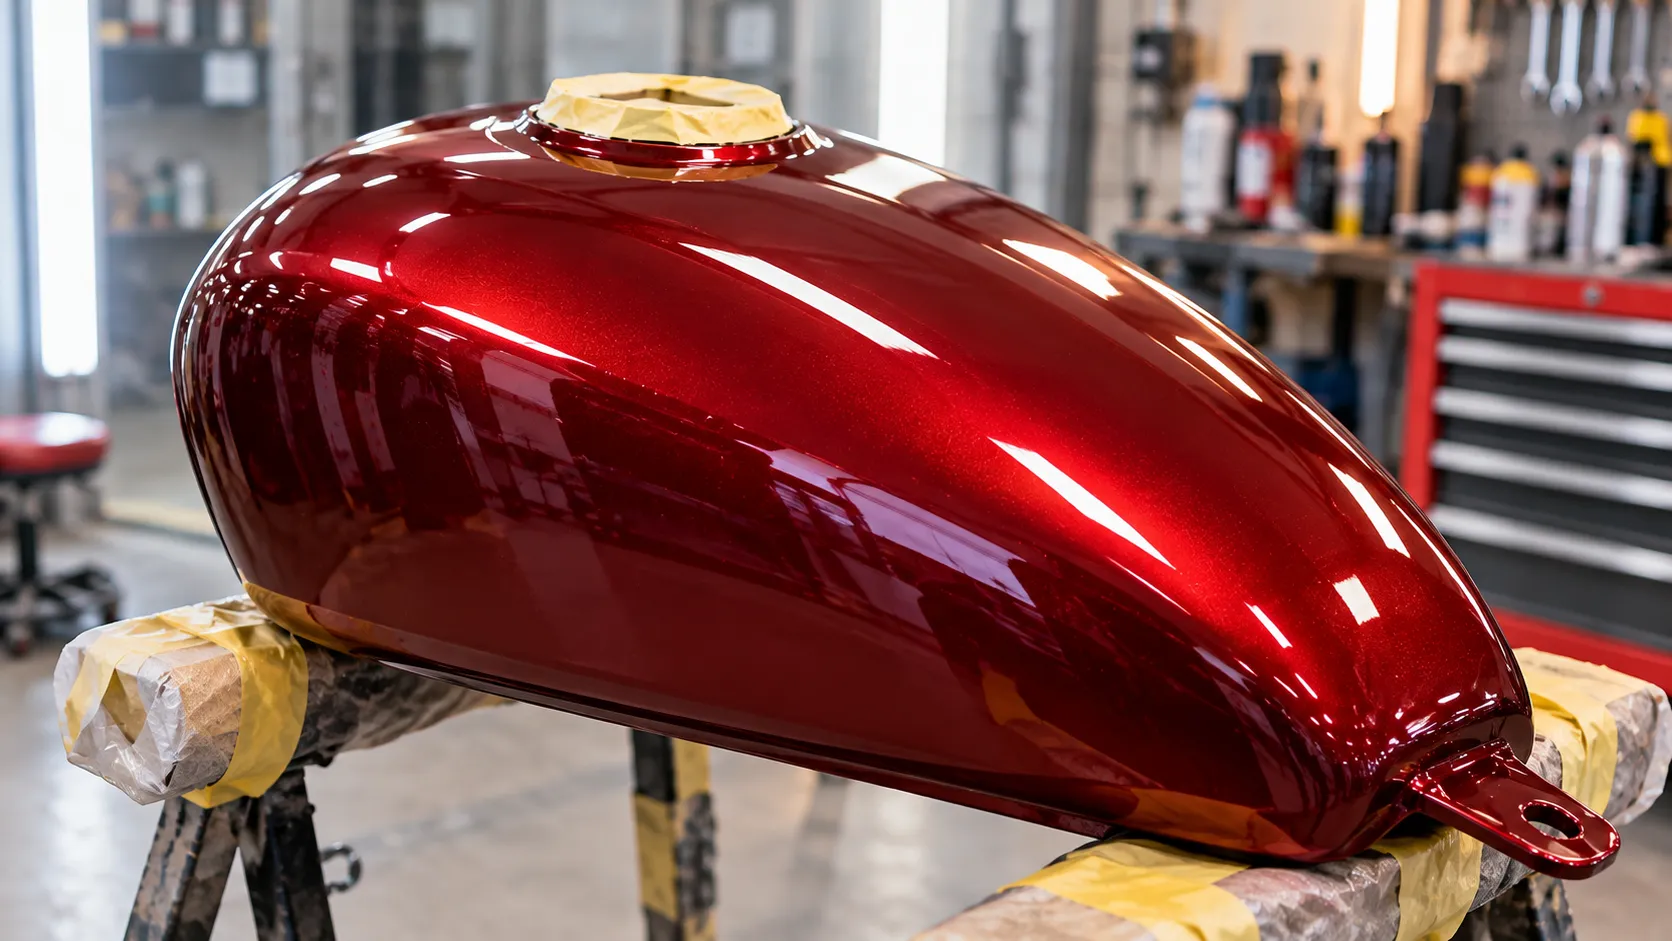
Why the Tank Is the Hardest Part to Paint Well
Most painted motorcycle parts have one or two enemies. A frame fights rust and chips. A fairing fights flex and UV. A tank fights almost everything at once:
- Fuel and fuel vapour. Petrol, and especially ethanol-blended petrol, is a solvent. Paint that isn’t designed for it can soften, wrinkle or go dull.
- Spills at the filler. Every top-up risks a splash, and a drip that sits for a few minutes can mark the wrong finish.
- Rider contact. Knees, zips, belt buckles, jacket buttons and gloves rub the tank in the same places every ride.
- Heat and sun. A black tank sitting in direct sun gets properly hot, and UV breaks down weak clear coats.
- Cleaning and polish. You’ll wash, wax and wipe it over and over.
Because the tank is large, visible and expensive to fix, a failed paint job is both disappointing and costly. I’ve seen it (and done it): a gorgeous colour coat with no proper clear, ruined by one careless fill-up. That’s why this guide spends most of its time on the system around the colour, not the colour itself.
“Gas Tank”, “Fuel Tank” or “Petrol Tank”: Does the Name Change the Paint?
No. Riders in different countries use different words, but the job is identical. Whether you search for the best paint for a motorcycle gas tank, fuel tank or petrol tank, you’re really asking the same question: what finish will survive fuel contact and everyday riding?
The material of the tank matters more than the name:
- Steel tanks (most classic and many modern bikes) need rust-proofing and a primer that bites into metal.
- Aluminium tanks need a primer designed for aluminium, because many standard primers don’t bond well.
- Plastic tanks (found on some scooters, dirt bikes and smaller bikes) need plastic-specific prep, similar to what I describe in my guide to spray paint for motorcycle plastics.
Check what your tank is made of before you buy anything. A magnet sticking to it tells you it’s steel; if it doesn’t stick, it’s aluminium or plastic.
The Paint System I Recommend for a Motorcycle Tank
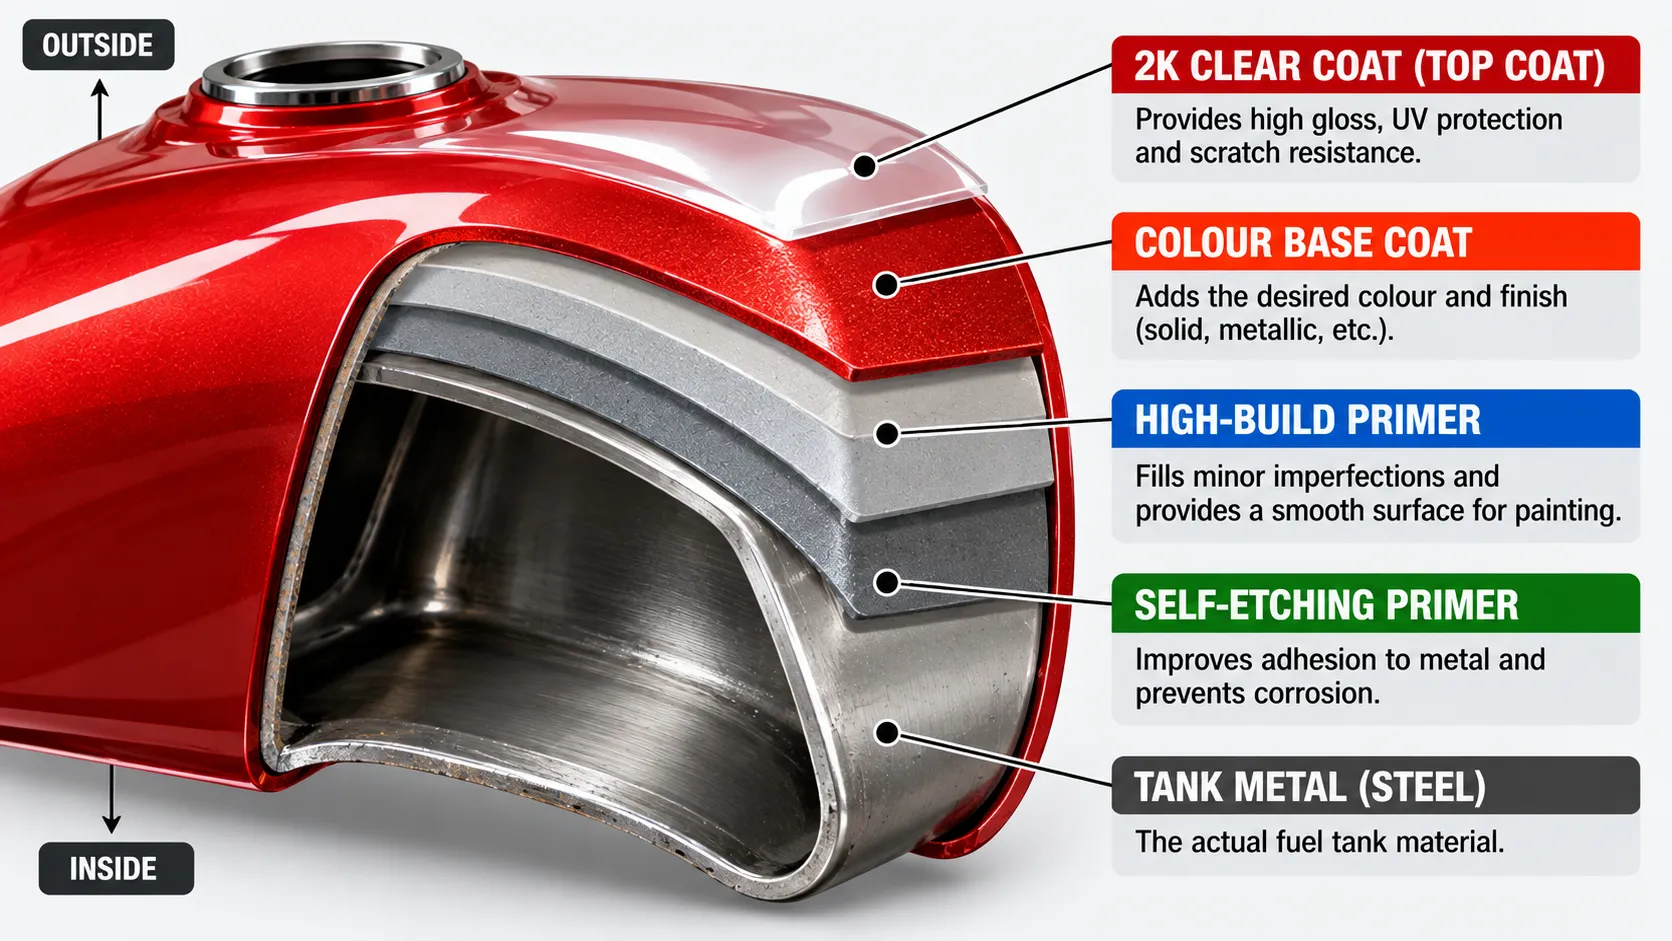
Think of it as four layers working together.
Layer 1: Metal prep and rust control
Bare metal needs to be clean, rust-free and slightly roughened. If there’s surface rust, remove it completely or treat it with a rust converter or an epoxy primer designed to seal it. Painting over rust doesn’t stop it; it just hides it until it blisters through.
Layer 2: Primer
For bare steel or aluminium, I use a self-etching primer, which chemically bites into the metal. For tanks with a lot of filler work, I follow with a high-build primer that can be sanded smooth. For rust-prone steel, an epoxy primer gives the best moisture barrier.
Layer 3: Colour (base) coat
This is where your colour comes from. You’ve got options:
- Automotive-style rattle cans. Convenient, with a good range of colours. Many are lacquer or acrylic based.
- Paint-matched cans if you’re matching an original colour code.
- Base-coat and clear systems from a proper automotive paint supplier, either sprayed from cans or through a spray gun.
The base coat has no fuel resistance of its own to speak of. It’s the colour, and it relies on the clear for protection.
Layer 4: Fuel-resistant clear coat
This is the layer that decides whether your tank lasts. My order of preference:
- 2K clear coat (with hardener). Usually the most fuel-resistant and chemical-resistant option available from a can. It’s tougher and glossier than ordinary clear.
- Fuel-resistant 1K clear coat. Some single-pack clears claim fuel resistance. I treat these as a compromise: better than nothing, but I’d still wipe spills quickly and check the label’s claims carefully.
- Ordinary clear coat. I wouldn’t rely on it for a tank, because many standard clears soften when they meet petrol.
A quick safety reminder: 2K clears contain isocyanates, which are a serious respiratory hazard. Read the manufacturer’s safety data sheet, work in a well-ventilated area away from ignition sources, and use a properly rated respirator, not a dust mask. If you paint often, consider a supplied-air solution.
Spray Paint vs Other Options for a Tank
Since many readers ask for the best spray paint for a motorcycle tank, here’s an honest comparison.
| Option | Pros | Cons | Who it’s for |
|---|---|---|---|
| Rattle can system (primer + base + 2K clear can) | Affordable, no equipment, good results with patience | Needs careful technique, 2K cans are pricier | Home garage riders, project bikes |
| Spray gun with automotive base/clear | Best finish control, easier to lay even coats | Needs a compressor, gun and practice | Riders who paint regularly |
| Professional paint shop | Highest quality, proper curing, warranty | Highest cost, no learning by doing | Show bikes, daily riders who want it done once |
| Powder coat | Tough on some parts | Not suitable for most fuel tanks | Usually not a tank option |
| Wrap or tank film | Reversible, protects existing paint | Not a “paint” and can lift over time | Protecting a finish or changing looks |
For most home riders, the rattle can system is the sweet spot. The key is to treat it as a system and not to cheap out on the clear.
Step-by-Step: How I Paint a Motorcycle Tank
This process works for steel tanks. If yours is aluminium or plastic, swap in the primer designed for it.
Step 1: Remove the tank and prepare it
Take the tank off the bike if you can. Disconnect fuel lines carefully, empty the tank of fuel and store the fuel safely. Remove the fuel cap, petcock and any badges or emblems. Leaving fuel in the tank while sanding or painting is a fire risk.
Step 2: Check the inside
Look inside with a torch. Rust, flaking old sealer or a smelly, varnished interior should be dealt with before you invest in a nice outside finish. Otherwise, you’ll paint a gorgeous tank that clogs your fuel system. My guide to the best motorcycle tank sealer covers the inside.
Step 3: Clean and degrease
Wash the outside with a degreasing soap, rinse and dry. Then wipe it with a proper wax and grease remover on a clean cloth, using one cloth to apply and another to wipe it off. Wear nitrile gloves from here on, because skin oils cause adhesion problems.
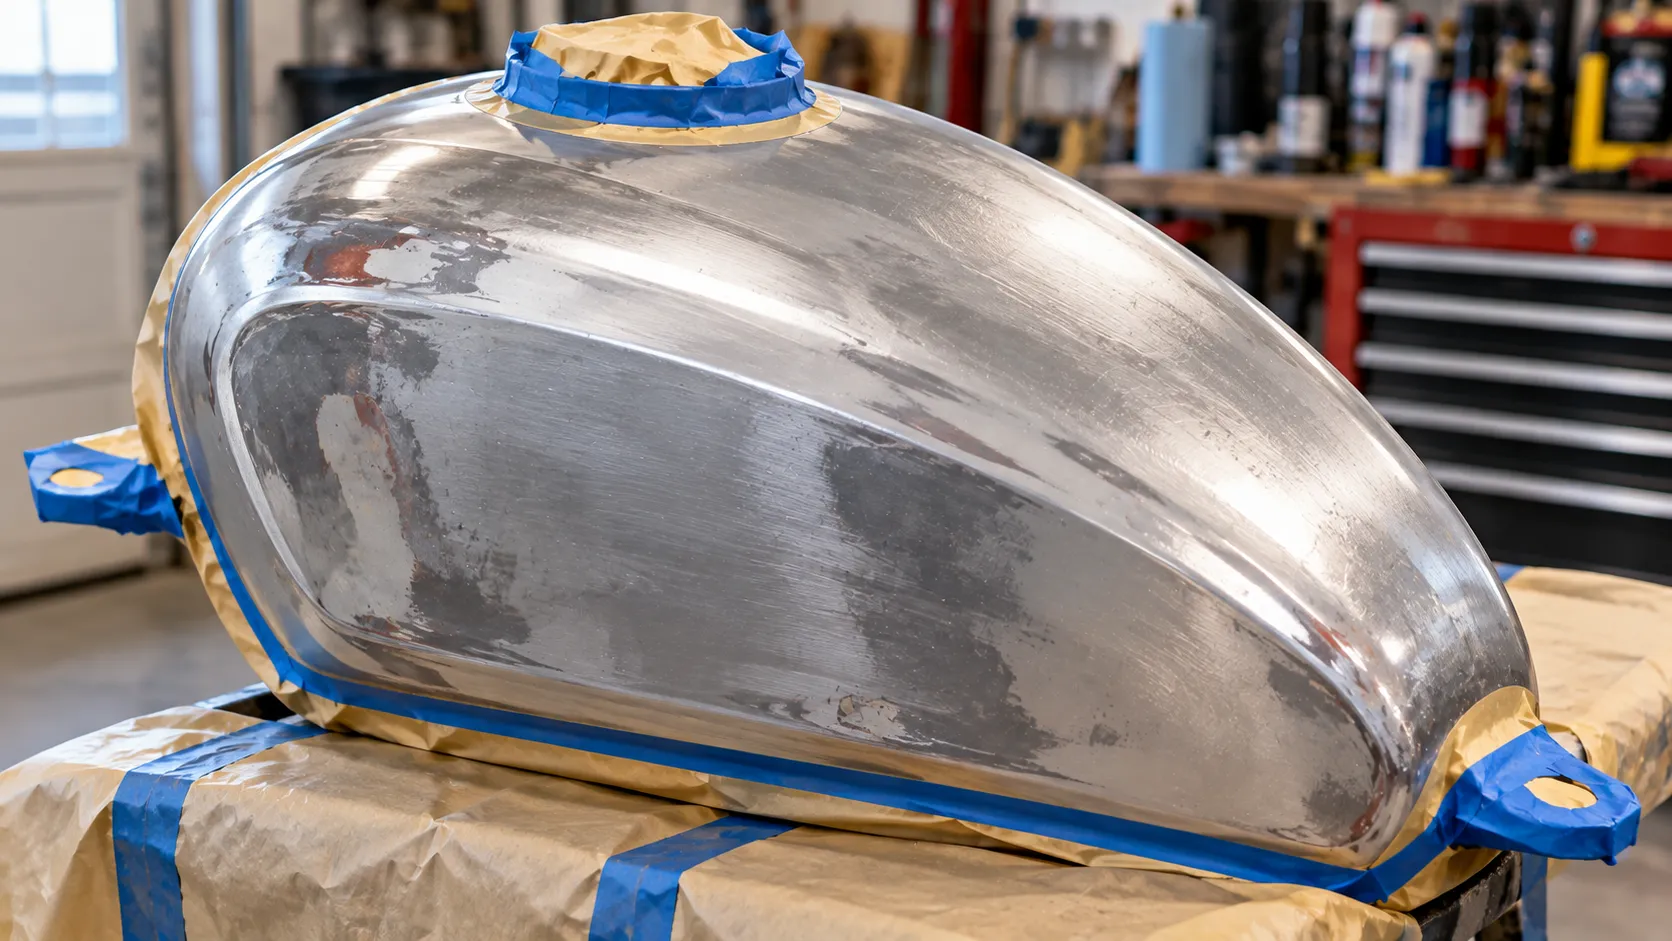
Step 4: Strip or sand the old paint
- Failing or peeling paint: strip back to a stable edge or bare metal.
- Sound paint: sand it to a uniform, dull surface so the new primer can grip.
- Dents: fill with a suitable body filler, shape it, and feather the edges smooth.
Use progressively finer sandpaper and sand evenly. Deep scratches show through glossy paint, so don’t skip grits.
Step 5: Mask the tank
Mask the filler neck area, mounting points, any openings and the underside. Press tape edges down firmly. I stuff the filler opening and petcock hole with something clean so paint and dust don’t drift inside.
Step 6: Prime
Apply two or three light coats of primer, respecting the flash time on the can. If you used filler, add a high-build primer and sand it smooth once cured. Finish with fine sanding so the surface feels perfectly even to the touch.
Step 7: Apply the colour coat
Shake the can well, test on cardboard and spray in thin, overlapping passes at the distance recommended on the label. The first coat should look dusty. Build colour with three to four light coats. Wait the stated flash time between coats, and don’t try to get full coverage in one pass.
Step 8: Apply the clear coat
Once the colour has flashed off and is within the clear’s recoat window, apply two to three medium-wet coats of fuel-resistant clear. With 2K cans, activate the hardener as the instructions say and use it within the stated pot life. Aim for a smooth, wet look without runs.
Step 9: Let it cure, properly
Dry to the touch isn’t cured. The clear may need days (or longer in cool weather) to reach full hardness. Follow the label. Don’t refuel the tank, bolt on heavy accessories or polish until it’s fully cured. This is the step I see rushed most often, and it’s why many “fuel-resistant” finishes fail.
Step 10: Polish and protect (optional)
After full cure, you can wet sand any orange peel very lightly and polish with a fine compound for extra gloss. Then apply a quality wax or sealant for protection.
Choosing the Colour Coat: Matching, Metallics and Custom Looks
Matching an existing colour
If you’re trying to match an original factory colour, find the paint code (often on a sticker on the frame or in the manual). Many suppliers can mix a match in spray cans. Test it on a scrap piece first, because sun-faded old paint can look different from the new colour.
Metallic and pearl paints
These look fantastic but are less forgiving. Uneven passes or inconsistent distance create blotchy “tiger striping”. I keep my spray distance consistent, overlap evenly and apply the last colour coat slightly lighter and wetter to help the metallic flakes settle evenly.
Stripes, graphics and decals
Apply decals or tape-and-paint graphics before your final clear coats, so they get sealed in. If you add a decal on top of cured clear, it creates an edge that can catch dirt and lift over time.
Matte and satin finishes
Matte paints look great but can be harder to maintain. Many marks (oils, polish and fuel) show more readily on matte. Use a matte or satin fuel-resistant clear designed for the job, and avoid wax or polish that isn’t matte-safe.
What Goes Wrong on Tanks (and How I Fix It)
| Problem | Likely cause | What I do |
|---|---|---|
| Dull ring or softening near the filler | Fuel splash on non-fuel-resistant paint | Wipe spills at once; for a repaint, use a fuel-resistant 2K clear |
| Wrinkling when clear goes on | Clear applied too heavy, or incompatible layers | Let it cure, sand back, and re-clear lightly; test compatibility on a scrap piece |
| Fisheyes (little craters) | Wax, silicone or oil on the surface | Stop, sand back, re-clean with wax and grease remover, then recoat |
| Runs or sags | Coat too heavy or sprayed too close | Let it cure, sand flat and recoat with lighter passes |
| Orange peel | Paint drying before it levels, or cold conditions | Wet sand and polish after full cure |
| Soft or tacky finish | Not enough cure time or too cold | Give it more time in a warm, dry space |
| Peeling edges | Poor adhesion or no primer | Strip back and re-prep with the right primer |
| Rust bubbles appearing later | Rust not fully treated before painting | Strip the area, treat the rust, reprime and repaint |
If something goes wrong, don’t keep spraying over the problem. Stop, let it cure, fix it properly and move on.
Keeping a Painted Tank Looking Good
A good finish deserves some care.
- Wipe fuel spills right away with a soft cloth. This is the single best habit for protecting tank paint.
- Use a tank protection film or pad where your knees and zips rub the tank.
- Wash gently with pH-neutral soap and a microfibre cloth. My guide on how to wash your motorcycle covers a safe routine.
- Wax or seal after the paint has fully cured, using products that suit your finish (matte-safe for matte).
- Cover or store the bike out of direct sun when you can. If you’re putting the bike away for the cold season, my guide on how to winterize your motorcycle has tips that also protect paint from moisture and dust.
When I’d Skip the DIY and Pay a Pro
I love DIY, but there are times I’d hand a tank over:
- A show-quality finish with candy colours, deep metallics or airbrushed graphics.
- A rare or valuable tank where a mistake would be costly.
- Extensive dent or rust repair, which needs skill to blend invisibly.
- No safe place to spray or no proper respirator for 2K products.
A professional paint shop has the booth, equipment and experience to cure paint properly. If your tank is a daily rider and you want it done right once, the extra cost can be worth it.
Where This Guide Fits in the Series
This tank guide is one part of my paint and finishing series. If you want to see how the tank fits into the whole bike, start with the best spray paint for motorcycle pillar guide. For the other parts:
| If you’re painting… | Read this guide |
|---|---|
| The inside of the tank | Best Motorcycle Tank Sealer |
| The frame | Best Paint for Motorcycle Frame |
| Fairings, fenders and plastics | Best Spray Paint for Motorcycle Plastics |
Frequently Asked Questions
What is the best paint for a motorcycle tank?
A system works better than a single product: self-etching primer on bare metal, a colour base coat, and a fuel-resistant 2K clear coat on top. The clear coat is the layer that protects against fuel, so it matters most.
What is the best spray paint for a motorcycle tank?
A good rattle can system is a solid choice for home riders: automotive-style primer, a colour base can, and a 2K clear can. Always check the label for the surfaces it’s rated for and any fuel-resistance claims, and test on a scrap piece first.
Can I use normal spray paint on a gas tank?
You can, but many ordinary enamels and lacquers aren’t fuel resistant, so a splash at the pump can soften or stain the finish. If you do use normal paint for colour, protect it with a proper fuel-resistant clear.
What type of paint is fuel resistant?
Two-pack (2K) urethane clear coats are generally the most fuel resistant once fully cured. Some one-pack clears claim fuel resistance too, but I’d read the label carefully and still wipe spills quickly.
How long should I wait before filling a freshly painted tank?
Follow the full cure time on your paint’s label, and when in doubt, wait longer. Cure time depends on temperature and humidity, and “dry to touch” is not the same as fully cured. Filling too early is a common reason for ruined finishes.
Do I need to paint the inside of the tank too?
Not with ordinary paint. The inside is a different job, handled with cleaning, rust treatment and sometimes a dedicated tank sealer. See my guide to the best motorcycle tank sealer.
Can I paint a plastic motorcycle tank?
Yes, but it needs plastic-specific prep, adhesion promoter and flexible-friendly paint. Check my guide to spray paint for motorcycle plastics.
How many cans do I need for a tank?
It varies by tank size, colour and your technique, so check the coverage estimate on each can. As a rough rule, buy a bit more than you think you need so you don’t run out mid-coat and struggle to match a new batch.
Final Thoughts
If I had to sum up everything I’ve learned about painting tanks, it’s this: the clear coat and the cure time matter more than the colour. A good-looking colour coat under a weak clear is a finish waiting to fail, while a patient, well-prepped system with a proper fuel-resistant clear can look great for years.
Take your time, spray thin, protect yourself, and wait for the paint to cure before you fill up. If you have questions about your tank, leave a comment and I’ll do my best to help. Ride safe.

Related Articles
5 Best Foam Cleaners for Motorcycles: My Top Picks for Ultimate Shine
I tested the best foam cleaners for motorcycles to find the top 5 picks for ultimate shine. See which foam…
Jake Miller
10 min read
7 Best Looking Silver Paints for a Motorcycle: My Honest Garage-Tested Picks
I've sprayed, sanded, and stared at more silver motorcycle paints than I can count. Here are 7 real products that…
Jake Miller
9 min read
7 Best Dry Cleaners for Motorcycle Gear: Where I Actually Trust My Leathers
I tested real dry cleaners that handle motorcycle leathers, jackets and helmets. Here are my 7 picks, what each does…
Jake Miller
7 min read