
Best Paint for Motorcycle Frame: Spray, Brush or Powder Coat? What Lasts
 Jake Miller
13 min read
Jake Miller
13 min read
Hook: A motorcycle frame is the skeleton of the bike, and it takes more abuse than any panel on it: chain lube, road salt, stone chips and years of heat cycles. Before you pick a can, read my pillar guide to the best spray paint for motorcycle parts, then use this guide for the frame-specific details.
- The best paint for a motorcycle frame is a tough, rust-resistant system, not one magic product: bare-metal prep, a quality primer, a durable topcoat and (ideally) a clear coat.
- Spray can, brush and powder coat can all work. Powder coat is the most durable, a good spray system is the best value for home riders, and brush paint suits small touch-ups and thick, protective coats.
- “Art paint” and craft paints are the wrong tool. They’re designed for display, not for chain lube, grit and weather.
- Prep decides the result. Strip loose paint and rust, degrease, and prime the right way for steel or aluminium.
- Mask carefully. Bearings, threads, ground points and mounting surfaces shouldn’t be painted.
- Look at the frame while it’s bare. A stripped frame is the best chance you’ll get to inspect welds and spot cracks or damage.
- Heat matters. Parts of the frame sit near the engine and exhaust, so check the paint’s heat tolerance.
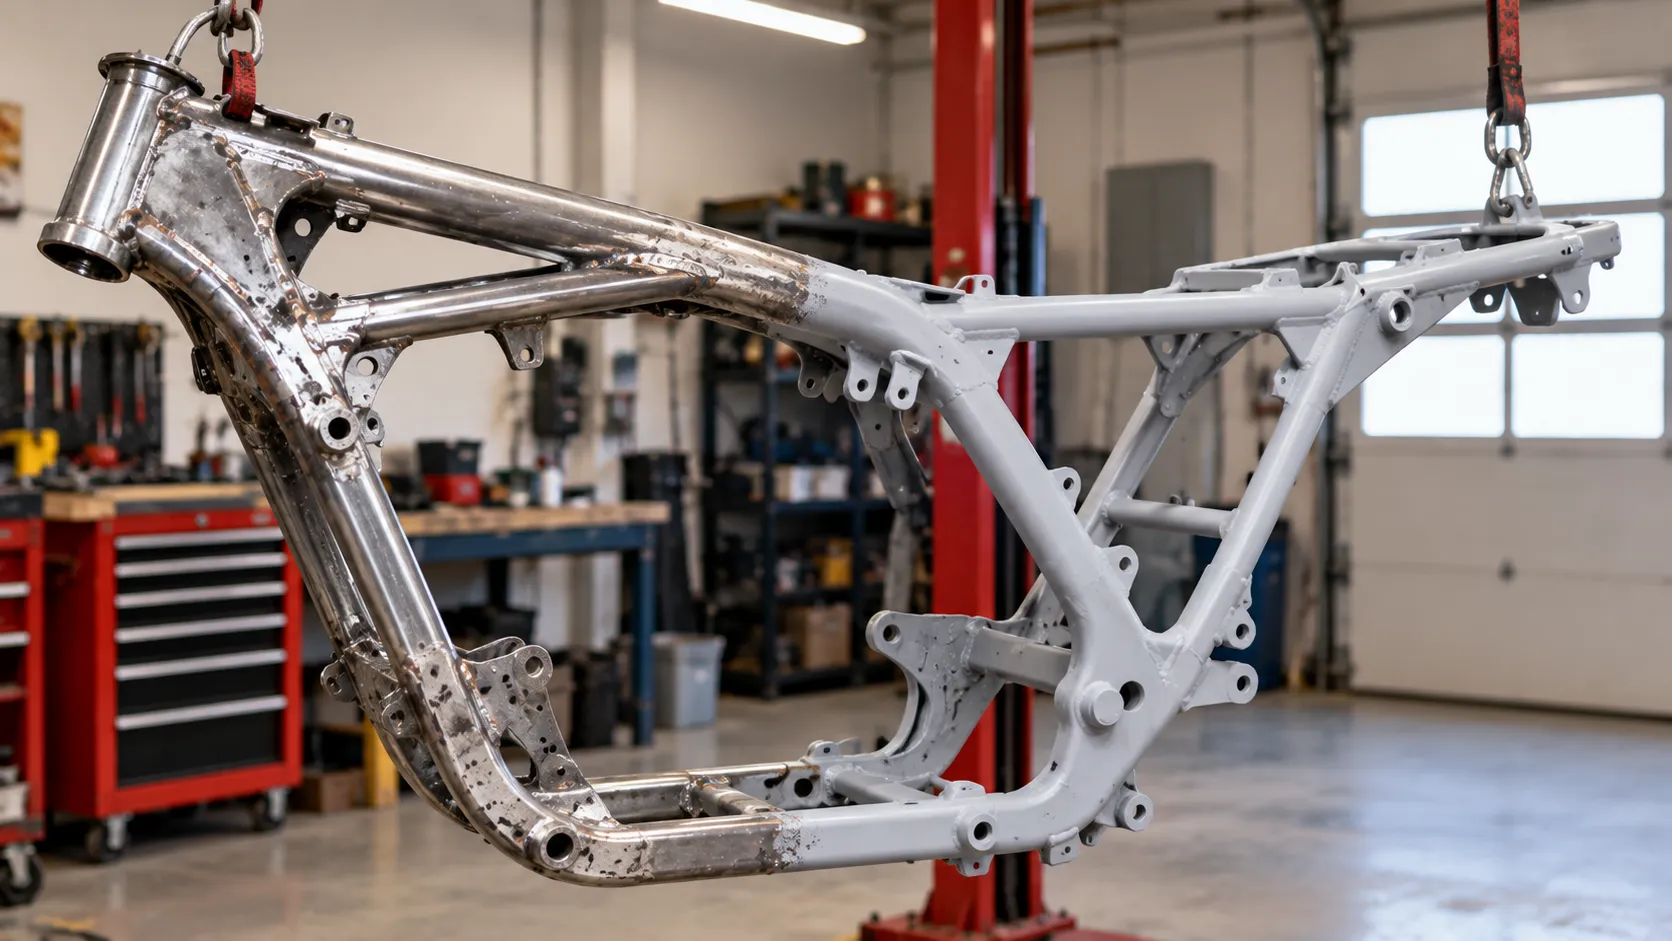
Why Frame Paint Is Different From Tank or Plastic Paint
When I paint a tank, I worry about fuel. When I paint plastic, I worry about flex. On a frame, my main worries are rust, chips and chemicals:
- Moisture and salt. Frames sit low and catch spray from the road. If you ride in winter or near the coast, rust is the enemy.
- Stone chips. Gravel, grit and debris hit the downtubes and lower sections constantly.
- Chain lube and oil. Fling-off from a chain or oil leaks can soften weak paint.
- Heat cycles. The areas near the engine and exhaust get hot and cool repeatedly.
- Hard-to-reach corners. Frames have tubes, brackets and welds, which make even coverage tricky.
A pretty finish that chips at the first stone is a waste of a weekend. So I focus on adhesion, a rust barrier and toughness before colour.
Frame Paint Options Compared
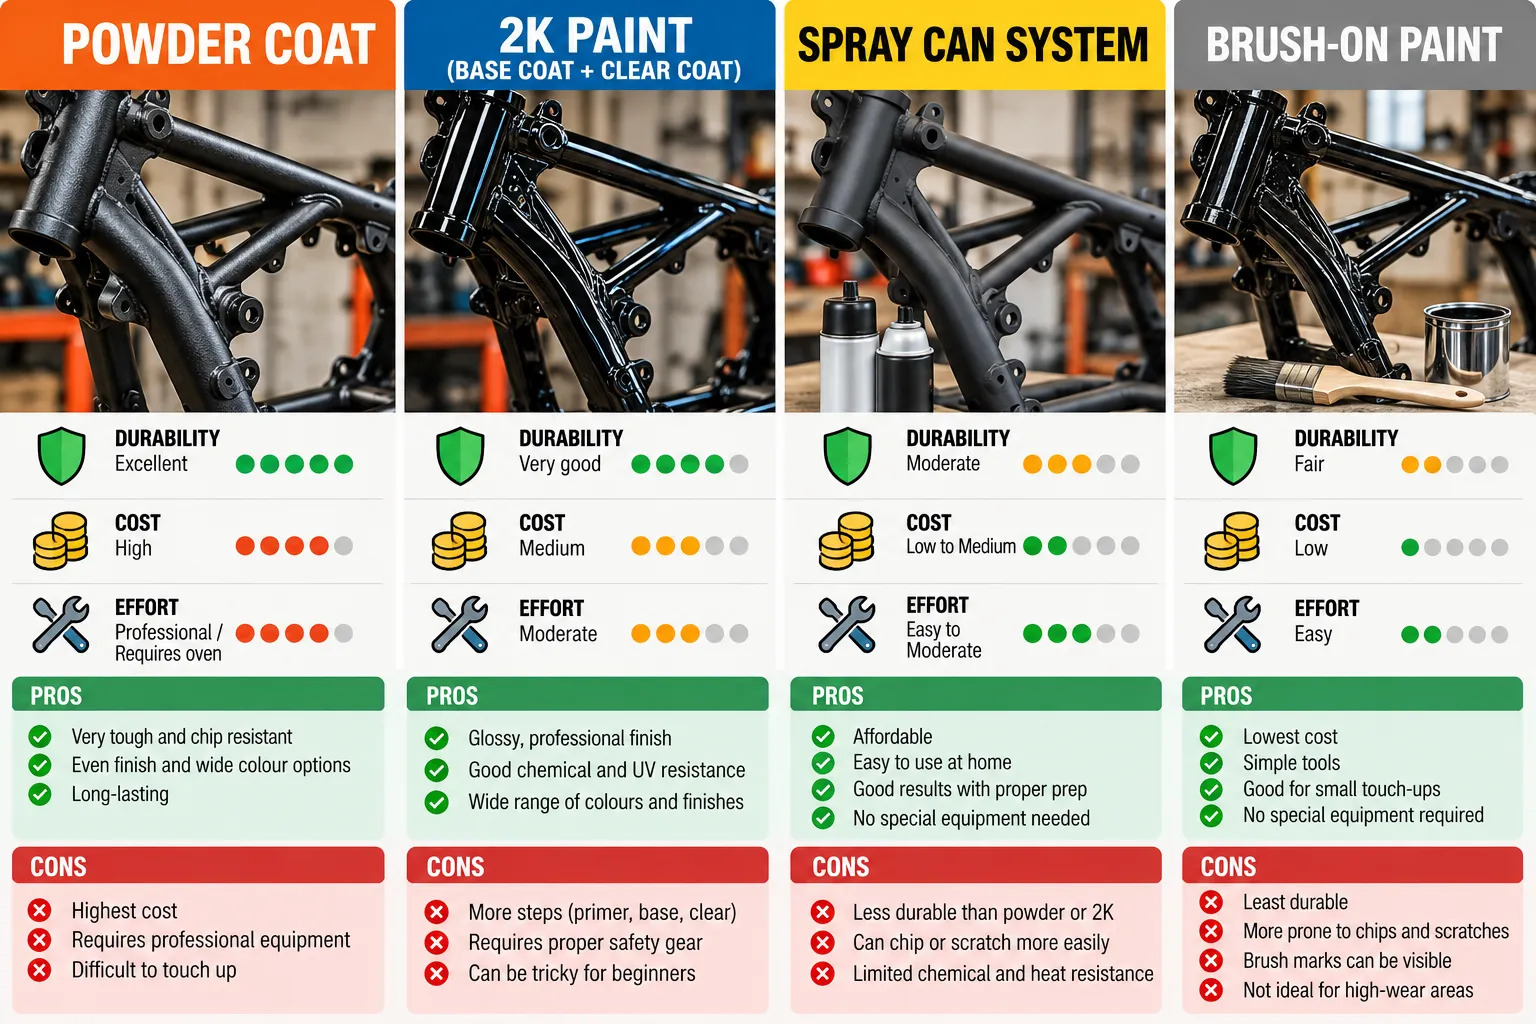
Here’s how the common approaches stack up.
| Method | Durability | Cost | Effort | Best for |
|---|---|---|---|---|
| Powder coat | Excellent | Medium to high | Low for you (professional job) | Full restorations, daily riders, frames you want to last |
| Two-part (2K) epoxy or urethane paint | Very good | Medium | Medium to high | Riders who can spray safely and want a tough finish |
| Spray can primer + enamel + clear | Good with proper prep | Low to medium | Medium | Home garage projects and budget builds |
| Brush-on rust-protective paint | Moderate to good (thick coats) | Low | Low to medium | Small touch-ups, chassis details, hard-to-reach spots |
| Craft or “art” paint | Poor for frames | Low | Low | Decorative detail only, never as the main coat |
Powder coat
Powder coating bakes a dry powder onto the frame to form a hard shell, and it’s well known for durability against chips and chemicals. The trade-offs are cost, the need for a professional, and the fact that the frame must be stripped and cleaned first. Some frames (with bonded parts, certain materials or sensitive components) aren’t good candidates, so ask the coater before you commit.
Spray can systems
For most riders I talk to, this is the sweet spot. A good primer, an enamel or urethane topcoat and a clear coat give a tough finish at reasonable cost. The key is prep and thin, patient coats. This is the approach I describe in most detail below.
Brush-on paint
A brush isn’t a bad idea for a frame, which surprises people. A thick coat of a rust-protective, brush-applied paint can be very durable and doesn’t need spray equipment. The trade-off is brush marks and a less “factory” look. It’s great for hidden areas, touch-ups and old workhorse bikes where function beats show.
“Art paint” and craft paint
I’ll be direct: I don’t recommend craft or art paints for a frame. They’re formulated for display, not for chain lube, grit, heat and weather. They can look great on day one and be a flaking mess by the end of the season. If you want an artistic touch, add it under a proper clear coat or keep it to small, protected details.
What Type of Paint Is Best for a Motorcycle Frame?
If you want the short version, here’s what I’d reach for, in order of durability:
- Powder coat if the budget allows and the frame is suitable.
- A 2K system (epoxy primer, 2K colour and 2K clear) if you can spray safely.
- A good rattle can system: self-etching or epoxy primer, an automotive or chassis-grade enamel, then a durable clear coat.
- A thick, rust-protective brush-on paint for utility, touch-ups or hidden areas.
Whichever you choose, the primer is critical. On bare steel, I use a self-etching or epoxy primer to bite into the metal and block moisture. On aluminium frames, use a primer rated for aluminium.
Steel vs Aluminium Frames: Check Before You Buy
The frame material changes the primer you need.
- Steel frames (tubular or pressed) are common on cruisers, classics and many standard bikes. A magnet will stick to them. They need rust protection, so I like epoxy or self-etching primer.
- Aluminium frames (common on sport bikes) won’t attract a magnet. They need a primer designed to bond to aluminium, and they’re sensitive to harsh strippers, so check what’s safe before you use any chemical.
- Mixed designs (steel trellis frames with aluminium parts) need care so each part gets the right treatment.
If you’re not sure what your frame is made of, check the owner’s manual or the manufacturer’s specifications.
Safety First: Inspect the Frame While It’s Bare
A stripped frame is a rare chance to look closely at the part that holds everything together. Before you paint:
- Look for cracks, especially around welds, steering head, swingarm pivot and engine mounts.
- Check for bends or kinks in the tubes after any crash history.
- Look for corrosion pits that go deep into the metal.
- Inspect brackets and mounts for fatigue or loose welds.
If you find anything that worries you, get it checked by a qualified frame specialist before painting over it. Paint can hide a problem, but it can’t fix it.
Step-by-Step: How I Paint a Motorcycle Frame
This works for a steel frame with a spray system. Adjust the primer for aluminium.
Step 1: Strip the bike down
Remove everything you can: wheels, swingarm if practical, engine (if you’re doing a full job), wiring, brackets and accessories. Take lots of photos so you remember where everything goes. Bag and label small parts. The more you remove, the better the coverage and the fewer masking headaches.
Step 2: Remove old paint and rust
Choose a method that suits your frame:
- Wire brush or abrasive pads for small areas.
- Sanding for sound surfaces that just need scuffing.
- Chemical stripper (check it’s suitable for your frame material and follow the safety instructions).
- Media blasting by a professional, which is thorough but should be done by someone who knows how to avoid warping or damaging the frame.
Work until you reach clean, stable metal. Treat any remaining rust with a rust converter or seal it with an epoxy primer, following the product’s instructions.
Step 3: Clean and degrease
Wash the frame, then wipe it down with a proper wax and grease remover using clean cloths. Frames are full of crevices that trap oil, so pay attention to tube ends, welds and bracket corners. Wear nitrile gloves so skin oils don’t contaminate the surface.
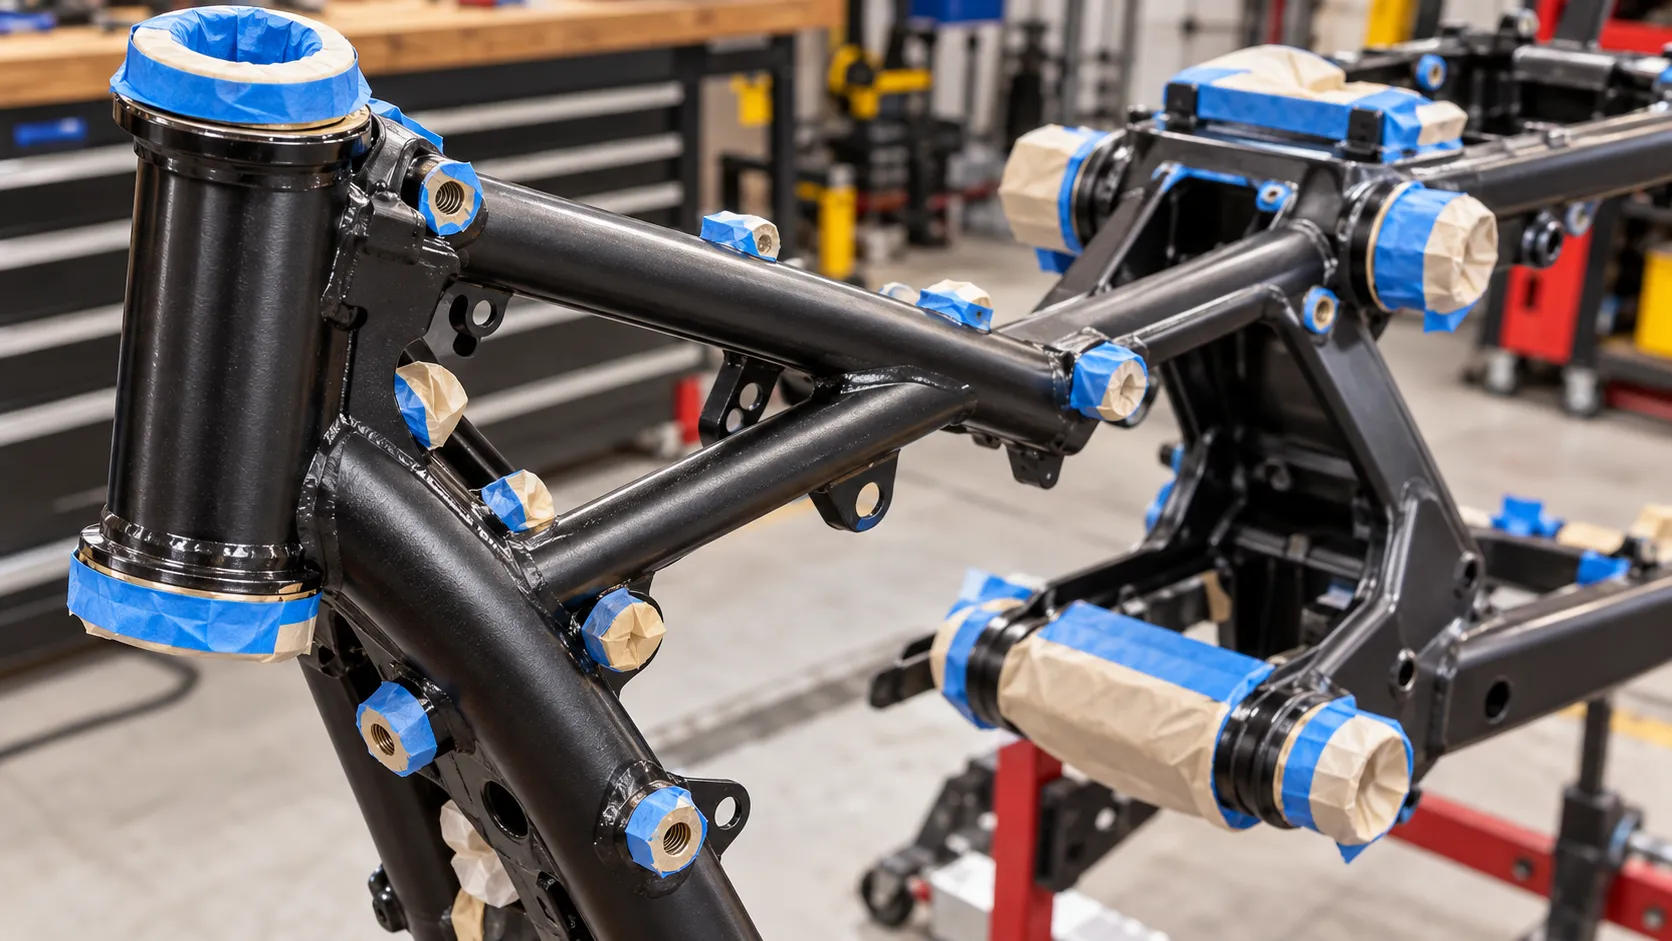
Step 4: Mask what shouldn’t be painted
This is the step people rush. Mask or plug:
- Steering head bearing seats and swingarm pivot surfaces
- Threaded holes and bolt threads
- Mounting faces where parts bolt directly to the frame
- Electrical ground points, so you keep a clean metal-to-metal connection (a painted ground can cause strange electrical gremlins)
- VIN stamping and any plates
Use proper masking tape and plugs, and press the edges down. If you’re not sure whether a surface should be painted, leave it bare and protect it lightly instead.
Step 5: Prime
Apply two or three light coats of the right primer, respecting the flash time on the can. Get into corners and behind tubes by moving around the frame and spraying from several angles. Let the primer cure fully, then lightly sand any rough spots for a smooth surface.
Step 6: Apply the topcoat
Shake the can well, test on cardboard, and spray in thin, overlapping passes at the recommended distance. Build colour in three to four light coats. Rotate or reposition the frame so you reach inside corners and behind tubes. Resist the urge to hit trouble spots with one heavy coat. That’s how runs happen.
Step 7: Apply clear coat (recommended)
A clear coat adds chip resistance, chemical resistance and gloss. Apply it within the recoat window on the label. A 2K clear is tougher, but follow the safety instructions carefully. If you skip the clear, choose a topcoat that’s designed to be used on its own.
Step 8: Cure fully
Don’t rush to rebuild. Paint that feels dry may still be soft underneath, and handling or bolting parts to it can leave marks. Follow the cure time on the label, and give it extra time in cool weather.
Step 9: Reassemble carefully
Use fresh hardware where you can, and protect fresh paint with tape, cardboard or soft padding where parts or tools touch it. Use correct torque values, and treat contact points (like where the swingarm pivot or engine mounts touch the frame) with care.
Choosing a Finish: Gloss, Satin or Matte?
The finish affects both looks and practicality.
- Gloss is easiest to wipe clean and often the most chemical resistant. It shows scratches and reflections, though.
- Satin gives a subtle sheen that hides small marks better than gloss and still wipes down fairly easily. It’s a popular compromise for frames.
- Matte looks modern but can be harder to keep clean, and oils and polish can leave marks. Use a matte-safe clear and avoid waxing it.
For a frame, I usually lean toward gloss or satin, because the frame gets dirty and I’m happier when it wipes clean.
Heat Considerations
Frames sit near the engine, and some sections get hot, especially around the engine mounts and areas close to the exhaust. Check:
- The temperature rating on any paint you plan to use near the engine.
- Whether your clear coat is rated for the heat it’ll face.
- Which parts are frame and which are engine. Engine cases and cylinders typically need high-heat engine enamel, not frame paint. My pillar guide on the best spray paint for motorcycle projects explains the difference.
If a section of frame sits right next to an exhaust header, consider a high-heat rated product for that area, and don’t use general-purpose paint where it will blister or smoke.
Common Frame-Painting Problems and Fixes
| Problem | Likely cause | What I do |
|---|---|---|
| Paint chipping quickly | Poor adhesion, no primer or contaminated surface | Strip back, re-prep and prime properly |
| Rust bubbles under the paint | Rust not fully removed or sealed | Strip the area, treat or seal rust, reprime and repaint |
| Runs in tube corners | Heavy coats where paint pools | Let it cure, sand flat and recoat lighter |
| Fisheyes | Oil or silicone left on the surface | Stop, re-clean with wax and grease remover, sand and recoat |
| Brush marks (brush-on paint) | Paint too thick or applied unevenly | Thin as the label allows, use a quality brush and lay off lightly |
| Soft finish that marks easily | Not cured long enough or cold conditions | Give it more time in a warm, dry space |
| Peeling near welds | Weld spatter or flux residue not cleaned | Clean welds thoroughly before priming |
| Electrical gremlins after reassembly | Painted ground points | Clean bare metal at ground contacts |
Looking After a Freshly Painted Frame
Once the work is done, a few habits keep it looking good.
- Clean regularly with pH-neutral soap and a soft cloth. My guide on how to wash your motorcycle covers a safe routine, including cleaning away road salt.
- Touch up chips quickly. A small chip can let moisture creep under the paint. A dab of matching touch-up paint is cheap insurance.
- Wipe chain lube and oil off the frame when you notice it.
- Check the paint during your regular inspections. My T-CLOCS pre-ride inspection guide is a good routine to build in, and it includes a look at the frame.
- Store the bike dry and consider a breathable cover for the off-season. My guide on how to winterize your motorcycle has more tips.
Where This Guide Fits in the Series
This frame guide is one part of my paint and finishing series, which starts with the best spray paint for motorcycle pillar guide. For the other parts:
| If you’re painting… | Read this guide |
|---|---|
| The outside of the fuel tank | Best Paint for Motorcycle Tank |
| The inside of the tank | Best Motorcycle Tank Sealer |
| Fairings, fenders and plastics | Best Spray Paint for Motorcycle Plastics |
Frequently Asked Questions
What is the best paint for a motorcycle frame?
The most durable option is usually powder coat. For home riders, a good system of primer, a tough enamel or urethane topcoat and a clear coat works very well. The right primer for your frame material matters more than the brand.
What is the best spray paint for a motorcycle frame?
Choose a primer designed for your frame’s metal (self-etching or epoxy for steel, aluminium-rated for aluminium), then a chassis-grade or automotive enamel and a durable clear coat. Check the label for the surfaces and heat range it’s rated for.
Can I use brush paint on a motorcycle frame?
Yes. A thick, rust-protective brush-on paint can be a durable, practical choice, especially for touch-ups, workhorse bikes and hidden areas. You’ll see brush marks, so it’s better for function than show quality.
Can I use art paint or craft paint on a motorcycle frame?
I wouldn’t. Craft paints aren’t built for chain lube, grit, heat or weather, and they tend to chip and flake. Use them only for protected decorative details under a proper clear coat.
Is powder coating better than spray paint for a frame?
Powder coat is generally tougher against chips and chemicals, but it costs more and needs a professional. A well-prepped spray system can look great and last well, so it depends on your budget and goals.
Do I need to strip the frame to bare metal?
If the old paint is flaking, rusty or failing, yes. If it’s sound, you can often scuff and prime over it. Bare metal is the best chance to inspect the frame, so I’d strip it if you’re doing a full restoration.
Should I paint the engine and frame the same paint?
Not usually. The engine and areas near the exhaust get much hotter than most of the frame, so they need high-heat rated paint. Check the temperature rating for each area.
Can I paint over a ground point?
I’d avoid it. Painted ground points can cause electrical problems. Keep a clean, bare metal contact where grounds attach.
Final Thoughts
If I had to summarise everything I’ve learned about frame paint, it’s that rust protection, primer and prep are worth more than any fancy colour. The riders with frames that still look good years later are the ones who stripped properly, primed correctly and took their time between coats.
Whether you choose powder coat, a careful spray system or a thick brush-on coat, make sure the paint matches the job, and take the chance to inspect the frame while it’s bare. If you have questions about your own project, leave a comment and I’ll do my best to help. Ride safe.

Related Articles
5 Best Foam Cleaners for Motorcycles: My Top Picks for Ultimate Shine
I tested the best foam cleaners for motorcycles to find the top 5 picks for ultimate shine. See which foam…
Jake Miller
10 min read
7 Best Looking Silver Paints for a Motorcycle: My Honest Garage-Tested Picks
I've sprayed, sanded, and stared at more silver motorcycle paints than I can count. Here are 7 real products that…
Jake Miller
9 min read
7 Best Dry Cleaners for Motorcycle Gear: Where I Actually Trust My Leathers
I tested real dry cleaners that handle motorcycle leathers, jackets and helmets. Here are my 7 picks, what each does…
Jake Miller
7 min read