
Best Spray Paint for Motorcycle: What to Use on Every Part (and What I’d Never Use Again)
 Jake Miller
17 min read
Jake Miller
17 min read
Hook: A rattle can can give a tired bike a finish that turns heads, or a peeling, fuel-stained mess within one season. After a few of both, I can tell you the difference is almost never the brand on the can. If you’re still getting your maintenance routine sorted, start with my complete guide to maintenance on a motorcycle and then come back here.
- There is no single “best” spray paint for a motorcycle. The right can depends on the part: tank, frame, plastics, engine cases and exhaust all need different paint.
- Prep decides the result. Cleaning, degreasing, sanding and priming are roughly 80% of the job. A cheap can over perfect prep beats an expensive can over a greasy surface.
- Match the paint to the job: self-etching primer on bare metal, a flexible plastic-safe system on fairings, high-heat enamel near the engine, and a fuel-resistant 2K clear on the tank.
- Use a clear coat on anything that gets touched or splashed. Standard enamel will soften if it meets petrol; a proper 2K clear will not.
- Spray in thin coats. Three or four light coats always beat one heavy coat that runs.
- Protect yourself. Good ventilation and the right respirator matter, especially with 2K products.
- Deep-dive guides for each part are linked below, so you can jump straight to the one you need.
Why I Wrote This Guide
I have been wrenching on and riding bikes for years, and almost every project bike I’ve owned has ended up with a paint job at some point. Some were a frame refresh after chasing rust. Some were a tank rescued from a dent and a faded finish. A few were quick fixes on plastics I scuffed in a parking lot tip-over.
I’ve made nearly every mistake there is. I’ve sprayed over a surface I thought was clean, only to watch the paint pull back into little craters. I’ve put a beautiful gloss coat on a tank, filled it up, and found a dull ring around the filler neck after one careless top-up. I’ve used the wrong can on plastic and had it flake off in sheets the first time I flexed the panel.
This guide is the one I wish I’d had. It is a pillar guide: it covers the principles that apply to every part, then points you to a dedicated guide for each one. If you only want one part, jump to the section for it.
How I Judge a Spray Paint (My Methodology)
Before I recommend anything, here is what I actually care about, so you can judge whether my priorities match yours:
- Adhesion. Does it stick to the material I’m painting (bare steel, aluminium, plastic, old paint)? This matters more than colour.
- Durability. Will it survive vibration, stone chips, rain, cleaning chemicals and my own boots and gloves?
- Resistance to what the part meets. Heat on engine parts, fuel on the tank, flex on plastics.
- Ease of use for a home garage. I don’t have a spray booth, so I favour products that are forgiving.
- Finish quality. How well does it level, and does it polish up?
A note on honesty: I’m describing product types and well-known product lines you can find easily, not claiming one can beats all others. Formulas, availability and labels change, so always read the can for the surfaces it’s rated for, the recoat window and the cure time. Where I mention a product family, treat it as a starting point and check the current label.
Understanding Spray Paint Types (The Part Most Guides Skip)
Most people buy by colour and gloss level. That’s how paint jobs fail. Here’s what the options actually are.
| Paint type | Best for | Strengths | Limits |
|---|---|---|---|
| Basic acrylic / general-purpose enamel | Small brackets, low-stress parts | Cheap, easy, many colours | Softens with fuel, chips easily, weaker UV and chemical resistance |
| Acrylic lacquer | Quick touch-ups, show pieces | Dries fast, easy to blend | Not fuel resistant, brittle, needs clear |
| High-heat enamel / engine enamel | Engine cases, cylinder fins, exhaust-adjacent parts | Withstands high temperatures | Heat rating varies a lot; not a tank paint |
| Self-etching primer | Bare steel and aluminium | Bites into metal, improves adhesion | Needs a topcoat; not a finish |
| Epoxy primer | Rust-prone bare metal | Strong barrier against moisture | Often needs a longer cure and careful recoat timing |
| Plastic-specific paint / adhesion promoter | Fairings, fenders, side panels | Bonds to flexible plastic, flexes without cracking | Needs correct prep for the plastic type |
| 2K clear coat (with hardener) | Tanks, frames, anything touched or splashed | Fuel and chemical resistant, tough, glossy | Requires a proper respirator, limited pot life, costs more |
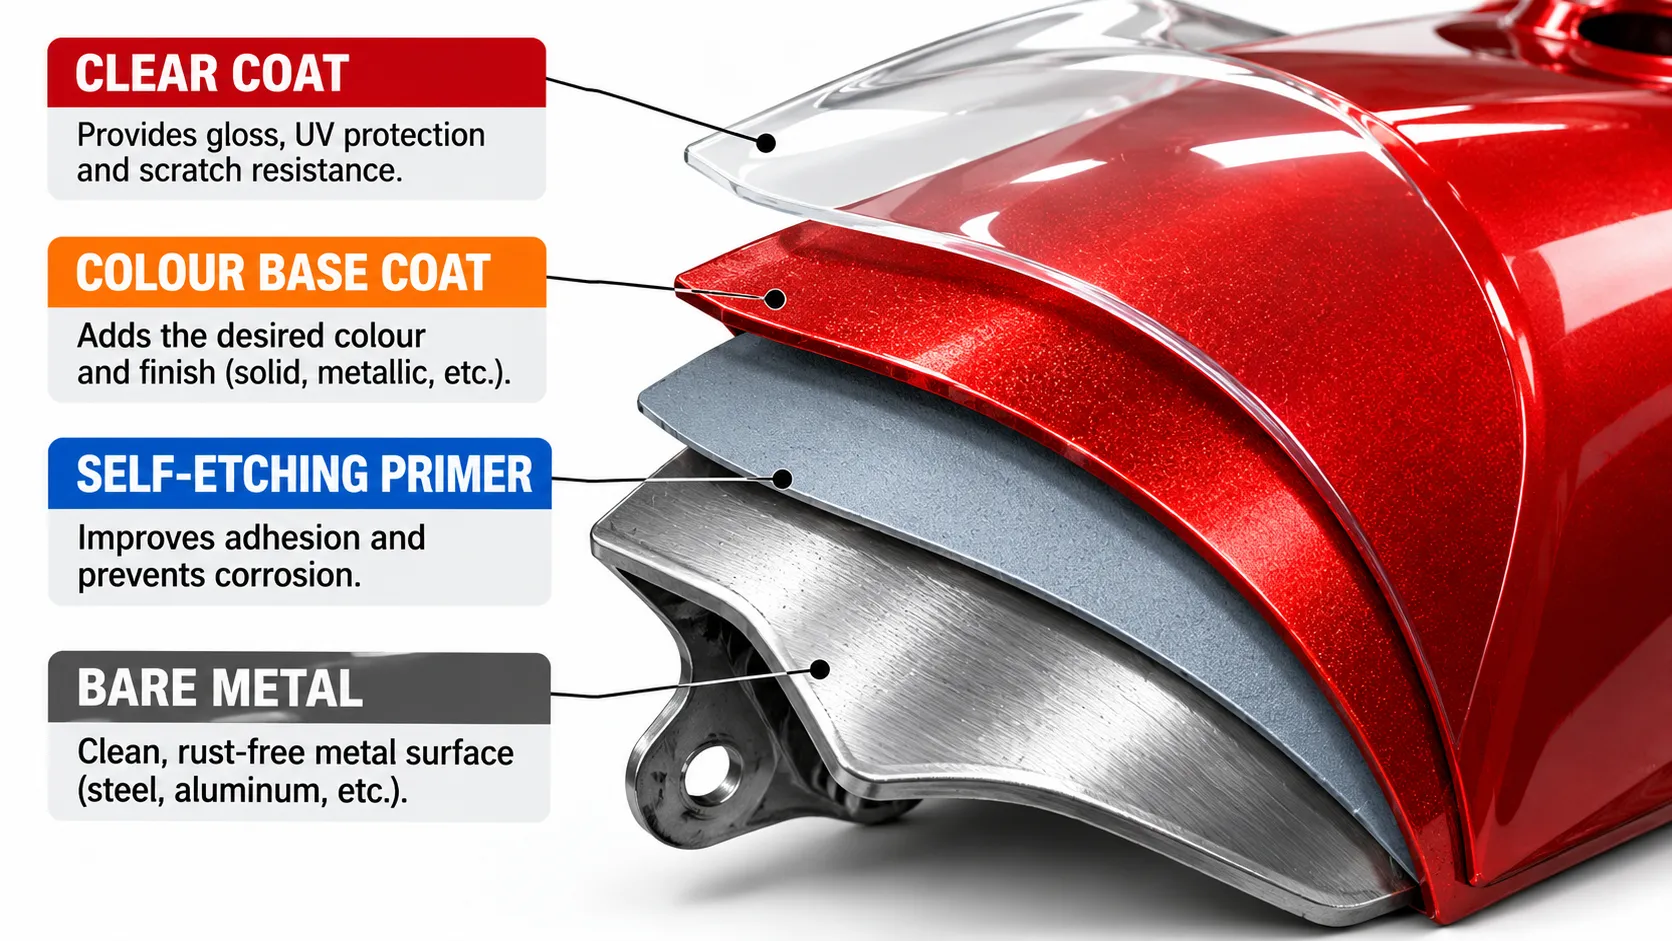
The key idea: a good finish is a system, not a single can. Primer, base colour and clear coat each have a job. When someone says their paint “didn’t last,” it is usually because one layer in that system was missing or mismatched.
Choosing Spray Paint by Motorcycle Part
This is the section that matters most. Different parts live very different lives, so they need different paint.
1. The Fuel Tank (Exterior)
The tank takes the most abuse: fuel spills, ethanol blends, knee grip, belt buckles, polish and sun. A standard colour coat alone will not hold up if fuel touches it. In my experience, a tank needs a proper primer, a good base colour and a fuel-resistant 2K clear coat to survive.
I go through the full process, including masking the filler area, wet sanding between coats and curing, in my dedicated guide: Best Paint for Motorcycle Tank. That guide also answers the common variations riders search for, such as the best paint for a gas tank, fuel tank or petrol tank.
2. Inside the Tank (Sealers and Liners)
Painting the inside of a tank is a completely different job. You’re not chasing a nice finish; you’re stopping rust and protecting the tank from fuel. Regular spray paint is the wrong tool here, and some tank products are incompatible with ethanol-blended fuel.
If you have rust flakes, a clogged petcock or a tank that’s been sitting for years, read Best Motorcycle Tank Sealer before you buy anything.
3. The Frame
Frames face stone chips, chain lube, road grime, moisture and heat cycling. Here I care most about rust protection and toughness. I lean on a strong primer and a durable topcoat, and I decide on gloss based on how often I’ll wipe it down.
I cover brush-on, spray can, and “art paint” shortcuts, plus when each is actually a bad idea, in Best Paint for Motorcycle Frame.
4. Plastics (Fairings, Fenders, Side Panels)
Plastics are where cheap paint jobs fail fastest. They flex, they sweat oils, and many are hard to bond to. You need correct cleaning, a scuff, an adhesion promoter, and flexible-friendly paint.
See Best Spray Paint for Motorcycle Plastics for the full approach.
5. Engine Cases, Cylinder Fins and Parts Near Heat
For these I use high-heat engine enamel, and I always check the temperature rating on the can against where the part sits. Exhaust headers and the engine run at very different temperatures, so a paint that’s fine on cases might not be fine on a header pipe. I don’t paint anything that sits directly on exhaust gases with a general-purpose can; that’s a recipe for blistering and smoke.
6. Wheels, Brackets and Small Parts
These are the forgiving jobs. A good primer plus a durable enamel and clear coat does the work. Small parts are a great place to practise your spray technique before you move on to the tank.
Prep Is 80% of the Job
I’ll say this plainly: if your prep is weak, even the most expensive paint will fail. Here’s the prep routine I follow.
Step 1: Clean thoroughly
Wash the part with a degreasing soap, rinse and let it dry. If you’re working on a bike that’s already filthy, my guide on how to wash your motorcycle covers the safe way to do it. Then wipe the part down with a proper wax and grease remover. Skin oils from your fingertips are enough to cause adhesion problems, so I wear clean nitrile gloves from this point on.
Step 2: Strip or scuff
- Flaking or failing paint: strip back to a stable edge.
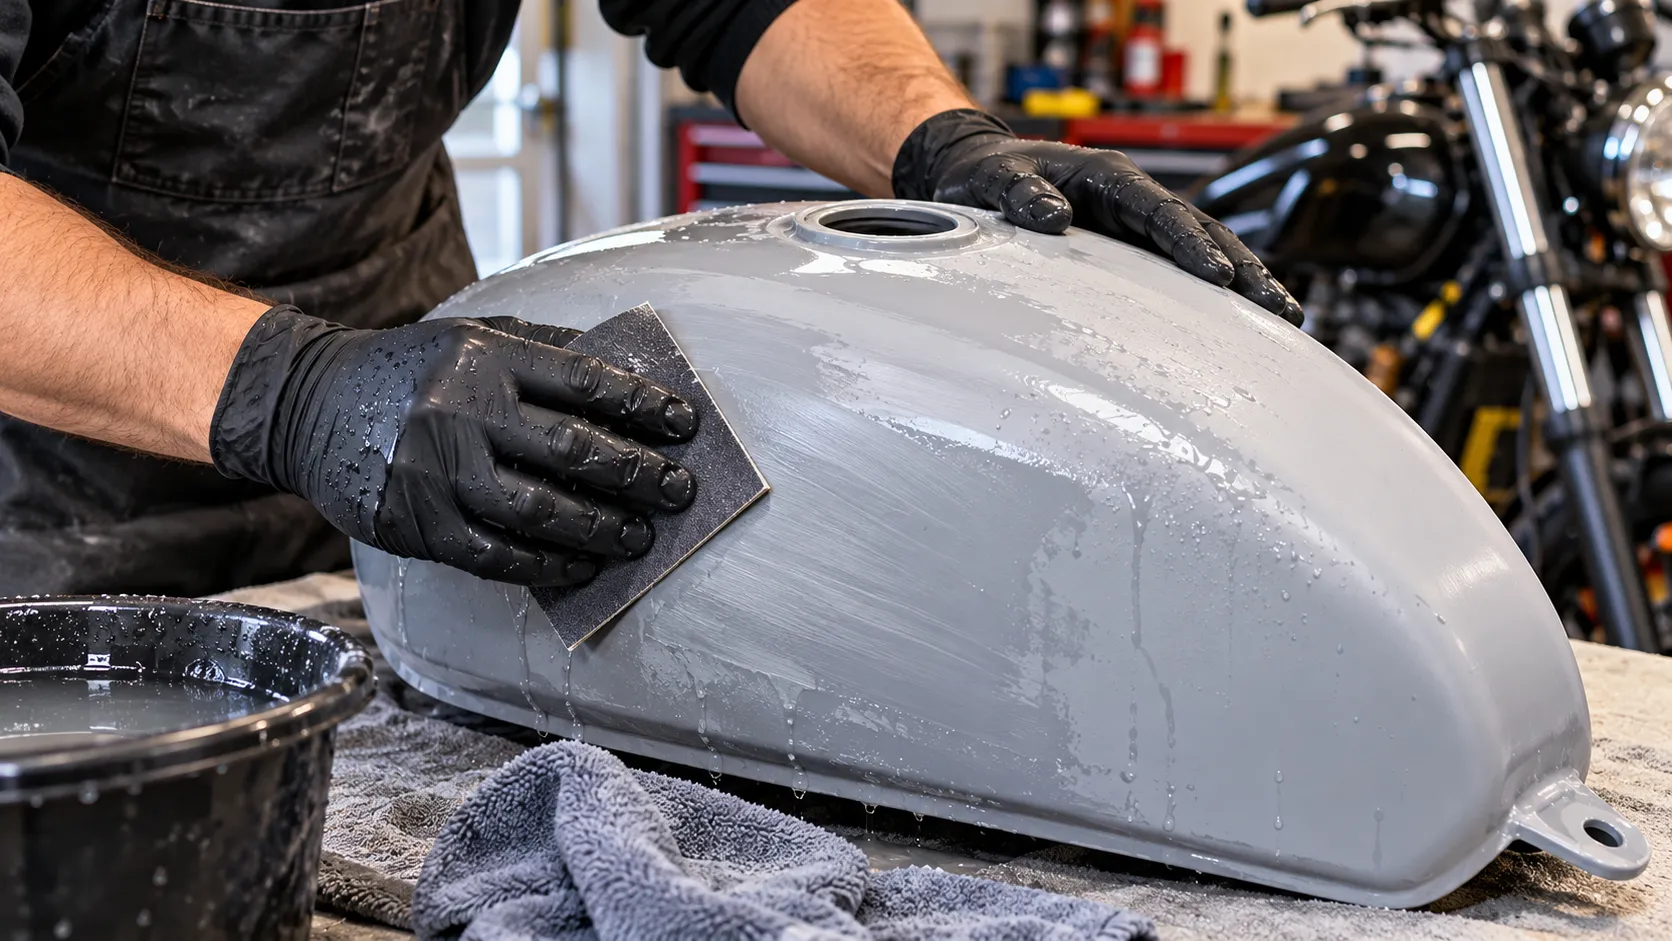
- Sound existing paint: scuff it so the new paint has something to grip. I typically use medium-fine sandpaper for the first scuff.
- Rust: remove it fully, or treat it with a rust converter or epoxy primer as the product instructs. Painting over live rust just hides it for a while.
Step 3: Fix dents and imperfections
Use a suitable filler, sand it smooth and feather the edges. Paint magnifies flaws, so a shiny finish will show every pinhole and scratch you left behind.
Step 4: Mask carefully
Cover everything you don’t want painted. Use good masking tape and paper, and press the edges down firmly. I plug openings (like bolt holes and the filler neck area) so paint doesn’t drift inside.
Step 5: Prime
Use the primer that matches the material: self-etching primer for bare metal, epoxy primer for rust-prone steel, adhesion promoter for plastics. Apply it in thin coats and respect the recoat window on the label. Once cured, lightly sand the primer so the colour coat levels smoothly.
How I Spray (Technique That Avoids Runs and Orange Peel)
Spray technique is easy to learn but easy to rush. Here’s the rhythm that works for me.
- Warm the can slightly by standing it in a bucket of warm (not hot) water for a few minutes. It improves spray pattern. Never heat a can with a flame or on a stove.
- Shake it properly. Follow the label, but I usually shake for a couple of minutes after the ball starts rattling.
- Test on cardboard first. Check the fan pattern and make sure nothing spits.
- Hold the can at the distance on the label, typically somewhere around 6 to 10 inches (15 to 25 cm). Too close causes runs, too far gives a dry, rough finish.
- Start spraying off the part, sweep across it in a steady pass, and release the nozzle after you’ve passed the edge. This avoids heavy blobs at the start and end of each pass.
- Overlap each pass by about half. That gives even coverage and avoids striping.
- Apply thin coats. The first coat should look almost dusty. That’s fine. Build colour over several passes.
- Respect flash time. Wait the time stated on the can between coats. Rushing is the number one cause of runs and wrinkling.
- Work in good conditions. Mild temperatures and low humidity are ideal. Cold or damp air can cause the paint to blush (turn cloudy) or cure poorly. I check the temperature range on the can before I start.
Clear coat
If you’re using clear, apply it after the colour has flashed off but before it fully cures, following the recoat window on the label. Two to three medium-wet coats usually do it. With a 2K clear, you activate the hardener as directed and you must use it within the pot life listed.
Curing and polishing
Paint can feel dry within minutes or hours but still be soft underneath. Give it the full cure time on the label before bolting parts back on, and wait even longer before using fuel-contact parts or polishing. If I’m polishing, I wait until the clear is fully cured, then use a fine polishing compound by hand.
Safety: Don’t Skip This Part
Spray paint isn’t something to treat casually.
- Ventilation: Work outdoors or in a well-ventilated space away from ignition sources, pilot lights and anything that could spark.
- Respirator: A dust mask isn’t enough. Use a respirator rated for organic vapours. 2K clear coats contain isocyanates, which are a serious respiratory hazard; for those, follow the manufacturer’s safety data sheet closely and consider a supplied-air solution if you paint often.
- Eye and skin protection: Wear safety glasses and nitrile gloves.
- Fire safety: Paint vapours and sanding dust can be flammable. Keep a fire extinguisher nearby, and dispose of used rags responsibly because some can self-heat.
I’d rather you take an extra ten minutes to gear up than take a shortcut your lungs pay for later.
Common Spray Paint Problems and How I Fix Them
| Problem | What’s usually happening | What I do |
|---|---|---|
| Fisheyes (little craters) | Silicone, oil or wax left on the surface | Stop, let it cure, sand back, re-clean with wax and grease remover, recoat |
| Runs and sags | Coat too heavy or too close | Let it cure fully, then sand flat and recoat with lighter passes |
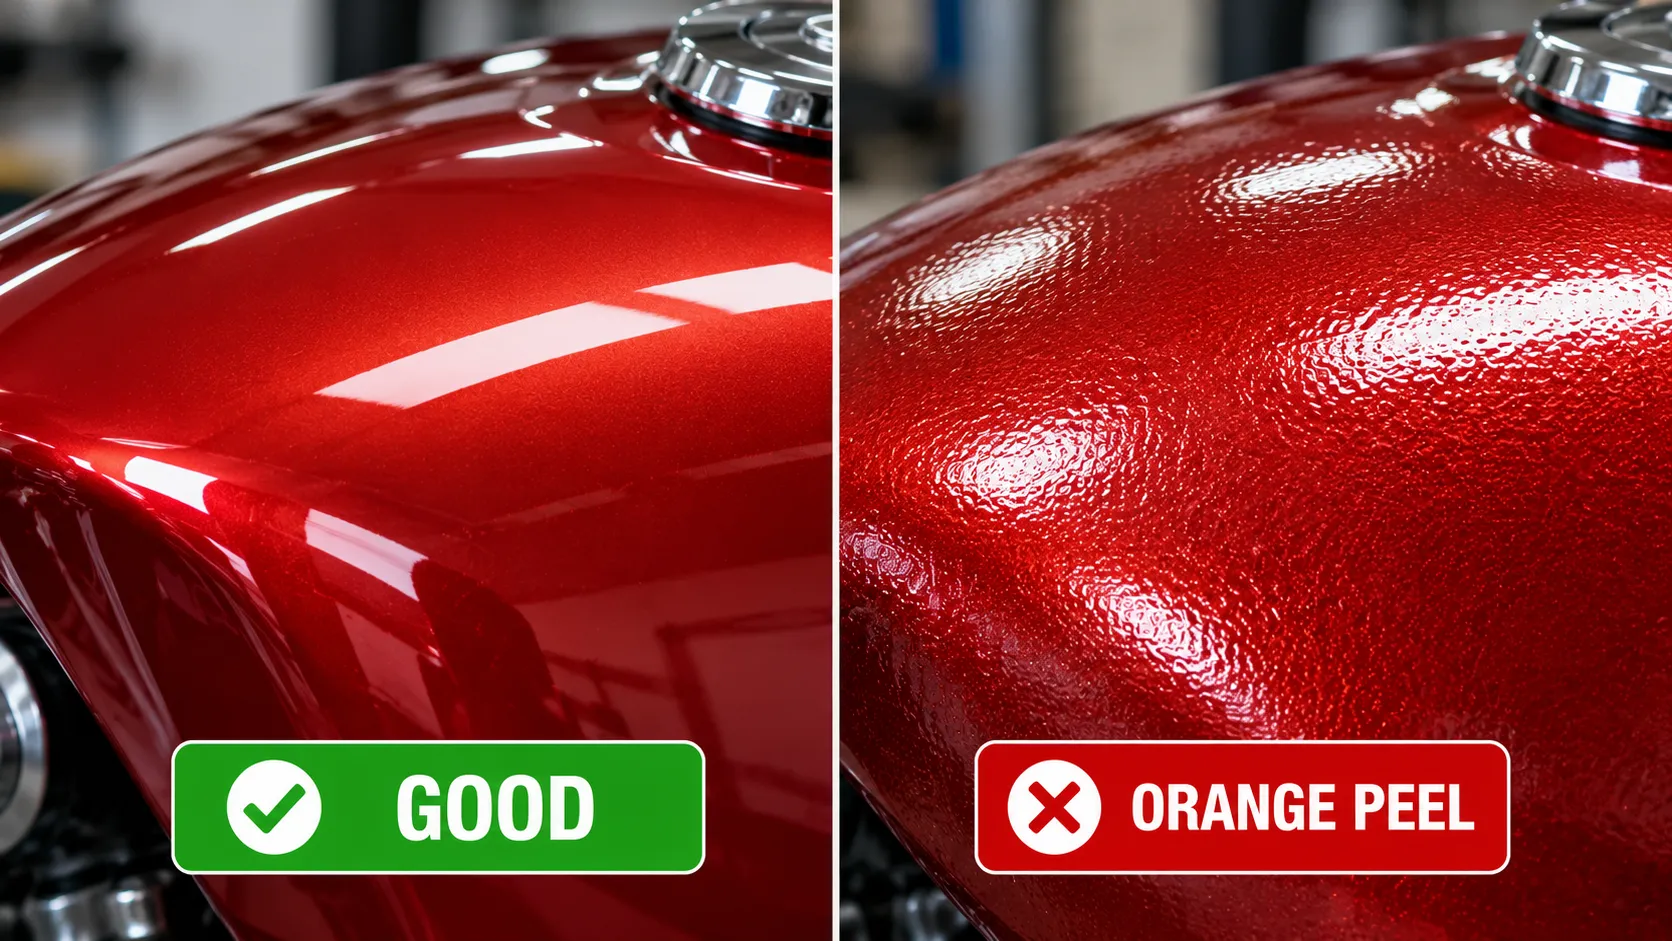
| Orange peel | Paint drying before it levels, can too far away, or cold conditions | Wet sand and polish once cured, or add a fresh clear coat |
| Blushing (cloudy patches) | Humidity trapped in the paint | Move to a drier day; light recoat can sometimes clear it |
| Peeling or lifting | Poor adhesion, wrong primer or incompatible layers | Strip back, re-prep and use the correct primer |
| Soft or sticky finish | Not enough cure time, or cold weather | Give it more time at the right temperature before handling |
| Dull ring around fuel cap | Fuel splashes reacting with non-fuel-resistant paint | Use a fuel-resistant clear coat on the tank, and wipe spills quickly |
Most of these failures come from rushing between coats or skipping prep. If something goes wrong, don’t keep spraying on top of the problem. Stop, let it cure, fix it properly and move on.
A Buyer’s Checklist: What to Look For on the Can
When I’m standing in the aisle, here’s what I check before I buy.
- Rated surfaces. Does it say metal, plastic or both? If you’re painting plastic, check that it’s rated for it.
- Heat rating (if relevant). Compare the stated temperature range with where the part will sit.
- Fuel or chemical resistance. If the can doesn’t claim it, assume it isn’t fuel-resistant.
- Recoat window and cure time. Make sure it suits your schedule and weather.
- Colour and sheen consistency. Buy enough cans of the same batch for the whole job so the colour matches.
- System compatibility. Primer, base and clear should be compatible. Mixing random brands can cause wrinkling or lifting. When in doubt, stay within one manufacturer’s system, or test on a scrap piece.
As a rough rule, buy a little more than you think you need. Running out mid-panel and trying to match a new can is frustrating. Coverage per can varies, so check the label’s estimate and test your own technique on a spare part first.
Spray Paint vs Other Methods: When a Rattle Can Isn’t the Right Answer
I love a good rattle can project, but I’m honest about when it falls short.
- Powder coating is very durable and often my first choice for frames and swingarms if the budget allows, because it handles chips, chemicals and heat better than most spray cans.
- Professional automotive paint gives the best finish on tanks and bodywork, especially for show quality.
- Wraps and films can protect fresh paint or change the look without a respray.
- Rattle cans shine for budget builds, touch-ups, small parts, and riders who enjoy the process.
If your bike is a daily rider and you need a long-lasting result, ask yourself whether the extra cost of a pro job or powder coating is worth it. If you’re building a weekend project and enjoy the work, a careful rattle can job can look great.
Keeping Your Paint Looking Good After You Finish
A fresh finish deserves a bit of aftercare.
- Let it fully cure before waxing or using harsh cleaners.
- Wash gently with a pH-neutral soap and a soft microfibre cloth.
- Wipe fuel spills immediately to protect the tank finish.
- Use a quality wax or sealant once cured to protect against UV and grime.
- Store the bike properly. If you’re putting it away for the cold months, my guide on how to winterize your motorcycle includes tips that also protect your paint from moisture and dust.
If you’re also thinking about a painted helmet to match your build, read can you paint a motorcycle helmet first. Helmets have safety considerations that make them a very different project from bodywork.
The Full Paint & Finishing Series
Here’s every guide in this series, so you can jump straight to the part you’re painting:
| If you’re painting… | Read this guide |
|---|---|
| The outside of the fuel tank | Best Paint for Motorcycle Tank |
| The inside of the tank (rust, sealers, liners) | Best Motorcycle Tank Sealer |
| The frame | Best Paint for Motorcycle Frame |
| Fairings, fenders and other plastics | Best Spray Paint for Motorcycle Plastics |
Bookmark this page as your starting point, and use the part-specific guides when you’re ready to dig into the details.
Frequently Asked Questions
What is the best spray paint for a motorcycle?
It depends on the part. For metal, use a self-etching primer plus a durable enamel and clear coat. For plastics, use an adhesion promoter and a flexible, plastic-rated paint. For engine parts near heat, use high-heat enamel. For a tank, use a fuel-resistant 2K clear coat over your colour. The system matters more than the brand name.
Can I use regular spray paint on a motorcycle?
You can use it on low-stress parts like small brackets, but it’s usually not the best choice for tanks, frames, plastics or anything exposed to heat or fuel. Regular general-purpose paint often chips easily and softens when it meets petrol. Choose a product designed for the surface and conditions.
Do I need a clear coat over spray paint?
For most parts I’d say yes. Clear coat adds protection against UV, chemicals, chips and fuel, and it gives you something to polish. On a tank, a fuel-resistant clear is especially important.
How many coats of spray paint does a motorcycle part need?
Typically a few light coats of primer, three to four thin coats of colour, and two to three coats of clear. Always follow the recoat window on your product’s label. Thin coats build better than thick ones.
How long should I wait before reassembling the bike?
Follow the cure time on the label, and remember that “dry to touch” isn’t fully cured. I’d rather wait longer than risk fingerprints, scratches or a soft finish. For tanks, let the clear cure completely before adding fuel.
Can I paint over old paint?
Yes, if the old paint is sound and well bonded. Clean it, scuff it and prime where needed. If the old paint is flaking, cracked or peeling, strip it back first, or the new paint will fail with it.
Is it safe to spray paint at home?
It can be, with the right precautions: good ventilation, away from ignition sources, a proper respirator, eye protection and gloves. For 2K products with isocyanates, take extra care and follow the manufacturer’s safety instructions.
Will spray paint survive heat from the engine?
Only if it’s rated for it. Use a high-heat engine enamel, and check that the temperature rating suits the specific part. Exhaust headers run far hotter than engine cases, so choose accordingly.
Final Thoughts
If I had to boil down everything I’ve learned from my own painting projects into one sentence, it would be this: spend your effort on prep and on matching the paint system to the part, not on hunting for a miracle can. The riders I know who get lasting results are the ones who clean obsessively, prime properly, spray patiently and let the paint cure.
Start with a small part to build your confidence, then move up to the tank or frame when you’re ready. And when you do, the dedicated guides above will walk you through the details for each one.
If you have questions about your own project, drop them in the comments, and I’ll do my best to point you in the right direction. Ride safe, and keep that paint shiny.

Related Articles
5 Best Foam Cleaners for Motorcycles: My Top Picks for Ultimate Shine
I tested the best foam cleaners for motorcycles to find the top 5 picks for ultimate shine. See which foam…
Jake Miller
10 min read
7 Best Looking Silver Paints for a Motorcycle: My Honest Garage-Tested Picks
I've sprayed, sanded, and stared at more silver motorcycle paints than I can count. Here are 7 real products that…
Jake Miller
9 min read
7 Best Dry Cleaners for Motorcycle Gear: Where I Actually Trust My Leathers
I tested real dry cleaners that handle motorcycle leathers, jackets and helmets. Here are my 7 picks, what each does…
Jake Miller
7 min read