
Best Motorcycle Tank Sealer: What to Put Inside a Rusty Tank (and When to Skip It)
 Jake Miller
14 min read
Jake Miller
14 min read
Hook: The inside of a motorcycle tank is the one place regular paint doesn’t belong, and the place where a neglected bike quietly rusts from the inside out. This guide is part of my series that starts with the best spray paint for motorcycle projects, but the tank interior plays by completely different rules.
- Don’t use regular spray paint inside a fuel tank. The answer to “what is the best paint for inside the motorcycle tank?” is a purpose-made tank sealer or liner, not a rattle can.
- A sealer only works on a properly prepared tank. Clean metal, no loose rust, no oil or old fuel varnish, and completely dry. Skipping prep is the number one reason sealers fail.
- Check ethanol compatibility. Not every sealer is happy with ethanol-blended fuel, so read the label for the fuel blends it’s rated for.
- A sealer isn’t a repair for holes. Pinholes, cracks and heavily corroded seams usually mean repair or replacement.
- Sometimes you don’t need a sealer at all. Light surface rust can often be cleaned off and the tank kept healthy with good habits.
- Clogged fuel systems follow bad tanks. Rust and failing coatings can block petcocks, filters and jets, so check the whole fuel path.
- If the tank is plastic, sealers are not the answer.
“Best Paint for Inside the Motorcycle Tank”: The Honest Answer
People often search for “what is the best paint for the inside of a motorcycle tank” or “best paint for motorcycle tank sealer”. I understand why: the logic seems simple. Rust inside, so paint it.
But a fuel tank interior is a hostile place. Fuel is a solvent. Fuel vapour, moisture and temperature swings work on the coating every day. Ordinary spray paint isn’t designed for constant fuel contact, and it’s nearly impossible to apply evenly inside a closed tank. It can flake off in pieces and travel straight into your fuel filter, petcock and carburettor or injector.
What you want instead is a fuel-tank sealer (or liner): a coating formulated for the inside of a tank, applied by pouring it in and rolling the tank around so it coats every surface. Most are epoxy-based or similar two-part or single-part chemistries made for fuel contact.
If your tank’s outside needs paint, that’s a separate project with a different system. See my guide to the best paint for a motorcycle tank.
How Do I Know If My Tank Needs a Sealer?
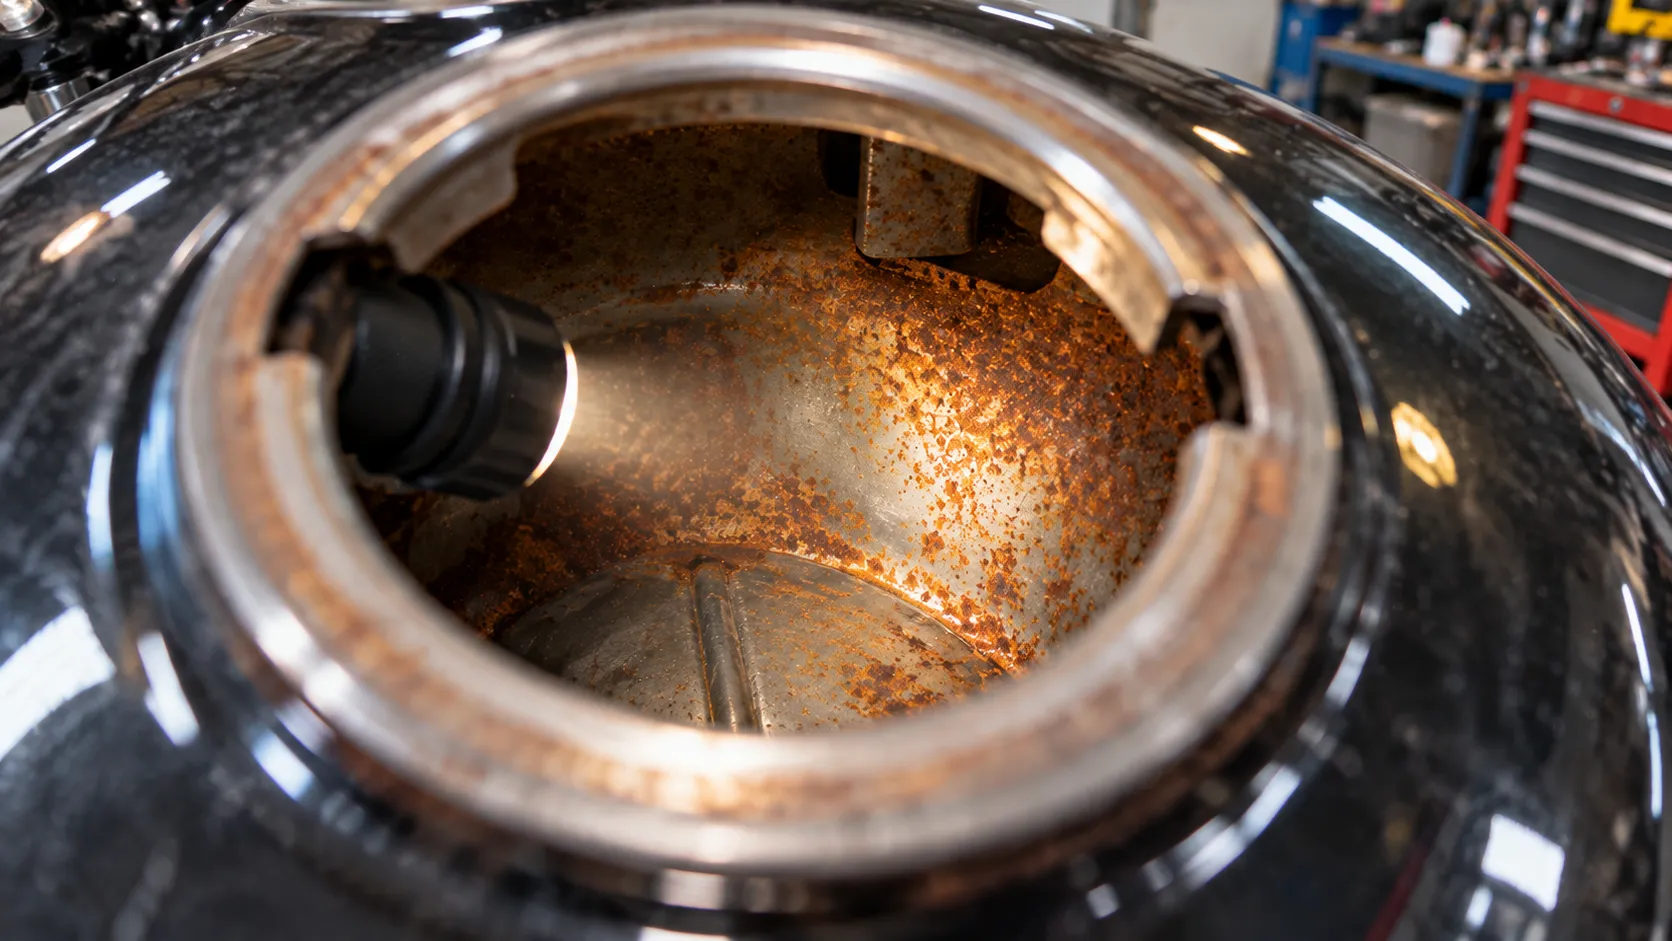
Before you buy anything, take a proper look. Remove the fuel cap and shine a torch inside. Use a small inspection mirror or a phone camera on a flexible stick if you can.
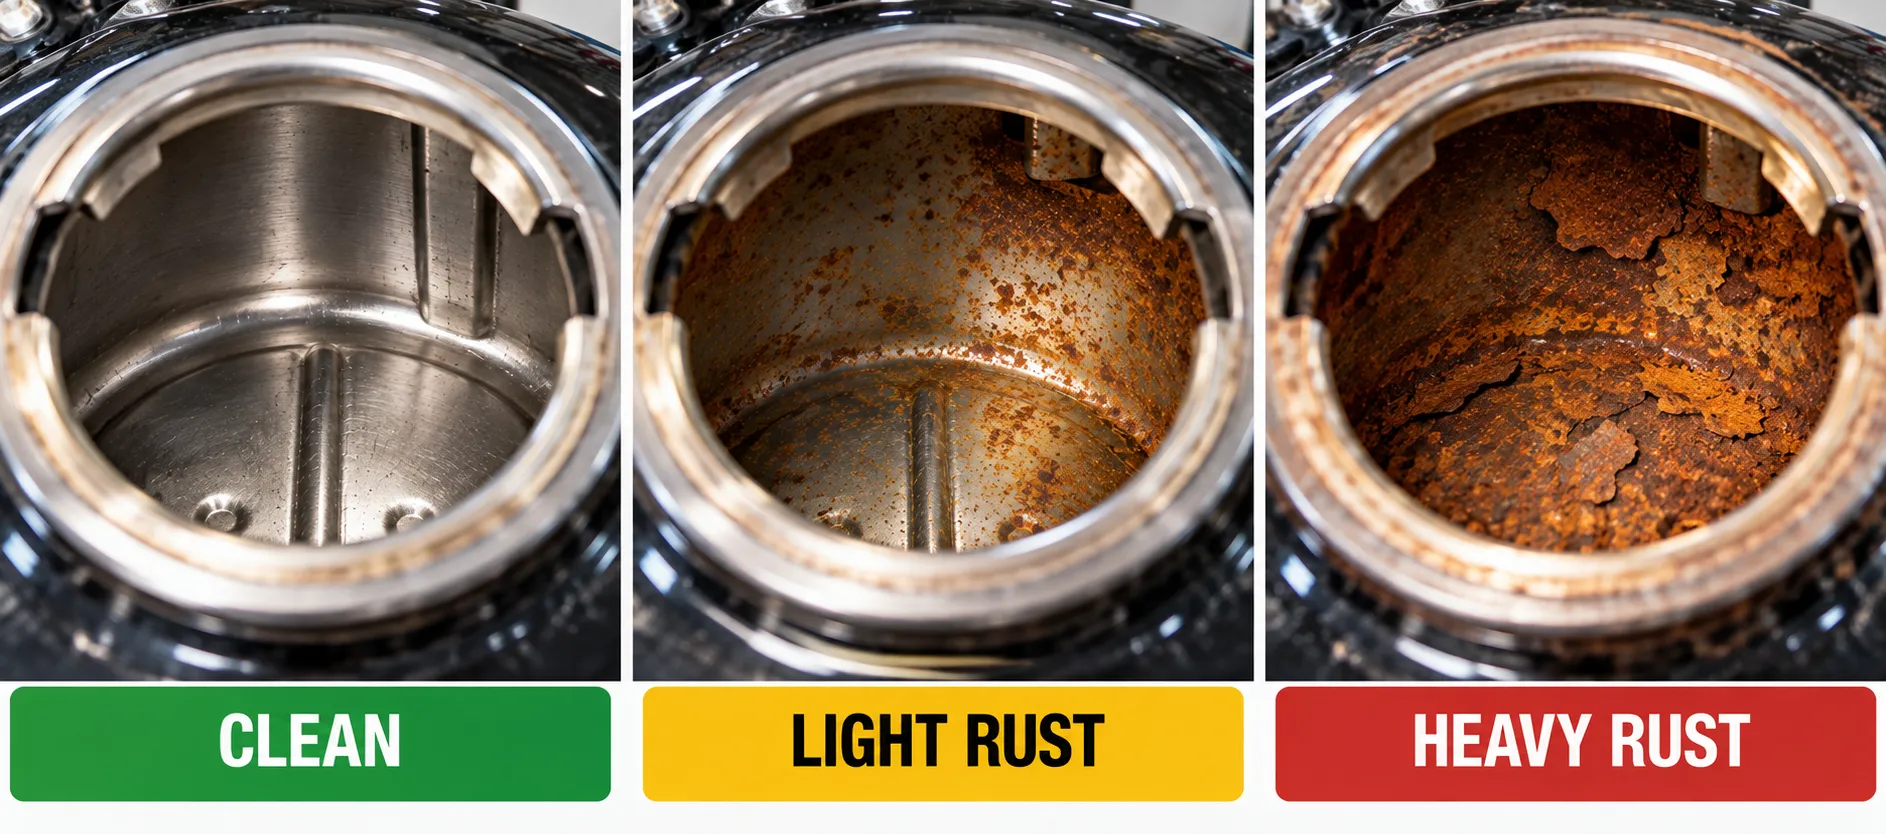
Signs you might not need a sealer
- Clean bare metal or a thin, even coating of old fuel residue
- A few light orange spots of surface rust that wipe off
- A sound original coating or a sealer that’s still bonded well
Signs you probably do
- Widespread rust coating the walls, especially the bottom
- Rust flakes or scale that fall off when you tap the tank
- Repeated clogged fuel filters or blocked petcocks
- A tank that has sat for a long time with old fuel or water in it
- Weeping seams where rust has started to thin the metal
Signs a sealer won’t save you
- Pinholes or active leaks. A sealer might temporarily hide a small one, but it’s not a structural repair.
- Deeply pitted or perforated metal. Thin metal under heavy rust may not be sound enough to coat.
- A failing previous sealer that’s peeling or bubbling. It has to come out first, and that’s a messy job.
- A plastic tank. Sealers are for metal tanks, so check your tank’s material first.
If your tank leaks, repair or replace it. Fuel leaks are a fire risk, and no sealer should be a substitute for a sound tank.
Types of Tank Sealers and What They’re Good At
Brands and formulas change, so I’ll talk about types and the well-known product families you’ll see, then show you how to check the label.
| Type | What it is | Strengths | Watch out for |
|---|---|---|---|
| Epoxy-based tank sealer | A two-part or specialist epoxy coating poured into the tank | Strong adhesion, good rust barrier | Needs spotless prep and careful mixing; check ethanol rating |
| Single-part tank liner | A ready-to-pour coating | Simpler to use | Quality and compatibility vary; read the label |
| Rust converter or etching treatment | Chemical treatment that converts or removes rust | Prepares or treats the metal | Not a sealer on its own; follow with a proper coating if needed |
| Cleaning and rust-removal only | Soaking or rinsing with a rust remover | Works well for light rust, keeps the tank “bare” | Needs follow-up care to prevent flash rust |
Some product families you’ll come across include POR-15, Kreem, Red-Kote and Caswell. I’m naming them so you recognise them in shops and forums, not because one is a guaranteed winner for every tank. Formulas get updated, and I’d rather you judge them by the label.
What to check on the label before you buy
- Rated for fuel tanks. It should say so clearly.
- Ethanol compatibility. Look for the blends it’s rated for (for example, E10 or higher). If the label doesn’t mention ethanol, ask the manufacturer or choose another product.
- Prep requirements. A good label spells out the cleaning and etching steps. If it’s vague, be wary.
- Cure time and temperature range. Make sure it fits your workspace and schedule.
- Tank size. Check the volume it covers against your tank.
- What it adheres to. Make sure it’s suitable for steel (and aluminium if yours is aluminium).
Do You Actually Need a Sealer? Alternatives I Consider First
Honestly, I try other approaches before I reach for a sealer, because sealers are hard to undo if something goes wrong.
Option 1: Clean and de-rust only
For light rust, a thorough clean can restore a tank. Common methods include:
- Citric acid soaks. A mild, relatively safe option for light to moderate rust.
- Commercial rust-removal products designed for fuel tanks, used exactly as directed.
- Mechanical cleaning with loose hardware (like chain pieces or specialist cleaning media) shaken inside the tank to break rust loose, followed by thorough rinsing.
I avoid harsh acids unless I know exactly what I’m doing and have proper protection. Some acids can damage thin metal and are hazardous to handle. If you’re not sure, choose the gentler route or ask a professional.
After any wet clean, dry the tank completely and quickly. Bare steel can flash-rust within hours if left damp. I flush with a suitable water-displacing solvent or use warm air, then protect the inside straight away with fuel or a light fogging product designed for tanks.
Option 2: Replace the tank
If the tank is badly corroded, leaking or too thin to trust, replacing it can be cheaper in time and worry than repair. A good used or aftermarket tank may beat a risky restoration.
Option 3: Professional restoration
Some shops specialise in cleaning, repairing and coating tanks. For a valuable classic or a tank with minor repairs needed, this can be worth it.
Step-by-Step: How I Prepare and Seal a Steel Tank
Different products have different requirements, so the manufacturer’s instructions always win over my general steps. Here’s the overall flow so you know what to expect.
Step 1: Work safely
Fuel tanks hold flammable vapour, even when they look empty. Work outdoors or somewhere well ventilated, well away from sparks, pilot lights and heaters. Wear chemical-resistant gloves, eye protection and a respirator suited to the products you use. Keep a fire extinguisher nearby.
Step 2: Remove and drain the tank
Take the tank off the bike, drain all fuel into an approved container and store it safely. Remove the fuel cap, petcock, fuel level sender (if fitted) and any other fittings. Plug any holes you can’t remove fittings from, following the sealer’s instructions.
Step 3: Degrease and remove old fuel varnish
Old petrol can leave a sticky varnish on the walls. A suitable degreaser or tank cleaner helps break it down. Rinse thoroughly. If the sealer’s instructions call for a specific cleaner, use that one.
Step 4: Remove the rust
Use one of the methods above (citric acid, a dedicated rust remover or mechanical cleaning) until the metal is clean and bright. Rinse until the water runs clear. Look inside with a torch and a mirror to check that you’ve reached every corner and seam.
Step 5: Etch or prepare the metal (if the product requires it)
Many sealers need the metal to be slightly etched so the coating can bite into it. Some products come with a metal-prep step. Follow it to the letter, including rinse and dry times.
Step 6: Dry the tank completely
This is the step I’d tape to the garage wall. Moisture trapped inside will ruin the bond. Use warm, dry air, leave it to dry in a warm place and check carefully. Don’t use a heat source that creates a fire risk. I’d rather wait an extra day than pour sealer into a tank that’s still damp.
Step 7: Mix and pour the sealer
Mix the sealer exactly as the instructions say, including any ratios and mixing times if it’s a two-part product. Pour the correct amount in through the filler opening.
Step 8: Coat the interior
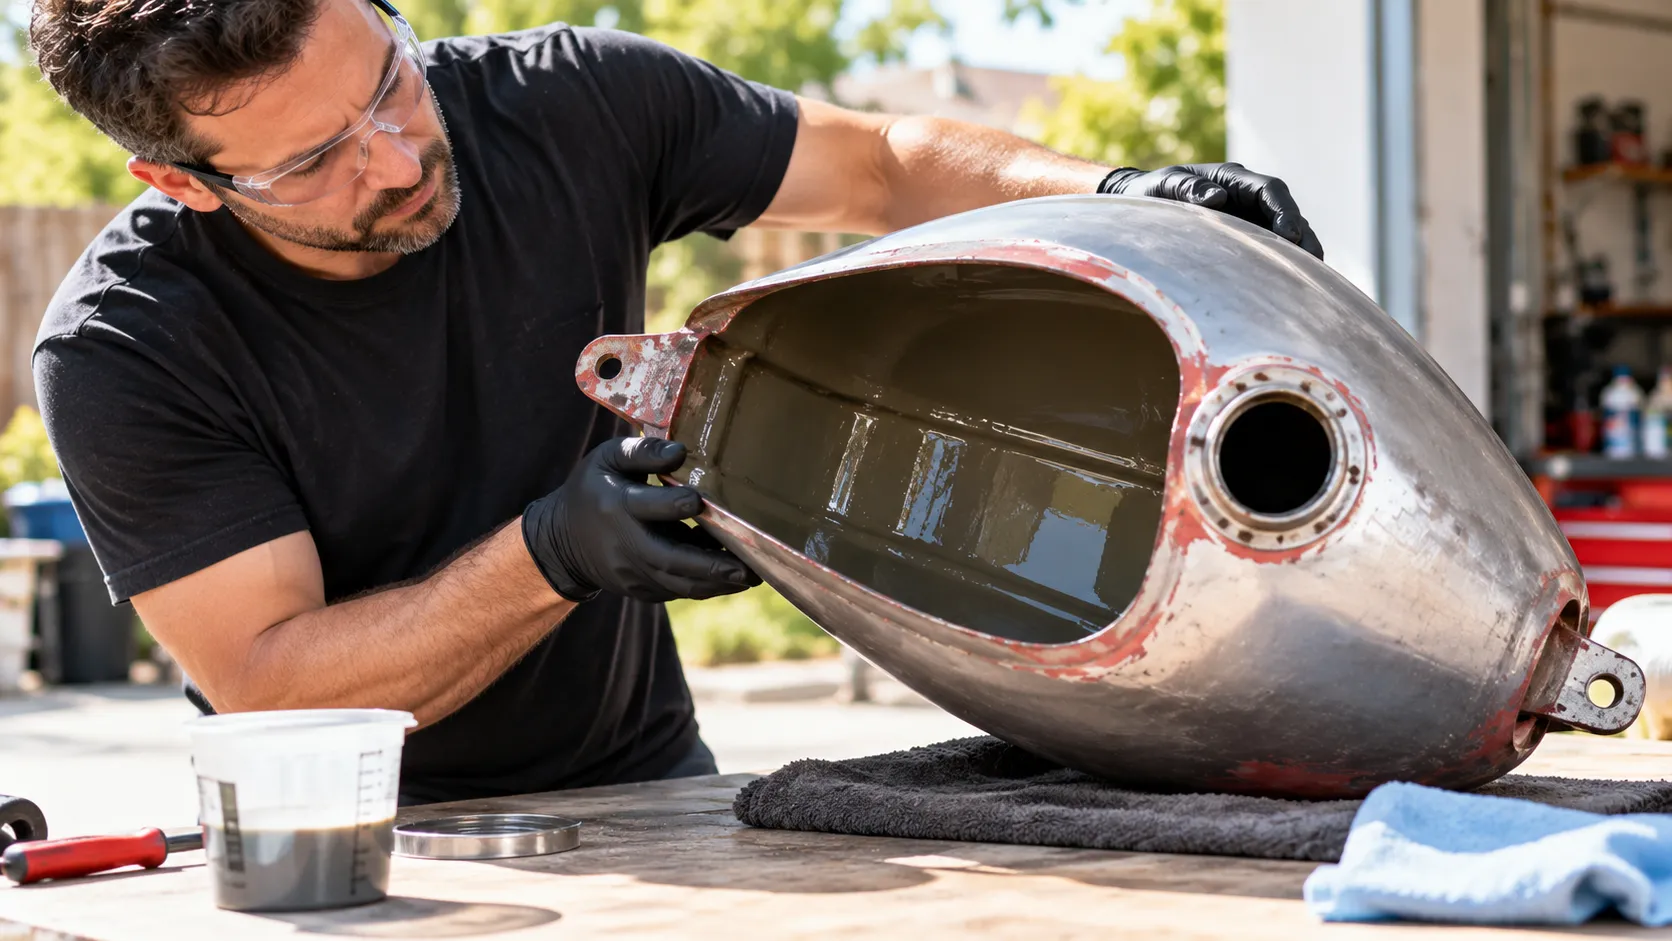
Slowly rotate and tilt the tank in all directions so the sealer reaches every surface. Take your time, and check the filler opening, seams and lower corners. Then drain the excess sealer as directed so it doesn’t pool and leave thick spots.
Step 9: Cure
Cure time varies by product and temperature. Leave the tank somewhere warm, dry and well ventilated for the full time on the label. Don’t rush to refit it. A tank that’s refilled too early can end up with a soft, tacky or peeling coating.
Step 10: Reassemble and check
Refit the petcock and sender with fresh seals, then refit the tank. Fill with fresh fuel and check carefully for leaks. For the first fills, consider using a clear inline fuel filter so you can see if any particles appear.
Why Tank Sealers Fail (and How to Avoid It)
Most failures come down to a handful of causes.
| Problem | What’s happening | How to prevent it |
|---|---|---|
| Peeling or flaking inside the tank | Poor adhesion from rust, oil or moisture left on the metal | Thorough cleaning, proper etching and a completely dry tank |
| Soft or tacky coating | Not cured long enough, or the wrong fuel compatibility | Follow cure times exactly; use a product rated for your fuel |
| Clogged filter or petcock after sealing | Excess sealer, loose particles or an overly thick coat | Drain excess properly; use an inline filter for the first fills |
| Sealer bubbling or lifting at seams | Rust or contamination left in seams | Clean seams thoroughly and inspect before coating |
| Fuel smell or contamination issues | Uncured or incompatible coating | Give it full cure time; choose an ethanol-rated product |
| Coating hides a leak temporarily | Sealer is bridging a hole it can’t permanently fix | Repair or replace a leaking tank rather than relying on sealer |
If a sealer starts to fail, you may end up with pieces in your fuel system and a tank that is much harder to restore than the one you started with. That’s why I tell people to think hard before sealing a tank that is only lightly rusted.
What About the Fuel System After a Tank Problem?
A rusty tank rarely only hurts the tank. Rust, old fuel and failed coatings can travel downstream. After dealing with a tank, I check:
- The petcock and its filter screen. Clean or replace it.
- Fuel lines. Replace brittle or stained lines.
- The inline filter. Fit a fresh one and consider a clear filter so you can see debris.
- The carburettors or fuel injectors. Varnish and rust can block jets and injectors. If the bike ran poorly before, don’t be surprised if they need cleaning.
- The fuel pump and its strainer on fuel-injected bikes.
Doing a full pre-ride check helps you catch issues early. My T-CLOCS pre-ride inspection guide is a good routine to build into every ride, and it includes the fuel system.
Preventing Tank Rust in the First Place
The best tank sealer is the one you never need. A few habits go a long way:
- Keep the tank mostly full during storage. Less air space means less condensation. My guide on how to winterize your motorcycle covers storage steps in detail.
- Use a suitable fuel stabiliser if the bike will sit for weeks or months.
- Avoid leaving the bike with a half-empty tank in humid places.
- Replace the fuel cap seal if it’s perished, so rain and moisture don’t creep in.
- Don’t ignore water in the fuel. If you find water, drain and flush before it starts rusting.
- Ride regularly if you can. A bike that’s used is usually healthier than one that sits.
How the Inside and Outside of a Tank Work Together
If you’re doing a full restoration, handle the inside first. Any cleaning, etching or sealing involves liquids and chemicals that can mark or damage fresh outer paint. Once the inside is sealed, cured and sound, you can paint the outside with confidence. My guide on the best paint for a motorcycle tank covers the exterior system, including the fuel-resistant clear coat.
If you’re repainting other parts at the same time, my pillar guide to the best spray paint for motorcycle projects helps you match the right paint to each part.
Where This Guide Fits in the Series
This tank sealer guide is one part of my paint and finishing series, which starts with the best spray paint for motorcycle pillar guide. For the other parts:
| If you’re painting… | Read this guide |
|---|---|
| The outside of the fuel tank | Best Paint for Motorcycle Tank |
| The frame | Best Paint for Motorcycle Frame |
| Fairings, fenders and plastics | Best Spray Paint for Motorcycle Plastics |
Frequently Asked Questions
What is the best paint for inside the motorcycle tank?
Ordinary paint isn’t the right choice. Use a purpose-made fuel-tank sealer or liner, rated for fuel and ethanol blends, applied to a clean, rust-free, completely dry tank.
What is the best tank sealer for a motorcycle?
There isn’t one winner for every tank. Epoxy-based sealers from well-known tank-sealer product families are common, but you should choose based on the label: fuel and ethanol compatibility, prep requirements, cure time and tank size. Follow the instructions exactly.
Can I use spray paint inside a motorcycle tank?
I wouldn’t. Spray paint is not designed for constant fuel contact, is hard to apply evenly inside a closed tank, and can flake into your fuel system.
Is tank sealer safe with ethanol fuel?
It depends on the product. Some are rated for ethanol blends and some aren’t. Check the label and, if in doubt, contact the manufacturer before you buy.
Do I need to seal a tank with light rust?
Not always. Light surface rust can often be cleaned and the tank kept healthy with good storage habits. Sealing is more useful for widespread rust or a tank that keeps clogging your fuel system.
Will a sealer fix a leaking tank?
Not reliably. Sealers aren’t a substitute for structural repair, and a leaking tank is a fire risk. Repair it properly or replace it.
How long does tank sealer take to cure?
It varies by product and temperature, from hours to several days. Follow the label’s cure time and don’t refit or refill until it’s done.
Can I seal a plastic or aluminium tank?
Sealers are mainly designed for steel tanks. Aluminium and plastic tanks need products specifically rated for them, and plastic tanks usually don’t need sealing at all. Check the label.
Final Thoughts
The key idea in this guide is simple: the inside of your tank needs a sealer or cleaning, not paint, and the prep matters more than the product. A well-prepped, fully dry tank with a compatible sealer can last for years, while a rushed job can leave you with flaking coating in your fuel system.
Take your time, check your tank honestly before you commit, and don’t be afraid to choose cleaning or replacement if that’s the sounder option. If you have questions about your own tank, leave a comment and I’ll do my best to help. Ride safe.

Related Articles
5 Best Foam Cleaners for Motorcycles: My Top Picks for Ultimate Shine
I tested the best foam cleaners for motorcycles to find the top 5 picks for ultimate shine. See which foam…
Jake Miller
10 min read
7 Best Looking Silver Paints for a Motorcycle: My Honest Garage-Tested Picks
I've sprayed, sanded, and stared at more silver motorcycle paints than I can count. Here are 7 real products that…
Jake Miller
9 min read
7 Best Dry Cleaners for Motorcycle Gear: Where I Actually Trust My Leathers
I tested real dry cleaners that handle motorcycle leathers, jackets and helmets. Here are my 7 picks, what each does…
Jake Miller
7 min read