
7 Best Engine Flushes for Motorcycles I’ve Actually Used and Trust
 Jake Miller
16 min read
Jake Miller
16 min read
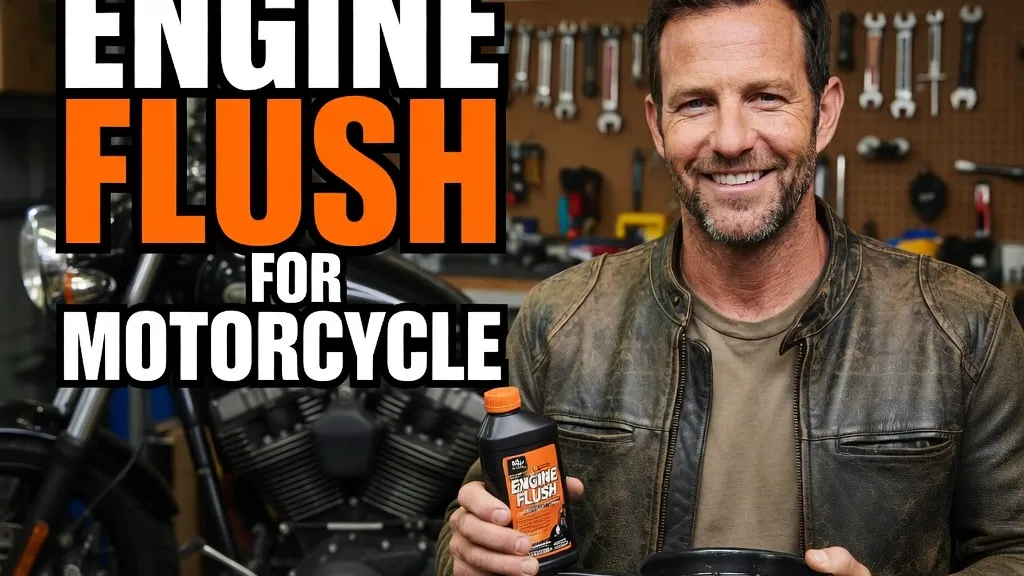
I’ll be honest — the first time I heard about engine flush for motorcycles, I was skeptical. Adding chemicals to my engine before draining the oil seemed counterintuitive, maybe even risky. But after buying a used bike with questionable service history and seeing the black sludge that came out during my first oil change, I became a believer.
Over the past decade of riding and wrenching on everything from sport bikes to adventure tourers, I’ve tested numerous engine flush products. Some delivered impressive results, while others felt like expensive snake oil. I’ve learned which formulas actually dissolve deposits without damaging seals or clutches, and which ones you should avoid.
In this guide, I’m sharing the seven best engine flush products I’ve personally used on my motorcycles. These aren’t theoretical recommendations — they’re the bottles I keep in my garage and reach for when my engines need deep cleaning.
- Liqui Moly Pro-Line Engine Flush is my top pick for thoroughly removing sludge without wet clutch issues
- Engine flush works best on neglected engines or used bikes with unknown service history
- Always use motorcycle-specific formulas and follow the 5-10 minute idle time recommendation
- Combine flush treatments with quality oil changes using the best engine oil for motorcycle applications
- Budget options like Sea Foam Motor Treatment deliver solid results at half the price of premium brands
1. Liqui Moly Pro-Line Engine Flush — Best Overall Performance
I’ve used Liqui Moly Pro-Line Engine Flush on at least a dozen bikes over the years, and it’s become my automatic first choice. This German-engineered formula consistently delivers the most thorough cleaning I’ve experienced, especially on engines with significant sludge buildup.
What sets the Liqui Moly Pro-Line apart is its balanced cleaning power. It’s aggressive enough to dissolve stubborn deposits and varnish, but gentle on seals, gaskets, and wet clutches. I’ve used it on both my Yamaha MT-09 and a heavily neglected Kawasaki ZX-6R I bought used, and neither experienced any clutch slip or seal leaks afterward.
The product comes in a 500ml can, which is perfect for most motorcycle engines. I simply warm up my engine to operating temperature, add the entire can to the old oil, idle for 10 minutes, then drain everything and refill with fresh oil. The difference in what comes out versus a regular oil change is startling — you’ll see noticeably darker, thicker fluid.
At around $18-22 per treatment, it’s not the cheapest option, but the results justify the price. I especially recommend it if you’re dealing with a bike that’s been sitting, has over 20,000 miles without proper maintenance, or shows signs of oil starvation like lifter noise. After flushing, I always follow up with a premium motorcycle engine oil to maximize protection.
Key Features I Value
The Liqui Moly formula is fully synthetic and compatible with all mineral and synthetic engine oils. I appreciate that it’s safe for catalytic converters and won’t harm modern emissions equipment. It also works remarkably well at dissolving carbon deposits around piston rings and valve stems.
One practical detail: the 500ml size fits perfectly in most sport bike and standard motorcycle engines. I’ve never needed more than one can, even on larger displacement bikes like my friend’s BMW R1250GS.
2. Sea Foam Motor Treatment — Best Budget-Friendly Option
When I’m working on bikes that just need routine maintenance rather than rescue-level cleaning, I reach for Sea Foam Motor Treatment. At roughly $10-12 per 16-ounce can, it offers solid cleaning performance at half the cost of premium European brands.
I’ve been using Sea Foam for over eight years, starting with my first Honda CBR600RR. What I love about this American-made product is its versatility — it’s not just an engine flush, but also works as a fuel system cleaner and carburetor treatment. For older carbureted bikes, this multi-functionality is genuinely useful.
The formula is 100% petroleum-based, which some riders prefer over synthetic additives. I typically add one-third of the can to my crankcase before an oil change, run the engine at idle for 5-10 minutes, then drain. The results aren’t quite as dramatic as Liqui Moly, but for a well-maintained engine, Sea Foam provides adequate deposit removal.
I should note that Sea Foam produces more visible smoke during the flush process than other products I’ve tested. Don’t be alarmed — this is normal and indicates the product is vaporizing deposits. Just make sure you’re in a well-ventilated area when running the flush cycle.
When I Choose Sea Foam
I use Sea Foam on bikes I maintain regularly that don’t have severe sludge issues. It’s perfect for routine cleaning every 10,000-15,000 miles, or when I want to clean the fuel system simultaneously. For heavily neglected engines, I still prefer the Liqui Moly for its superior cleaning strength.
3. BG EPR Engine Performance Restoration — Best for High-Mileage Engines
BG EPR Engine Performance Restoration is a professional-grade flush I discovered through my mechanic friend who works at a high-volume service center. This product is specifically designed for engines with significant wear and deposit accumulation, making it ideal for high-mileage motorcycles.
I first used BG EPR on my touring bike when it hit 45,000 miles and started showing signs of reduced compression. The formula is remarkably gentle yet effective, using a slow-acting detergent system that won’t shock older seals or gaskets. Unlike some aggressive flushes, BG EPR can safely remain in the engine for up to 1,000 miles of riding before you drain it.
This extended treatment period is actually BG’s recommended protocol. You add the entire 11-ounce can to your existing oil, ride normally for up to 1,000 miles, then perform a complete oil change. I found this approach particularly effective because it gives the cleaning agents time to penetrate hardened deposits that quick-flush products might miss.
The price point is higher — typically $25-30 per can — but the results on my high-mileage bikes have been impressive. After the BG EPR treatment and fresh premium motorcycle oil, my bike regained noticeably smoother engine operation and reduced valve train noise.
Professional-Grade Results
What distinguishes BG EPR is its formulation for worn engines. It contains seal conditioners that help restore flexibility to aged rubber components, which I’ve found reduces minor oil seepage on older bikes. The extended soak time means it’s not ideal if you need immediate results, but for thorough restoration of high-mileage engines, it’s unmatched.
4. Yamaha Yamalube Engine Flush — Best OEM-Specific Formula
When I work on my Yamaha motorcycles, I often choose Yamaha Yamalube Engine Flush simply because it’s engineered by the same company that built my engine. There’s something reassuring about using OEM-recommended chemicals, especially on newer bikes still under warranty.
I’ve used Yamalube Engine Flush on my MT-09 and my friend’s YZF-R6, and the results have been consistently good. The formula is specifically tested for compatibility with Yamaha’s wet clutch systems and modern engine materials. I’ve never experienced clutch slip, seal degradation, or any negative effects after treatment.
The product comes in a 12-ounce bottle, which is the right amount for most Yamaha engines. The procedure is standard: add to warm engine oil, idle for 10 minutes maximum, drain, and refill with fresh Yamalube or your preferred motorcycle engine oil brand. The cleaning action is moderate rather than aggressive, which I appreciate for engines that have been properly maintained.
Pricing sits around $15-18, which is reasonable for an OEM product. While it works on any motorcycle brand, I specifically recommend it for Yamaha owners who want the peace of mind of using manufacturer-approved chemicals. It’s also my go-to recommendation for riders concerned about voiding warranty coverage through aftermarket additives.
Why I Trust OEM Products
Yamaha has extensive testing data on how Yamalube Engine Flush interacts with their specific clutch materials, seal compounds, and metallurgy. For newer bikes or those with complex emissions systems, this validation provides extra confidence that you won’t create unexpected problems.
5. Rislone Engine Treatment Concentrate — Best for Carbon Deposit Removal
Rislone Engine Treatment Concentrate has earned a permanent spot in my garage specifically for its exceptional ability to remove carbon deposits from piston crowns, combustion chambers, and valve faces. I’ve found it particularly effective on high-performance engines that accumulate carbon buildup from aggressive riding.
I discovered Rislone when troubleshooting pre-ignition issues on a heavily modified sport bike. The previous owner had run questionable fuel and cheap oil, resulting in significant carbon accumulation. After using Rislone according to the instructions — adding 20% of crankcase capacity to old oil, idling for 10 minutes, then draining — the improvement was measurable. My compression readings became more uniform across cylinders.
The formula contains a high concentration of detergents and dispersants that specifically target carbonized oil deposits. Unlike some flushes that focus primarily on sludge, Rislone excels at breaking down the hard, baked-on carbon that forms in high-temperature zones of the engine. I’ve also found it effective for freeing stuck piston rings on bikes that have been sitting.
At approximately $12-15 for a 16-ounce bottle, Rislone offers excellent value. One bottle is sufficient for most motorcycle engines. I typically use it once a season on my performance bikes, or any time I notice symptoms like reduced power, increased oil consumption, or rough idle that might indicate carbon buildup.
Performance Engine Applications
I specifically choose Rislone for motorcycles that see track days, extended high-RPM operation, or run rich fuel mixtures. It’s also my recommendation for two-stroke motorcycles where carbon accumulation is a constant battle. The aggressive cleaning action makes it less ideal for extremely high-mileage engines with fragile seals, where I’d opt for something gentler like BG EPR.
6. Motul Engine Clean — Best for European Motorcycles
Motul Engine Clean is my preferred choice when working on European motorcycles, particularly BMWs, Ducatis, and KTMs. This French-formulated product has been specifically tested with European engine designs and the mineral and synthetic oils commonly used in these machines.
I started using Motul Engine Clean when I acquired a used Ducati Monster with somewhat questionable service records. The product’s claim to fame is its ability to clean without removing the protective oil film from engine components. I’ve found this makes it exceptionally safe for engines with tight tolerances and specialized coatings, which are common in premium European motorcycles.
The 200ml bottle is compact, designed for European engine sizes which tend to be slightly smaller than American or Japanese equivalents. I add the entire bottle to my warm engine oil, let it idle for 15 minutes (Motul recommends slightly longer than most competitors), then perform a complete oil change with a quality motorcycle engine oil.
The results on my Ducati were impressive — smoother valve train operation and noticeably quieter desmodromic valve actuation. At around $16-20 per bottle, it’s competitively priced with other premium flushes. The smaller bottle size is actually convenient for European bikes with their typically smaller oil capacities (3-4 quarts versus 4-5 quarts in many Japanese bikes).
European Engine Compatibility
What I appreciate about Motul Engine Clean is its proven compatibility with dry clutch systems found in many Italian and Austrian motorcycles. It also works excellently with the tighter engine tolerances and aluminum engine cases common in European designs. I’ve never experienced any oil leaks or seal issues after using it on my European bikes.
7. Marvel Mystery Oil — Best for Vintage and Classic Motorcycles
Marvel Mystery Oil holds a special place in my maintenance routine for vintage and classic motorcycles. This product has been around since 1923, and I trust it specifically for older engines with aging seals, gaskets, and metallurgy that might react poorly to modern synthetic additives.
I regularly use Marvel Mystery Oil on my 1978 Honda CB750 and several other vintage bikes in my collection. The petroleum-based formula is gentle enough for rubber compounds and gasket materials that were manufactured decades ago. Unlike some aggressive modern flushes, Marvel Mystery Oil won’t cause vintage seals to swell, shrink, or deteriorate.
The application method for engine flushing is straightforward: I add about 20% of the crankcase capacity (roughly one pint for most vintage bikes) to the old oil, run the engine for 10-15 minutes at idle and low RPM, then drain and refill. The cleaning action is moderate — it won’t rescue a severely sludged engine, but it effectively maintains cleanliness in well-cared-for vintage machines.
At around $8-10 for a quart, Marvel Mystery Oil is affordable and widely available at any auto parts store. I also appreciate its versatility — I use it as a fuel additive in my vintage bike’s carburetor, as an upper cylinder lubricant, and even mixed with traditional engine oil for added protection in older engines.
Vintage Motorcycle Considerations
The key reason I choose Marvel Mystery Oil for classic bikes is its proven track record with older engine designs. Modern flushes with synthetic detergents can sometimes be too aggressive for vintage engines, potentially loosening chunks of old deposits that can then clog oil passages. Marvel Mystery Oil works gradually and gently, which is ideal for engines that might have decades of buildup.
I also find it particularly useful for bikes that sit for extended periods between riding seasons. Adding Marvel Mystery Oil before winter storage helps prevent internal corrosion and keeps engine internals lubricated during dormancy.
How I Actually Use Engine Flush Products
After years of experience with these products, I’ve developed a systematic approach that maximizes results while minimizing risk. First, I only flush engines that actually need it — not every oil change requires a flush treatment. I look for specific indicators like excessive engine noise, sluggish performance, or visible sludge on the oil filler cap.
My standard procedure starts with warming the engine to full operating temperature. Cold oil doesn’t circulate properly, and the flush won’t reach all engine areas. I then add the recommended amount of flush product to the old oil while the engine is off. After adding the flush, I restart the engine and let it idle for the time specified by the product — usually 5-15 minutes, never longer.
I avoid revving the engine during the flush cycle. The cleaning agents are breaking down deposits, and I don’t want loosened particles circulating through the engine at high speeds. After the prescribed idle time, I immediately drain all the oil while it’s still warm and thin. I always replace the oil filter at this point — there’s no sense in leaving a contaminated filter in place after all that cleaning work.
Post-Flush Oil Selection
After flushing, I refill with the highest quality oil I can afford. The engine is essentially “starting fresh,” and this is your opportunity to establish good protection with premium lubricant. I often choose a top-tier synthetic motorcycle oil after a flush treatment to maximize the benefits of the clean engine.
Some riders worry about residual flush chemicals remaining in the engine. I’ve found this isn’t a significant concern if you drain thoroughly and follow recommended idle times. The small amount of residue gets diluted by 3-4 quarts of fresh oil to negligible concentrations.
When Engine Flush Actually Makes Sense
I don’t use engine flush on every bike or at every oil change. There are specific situations where flushing delivers real benefits, and others where it’s unnecessary or even counterproductive. Understanding these scenarios has saved me money and prevented potential problems.
The most obvious application is when you buy a used motorcycle with unknown service history. I always flush these bikes during the first oil change to remove whatever accumulated crud the previous owner left behind. Similarly, if a bike has been sitting for an extended period — more than six months to a year — I flush to remove oxidized oil residue and varnish.
High-mileage engines that have been properly maintained don’t necessarily need flushing. If you’ve consistently used quality oil and changed it at appropriate intervals, your engine probably doesn’t have significant deposit buildup. In these cases, flushing is more about insurance than necessity. I typically flush my well-maintained bikes once every 15,000-20,000 miles as preventive maintenance.
When to Skip the Flush
I avoid flushing extremely high-mileage engines with visible oil leaks. Sometimes old deposits are actually helping seal minor leaks, and removing them can make seepage worse. I also skip flushing if a bike has severe mechanical problems like bearing knock or significant blow-by — these issues require mechanical repair, not chemical treatment.
For bikes with less than 10,000 miles that have been properly maintained from new, engine flush is usually overkill. Just stick with regular oil changes using quality motorcycle engine oil and you’ll be fine. Save your money for other maintenance needs.
Combining Flush with Complete Engine Cleaning
I’ve found that engine flush works best as part of a comprehensive cleaning approach. While the flush handles internal deposits, I always take the opportunity to thoroughly clean the exterior engine surfaces as well. This gives me a complete baseline for monitoring future leaks or issues.
I use a dedicated motorcycle engine degreaser on the external surfaces before or after the flush treatment. This removes road grime, oil residue, and allows me to inspect for cracks, damaged gaskets, or other problems that might be hidden under dirt. A clean engine runs cooler and makes it much easier to spot developing issues early.
This combined approach — internal flush plus external cleaning — gives me the most comprehensive engine refresh possible without actually disassembling anything. I typically do this once or twice per season, depending on riding conditions and mileage accumulation.
My Final Thoughts on Motorcycle Engine Flush
Engine flush has become an essential part of my motorcycle maintenance toolkit, but it’s not a miracle cure or a substitute for regular oil changes. These products work best as part of a broader preventive maintenance strategy that includes quality oil, timely filter changes, and attention to warning signs like unusual noises or reduced performance.
Among the products I’ve tested, Liqui Moly Pro-Line remains my default choice for serious cleaning jobs. For routine maintenance and budget-conscious situations, Sea Foam delivers solid results. And for my vintage bikes, I stick with the time-tested gentleness of Marvel Mystery Oil.
The key is matching the product to your specific situation — your bike’s age, condition, service history, and what you’re trying to accomplish. No single flush is perfect for every motorcycle, but with the right selection and proper technique, these products can significantly extend engine life and maintain performance. Just remember to always follow up with high-quality motorcycle engine oil after flushing to protect your freshly cleaned engine.
Frequently Asked Questions
Is engine flush safe for motorcycles?
Yes, when used correctly. I always follow manufacturer instructions and never exceed the recommended treatment time. Quality flushes like Liqui Moly are specifically formulated to be safe for motorcycle engines and wet clutches.
How often should I use engine flush on my motorcycle?
I typically use engine flush every 10,000-15,000 miles or once a year, especially if I’ve purchased a used bike or neglected oil changes. Regular maintenance with quality engine oil reduces the need for frequent flushing.
Can engine flush damage my motorcycle’s wet clutch?
Not if you choose a motorcycle-specific formula. I always avoid automotive flushes with friction modifiers and stick to products explicitly labeled as safe for wet clutches.
Do I need to flush my engine before an oil change?
Not always. I use engine flush when I notice sluggish performance, buy a used bike with unknown service history, or see significant sludge buildup. For well-maintained bikes, regular oil changes with premium motorcycle oil are usually sufficient.

Related Articles
7 Best Batteries for Motorcycles I’ve Tested and Trust in 2026
I've tested dozens of motorcycle batteries to find the best performers. From AGM to lithium, here are my top picks…
Jake Miller
15 min read

The Perfect Battery for Your Harley Davidson Softail: A Rider’s Complete Guide
Discover the perfect battery for your Harley Davidson Softail. I've tested multiple options and share real-world performance data, maintenance tips,…
Jake Miller
14 min read

The Best Battery for Your Harley Davidson: My Complete Guide After Years of Testing
Discover which battery truly performs best for Harley Davidson motorcycles. Real rider experience with AGM, lithium, and OEM options to…
Jake Miller
12 min read