
7 Best Silver Paints for Motorcycle Engine Restoration and Detailing
 Jake Miller
14 min read
Jake Miller
14 min read
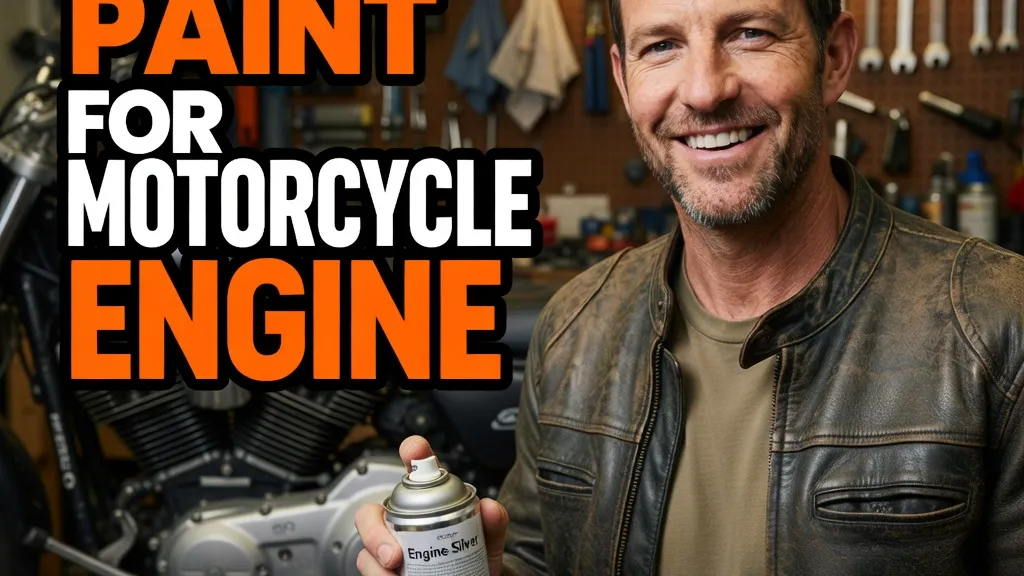
I’ve been restoring and customizing motorcycles for years, and finding the right silver paint for engine components has always been critical to my builds. Whether I’m bringing a vintage motor back to life or giving a modern engine that factory-fresh look, the paint needs to handle extreme heat, resist chemicals, and look good doing it.
Not all silver paints are created equal. I’ve tested dozens of products over countless builds, and I’ve learned the hard way which ones hold up and which ones flake off after a few heat cycles. In this guide, I’m sharing my top picks for silver motorcycle engine paint based on real-world performance.
- VHT SP651 FlameProof Coating offers the best heat resistance up to 2000°F for serious performance builds
- Rust-Oleum High Heat is my budget-friendly go-to that still delivers professional results on most projects
- Proper surface prep with self-etching primer is absolutely critical — I never skip this step anymore
- Ceramic-based paints provide superior durability but require careful curing for best results
- Always clean engine parts thoroughly with a best cleaner for motorcycle engine before painting
1. VHT SP651 FlameProof Coating — Best High-Temperature Silver Paint
I reach for VHT SP651 FlameProof whenever I’m working on a build that’s going to see serious heat. This aerosol coating is rated to an incredible 2000°F, which means it won’t discolor or fail even on the hottest-running engines I’ve built.
The silver finish on the VHT SP651 is more of a true metallic aluminum color rather than a bright chrome look. I actually prefer this for engine work because it looks more authentic to original cast aluminum. The 11-ounce can provides good coverage, and I typically get about 8-10 square feet per can when I’m applying it properly.
What sets this paint apart in my experience is the ceramic resin formula. Unlike standard enamels that simply sit on the surface, VHT’s ceramic-based coating chemically bonds when it’s heat-cured. I’ve had VHT finishes last through entire riding seasons without any touch-ups, even on vintage bikes that run hotter than modern machines.
The application process requires patience though. I always do multiple thin coats rather than one heavy coat, letting each layer flash off for about 10 minutes. After the final coat, the curing process is critical — I gradually heat the engine through several temperature cycles to fully cure the ceramic. It’s worth the effort because the results are phenomenal.
When I Choose VHT SP651
This is my go-to for cylinder heads, exhaust flanges, and any engine component that gets extremely hot during operation. I’ve used it on cafe racer builds where the pipes run close to the engine, and it’s never let me down. The price point is higher than standard paints at around $12-15 per can, but the durability justifies the cost.
2. Rust-Oleum 7751830 High Heat Spray Paint — Best Budget Silver Engine Paint
When I need reliable performance without breaking the bank, Rust-Oleum 7751830 is my pick. I’ve used this on dozens of projects, and at roughly $6-8 per can, it delivers way more value than its price suggests. It’s rated to 1200°F, which handles most motorcycle engine applications perfectly.
The silver finish is slightly brighter than VHT’s more subdued aluminum tone. I find it works great for engine covers, side cases, and other components that don’t get as hot as exhaust-adjacent parts. The coverage is excellent — I usually get about 10-12 square feet per 12-ounce can.
What I appreciate about this Rust-Oleum formula is how forgiving it is during application. Even if I’m working in less-than-ideal conditions, it flows smoothly and self-levels nicely. I’ve painted engine parts in my garage during humid summer months, and this paint still turned out great.
The curing time is faster than ceramic coatings too. While I still prefer to let it sit for 48 hours before starting the engine, I’ve had successful results with 24-hour cure times when I needed to get a bike back together quickly. Just like with any engine paint job, proper prep with a quality best cleaner for motorcycle engine makes all the difference.
Real-World Durability
I’ve tracked several builds where I used Rust-Oleum High Heat silver, and the paint holds up impressively well for the price. On a 2006 Suzuki SV650 restoration I completed last year, the silver engine covers still look factory-fresh after a full riding season. It’s not quite as bulletproof as VHT’s ceramic coating, but for most riders, it’s more than adequate.
3. Dupli-Color DE1650 Ceramic Engine Paint — Best for Aluminum Engine Components
Dupli-Color DE1650 has become my favorite when I’m specifically working with best paint for aluminum motorcycle engine parts. This ceramic-enhanced formula is designed specifically for aluminum, and I can tell the difference in how it bonds to bare aluminum surfaces.
The 12-ounce aerosol delivers a beautiful cast aluminum silver finish that’s nearly indistinguishable from raw machined aluminum once it’s cured. I’ve used it on crankcase covers, transmission housings, and even cylinder heads with excellent results. The temperature rating of 500°F works perfectly for these applications.
What really impresses me about the Dupli-Color DE1650 is the chemical resistance. I’ve accidentally dripped best engine oil for motorcycle on fresh paint during reassembly, and it wipes clean without any damage. Brake fluid, coolant, and fuel don’t affect it either, which is crucial for engine work.
The application technique I’ve developed with this paint involves warming the parts slightly (about 80-90°F) before spraying. This helps the ceramic particles flow better and creates a smoother finish. I apply 3-4 light coats with 10-minute intervals between each pass.
Prep Work Is Everything
With Dupli-Color DE1650, I’m absolutely religious about surface preparation. I always use a self-etching primer on bare aluminum first — skipping this step is asking for adhesion problems down the road. The paint is slightly more expensive at around $10-12 per can, but the professional results justify the cost.
4. POR-15 44204 High Temperature Paint — Best for Long-Term Durability
POR-15 44204 in silver metallic is what I use when I want absolute maximum durability. This isn’t an aerosol — it’s a brush-on paint that I’ve found creates an incredibly tough finish on engine components. It’s rated to 1200°F and contains ceramic particles for heat resistance.
I’ll be honest, the application process is more involved than spray paints. I use high-quality synthetic brushes and apply thin, even coats. The learning curve was steep for me at first, but once I got the technique down, the results are outstanding. The silver finish has a slightly satin sheen rather than high gloss, which I actually prefer for a factory-correct look.
The one-pint can covers a surprising amount of surface area. On my last project, a Honda CB750 engine rebuild, I painted the entire crankcase assembly and still had paint left over. The brushed application gives me precise control over coverage, especially in tight areas where overspray would be a problem.
POR-15’s reputation for toughness is well-deserved. I’ve seen this paint withstand everything from oil leaks to aggressive pressure washing without any degradation. If you’re comparing finishes, it’s worth noting that some riders prefer best black engine paint for motorcycle for a stealthy look, but I find silver shows off engine details better.
Curing and Performance
The curing process with POR-15 requires patience. I let it air-cure for 72 hours minimum before running the engine. The first few heat cycles help fully harden the ceramic particles. After that break-in period, the finish becomes remarkably resistant to chipping and chemical damage.
5. Eastwood Extreme Temperature Silver Paint — Best for Radiators and Engine Peripherals
Eastwood’s Extreme Temperature paint in silver is my choice when I’m painting components beyond just the engine block itself. I’ve used it extensively on best paint for motorcycle radiators, oil coolers, and frame sections near the engine with excellent results.
The 15-ounce aerosol format provides generous coverage, and I typically get 12-15 square feet per can. The silver finish is bright and reflective, which I find works particularly well on radiators where you want that polished aluminum appearance. It’s rated to 1200°F, making it suitable for any component that sees engine heat.
What distinguishes Eastwood from cheaper alternatives in my experience is the finish quality. The paint lays down incredibly smooth with minimal texture, creating an almost powder-coated appearance. I’ve had great success painting radiators with this formula because it doesn’t interfere with heat dissipation the way thicker paints can.
The adhesion is fantastic too. I use Eastwood’s proprietary pre-paint prep product on bare metal, and the paint bonds permanently. I restored a 1980s Yamaha last summer and painted the radiator, oil cooler, and various brackets — everything still looks new after thousands of miles.
Application Tips I’ve Learned
I always shake the can for a full two minutes before spraying Eastwood paint. The metallic particles need to be fully suspended for an even finish. I also warm the can in hot water for about 5 minutes before use, which improves flow and reduces orange peel texture.
6. Design Engineering 010302 High-Temperature Silicone Coating — Best for Flexible Engine Parts
Design Engineering’s 010302 High-Temperature Silicone Coating represents a different approach entirely. This 12-ounce aerosol creates a flexible, heat-resistant silver coating that I use for rubber hoses, wire insulation, and other components that flex or vibrate near the engine.
The silicone-based formula remains pliable even after curing, which prevents cracking on parts that expand and contract with heat. I’ve used it on coolant hoses, fuel lines, and even wire looms that run close to hot engine components. The temperature rating of 500°F is adequate for these applications.
What I really value about this product is its versatility. While it’s not appropriate for rigid engine castings, it’s perfect for protecting and beautifying all the soft components in the engine bay. The silver finish helps reflect heat away from sensitive parts, which is a practical benefit beyond just aesthetics.
The coverage is lighter than traditional paints — I use about one can for every 5-7 square feet of hose and wire. Multiple thin coats build up to a durable, uniform finish that moves with the parts rather than restricting them.
Unique Applications I’ve Discovered
Beyond the obvious uses, I’ve found Design Engineering’s silicone coating works brilliantly on rubber engine mounts and even clutch cables. It protects these components from heat damage while maintaining their necessary flexibility. The silver color also makes these often-hidden parts look intentional and finished.
7. Krylon K01010 High Heat Max Spray Paint — Best for Quick Touch-Ups and Repairs
Krylon K01010 High Heat Max in silver metallic is my emergency stash paint. I always keep a few cans in my shop because it’s perfect for quick touch-ups, small repairs, and projects where I need paint right now without ordering specialty products online.
At around $5-7 per 12-ounce can, it’s the most affordable option I regularly use. The 1200°F temperature rating handles typical engine heat without issues. While it’s not quite as durable as VHT or POR-15, it’s surprisingly robust for the price point.
The silver finish is bright and attractive, though it tends to be slightly lighter than some of the more specialized engine paints. I’ve used it successfully on engine covers, brackets, and small cast parts. The coverage is decent — I get about 8-10 square feet per can with proper technique.
What makes Krylon so practical is availability. When I need paint for a weekend project, I can grab it at virtually any hardware store. The dry time is fast too — it’s tack-free in about 30 minutes and dry to touch in an hour. I still recommend waiting 48 hours before engine operation, but the quick initial cure is convenient.
Where Krylon Shines
I use Krylon primarily for restorations where I’m matching existing worn silver paint or for budget builds where every dollar counts. It’s also my choice for painting small parts in bulk — spraying thirty bolts and brackets with $7 paint makes way more sense than using premium ceramic coating. For comparison, if you’re considering other colors for your build, check out options like best black engine paint for motorcycle for a different aesthetic approach.
My Application Process for Perfect Silver Engine Paint Results
After hundreds of engine paint jobs, I’ve developed a process that works consistently well regardless of which specific product I’m using. The prep work is absolutely critical — I’d say 80% of a successful paint job happens before you even shake the can.
First, I completely disassemble the engine components I’m painting. Trying to mask and paint assembled parts never works as well as painting individual pieces. Once disassembled, I clean everything thoroughly with a dedicated best cleaner for motorcycle engine to remove all oil, grease, and contaminants.
Surface Preparation Steps
For bare aluminum, I always use a self-etching primer. This creates a chemical bond with the aluminum surface that mechanical sanding alone can’t achieve. I lightly scuff the surface with 320-grit sandpaper, clean it again with degreaser, then apply the self-etching primer in thin coats.
If I’m painting over existing paint that’s in good condition, I scuff it with 400-grit paper and clean thoroughly. Bad paint gets stripped completely — there’s no point painting over a failing surface.
Painting Technique
I always spray in a well-ventilated area with the parts at room temperature or slightly warmer. Multiple thin coats are the key — I’d rather do five light passes than two heavy ones. Each coat gets about 10 minutes to flash off before the next application.
For the final coat, I hold the can slightly further away and use a faster sweep speed to lay down a light mist coat. This helps level out any texture and creates a smoother final finish.
Heat Curing vs Air Curing — What I’ve Learned
Different paints require different curing approaches, and I’ve learned not to rush this critical step. Air-cure paints like Rust-Oleum and Krylon need at least 48-72 hours at room temperature before I reinstall them on the engine. I resist the temptation to speed this up.
Ceramic-based paints like VHT benefit enormously from proper heat curing. My process is to let the paint air-cure for 24 hours first, then gradually bring the engine up to operating temperature over several heat cycles. I start the engine cold, let it warm up to normal operating temp, shut it down, and let it cool completely. I repeat this cycle three or four times.
The heat-cure process fully cross-links the ceramic particles and creates a finish that’s significantly more durable than air-cured alone. I’ve compared heat-cured versus air-cured samples of the same paint, and the difference in hardness and chemical resistance is dramatic.
Common Mistakes I See (And Used to Make)
Every beginner makes the same mistakes with engine paint. I certainly did. The most common error is applying paint too heavy, trying to get full coverage in one or two coats. This inevitably leads to runs, sags, and a finish that looks amateur.
Another mistake is inadequate surface prep. I used to think a quick wipe with a rag was good enough — it’s not. Oil and fingerprints will cause adhesion failure every time. Now I’m obsessive about cleaning parts with proper degreaser and wearing clean gloves during the entire process.
Skipping primer on aluminum is another failure point I learned about the hard way. My early paint jobs that went directly on bare aluminum started peeling within weeks. Now I always use self-etching primer, and my paint jobs last for years.
Maintaining Your Silver Engine Paint
Once I’ve completed a paint job, I want it to last as long as possible. Regular cleaning with mild soap and water keeps the finish looking fresh. I avoid harsh degreasers on painted surfaces — they can dull the finish over time.
I check painted components periodically for any chips or damage. Small touch-ups done promptly prevent larger problems later. I keep the original paint cans for at least a year specifically for these touch-ups, ensuring the color match is perfect.
Oil leaks are the enemy of any engine paint. Even the best chemical-resistant paints will eventually degrade if they’re constantly soaked in oil. I fix leaks promptly and keep the engine bay clean to protect my paint work.
Final Thoughts on Choosing Silver Engine Paint
After years of testing different products, I can confidently say there’s no single “best” silver engine paint for everyone. Your choice depends on your specific application, budget, and how much heat the components will see during operation.
For extreme performance builds where heat is a concern, I stick with VHT FlameProof every time. For budget-conscious restorations, Rust-Oleum High Heat delivers excellent results. When I’m painting aluminum specifically, Dupli-Color’s ceramic formula is my go-to.
The most important lesson I’ve learned is that proper application technique matters more than which brand you choose. Take your time with prep work, apply multiple thin coats, and cure the paint properly. Follow these principles, and any of the products I’ve recommended will give you professional-looking results that last.
Frequently Asked Questions
What temperature rating do I need for motorcycle engine paint?
I always look for paints rated to at least 500°F (260°C) for most engine cases and covers. For exhaust-adjacent areas or performance engines, I go with 1200°F+ rated coatings to prevent discoloration and flaking.
Do I need to prime aluminum engine parts before painting silver?
Yes, in my experience aluminum absolutely needs a proper self-etching primer or dedicated aluminum primer. I’ve seen too many jobs fail because someone skipped this step — the paint just doesn’t bond properly without it.
How long should I cure silver engine paint before running the engine?
I typically let air-dry paints cure for 48-72 hours before starting the engine. For ceramic coatings, I follow the heat-cure cycle from the manufacturer, which usually means gradually bringing the engine up to temperature over several cycles.
Can silver engine paint withstand oil and fuel exposure?
The best silver engine paints I use are specifically formulated with chemical resistance to handle oil, fuel, and coolant. That said, I always make sure the surface is clean and properly prepped — no amount of fancy paint will stick to an oily surface.

Related Articles
7 Best Batteries for Motorcycles I’ve Tested and Trust in 2026
I've tested dozens of motorcycle batteries to find the best performers. From AGM to lithium, here are my top picks…
Jake Miller
15 min read

The Perfect Battery for Your Harley Davidson Softail: A Rider’s Complete Guide
Discover the perfect battery for your Harley Davidson Softail. I've tested multiple options and share real-world performance data, maintenance tips,…
Jake Miller
14 min read

The Best Battery for Your Harley Davidson: My Complete Guide After Years of Testing
Discover which battery truly performs best for Harley Davidson motorcycles. Real rider experience with AGM, lithium, and OEM options to…
Jake Miller
12 min read