
7 Best Paints for Motorcycle Engine Cases That Actually Last
 Jake Miller
15 min read
Jake Miller
15 min read
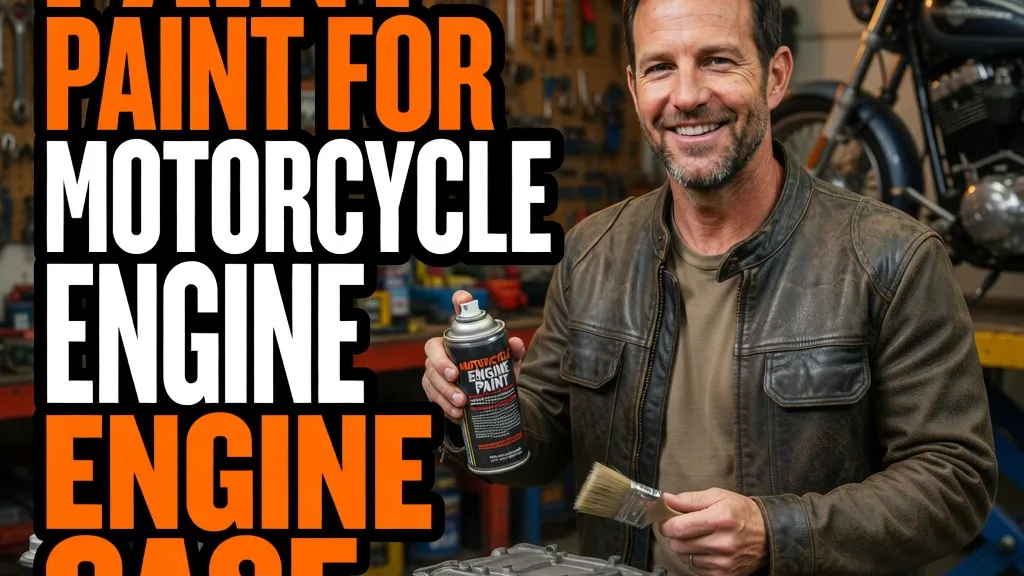
Why I Take Engine Case Paint Seriously
I’ve spent more hours than I’d like to admit stripping failed paint jobs off motorcycle engine cases. There’s nothing worse than watching a fresh restoration turn into a bubbled, peeling mess after a few heat cycles.
The engine case might not reach exhaust-level temperatures, but it faces a brutal combination of heat, oil, vibration, and constant thermal expansion. Standard paints don’t stand a chance. After testing dozens of products across multiple restoration projects, I’ve narrowed down the paints that actually deliver on their promises.
I’ve used these products on everything from vintage Honda twins to modern sportbikes. Some have impressed me year after year, while others looked great for a month before disappointing me completely.
- VHT Engine Metallic and Dupli-Color Engine Enamel are my top picks for durability and ease of application
- Self-etching primer is non-negotiable on aluminum—it’s the difference between years of life and immediate failure
- Proper surface prep (degreasing, sanding, cleaning) matters more than the paint brand you choose
- Heat curing takes patience but dramatically improves adhesion and chemical resistance
- Budget options exist, but I’ve found spending $15-25 per can saves me from redoing the job six months later
1. VHT SP125 Engine Metallic Burnt Copper — Best Overall Finish Quality
I keep coming back to VHT’s Engine Metallic line for restorations where appearance matters as much as durability. The SP125 Burnt Copper has become my go-to for vintage Japanese bikes, where it closely matches the original factory finish on many Honda and Kawasaki engines from the ’70s and ’80s.
The VHT SP125 is rated to 550°F, which gives me plenty of margin for engine case temperatures. What sets this apart is the metallic finish—it has a subtle flake that catches light beautifully without looking gaudy. I’ve had cases painted with VHT SP125 that still look fresh after three years of regular riding.
Application takes patience. I apply 3-4 light coats with 10-minute flash times between each coat. The key is resisting the urge to spray heavy coats—they’ll run, and you’ll hate yourself. After air-drying for 48 hours, I cure it by running the engine in 10-minute intervals.
At around $18-22 per 11-ounce can, VHT isn’t the cheapest option. But I’ve never had a properly applied VHT job fail on me. For show-quality restorations or bikes where the engine cases are highly visible, this is what I reach for first. If you’re specifically looking for darker finishes, check out options for best black engine paint for motorcycle builds.
2. Dupli-Color DE1613 Ceramic Engine Paint — Best for Daily Riders
My daily-ridden bikes wear Dupli-Color DE1613, and I can’t recommend it enough for practical applications. This ceramic-based formula is rated to 500°F and has survived everything I’ve thrown at it—rain, road salt, oil drips, and thousands of miles of vibration.
The Dupli-Color Ceramic Engine Paint dries to a semi-gloss black finish that hides minor imperfections well. I appreciate this on bikes that see real use, where perfect show finishes would just stress me out. The ceramic additives provide excellent chemical resistance—I’ve spilled chain lube and brake cleaner on fresh paint without damage.
Application is forgiving compared to VHT metallics. The paint flows smoothly, and runs are rare even for beginners. I still use multiple light coats, but Dupli-Color tolerates slight technique mistakes better than other brands I’ve tested.
The cure process is straightforward. After 24 hours of air drying, I run the engine for three heat cycles. By the second ride, the paint has hardened to its final durability. At $12-16 per can, it’s also more budget-friendly than premium options while still delivering professional results.
I’ve used Dupli-Color DE1613 on four different bikes over the past five years. None have required touch-ups. For riders who want reliability without fussing over show-perfect finishes, this is my strongest recommendation.
3. POR-15 High Temp Paint — Best Chemical Resistance
POR-15 High Temp Paint is the toughest coating I’ve used on motorcycle engine cases. It’s rated to 1200°F, which is overkill for cases but means it laughs at the 300-400°F temperatures they actually reach. What makes POR-15 special is its remarkable resistance to oil, gasoline, and solvents.
I discovered POR-15 after fighting chronic oil seepage on an older Triumph. The case had slight porosity, and every paint I tried would eventually soften and peel where oil migrated through. POR-15 High Temp stopped that cycle completely. The coating remains hard and intact even when constantly exposed to petroleum products.
The application process requires commitment. POR-15 is a brush-on product, not a spray, which means more labor and more visible brush strokes if you’re not careful. I thin it slightly with POR-15’s own solvent and apply with a quality foam brush, working in sections. Three thin coats over 36 hours give me the best results.
Once cured, POR-15 is nearly permanent. I mean that literally—removing it later requires aggressive chemical strippers or media blasting. This permanence is perfect for riders who want a “do it once and forget it” solution, but it’s nerve-wracking if you’re indecisive about color choices.
At $25-30 for a small can, POR-15 is premium-priced. But I’ve seen cases painted five years ago that still look fresh. For bikes with oil seepage issues or extreme riding conditions, nothing else I’ve tested comes close to POR-15’s durability.
4. Rust-Oleum High Heat Spray Paint — Best Budget Option
I’ll be honest—I was skeptical of Rust-Oleum’s High Heat spray when I first tried it. At $7-10 per can, it’s half the price of dedicated motorcycle paints, and my experience has taught me that cheap usually means redoing the job in six months. But Rust-Oleum surprised me.
The Rust-Oleum High Heat formula (rated to 1200°F) has held up remarkably well on three budget restoration projects I’ve completed. It’s not as chemically resistant as Dupli-Color or POR-15, and the finish quality doesn’t match VHT’s metallics, but it stays put through normal riding conditions.
I’ve had the best results using Rust-Oleum on lower-visibility engine components or beater bikes where appearance isn’t critical. The flat black finish is workmanlike rather than beautiful, but it covers well and doesn’t chip easily. Application is straightforward—if you can use spray paint, you can use this.
The weakness shows up with chemical exposure. Gasoline drips will soften the paint if left to sit, and aggressive degreasers can dull the finish. I learned to be gentler when using a best cleaner for motorcycle engine maintenance on bikes with Rust-Oleum finishes.
For budget builds, winter beaters, or situations where you need something better than bare aluminum but don’t want to invest in premium paint, Rust-Oleum delivers surprising value. Just temper your expectations—this is a functional coating, not a show finish.
5. Eastwood High Temp Coating System — Best for Show Bikes
When I’m building a bike for shows or magazine features, I turn to Eastwood’s High Temp Coating System. This isn’t a single can of spray paint—it’s a complete system with dedicated primer, base coat, and optional clear coat. The results justify the complexity and cost.
The Eastwood system starts with their Extreme Chassis Black Primer, formulated specifically for aluminum. The base coat (available in multiple colors rated to 500°F) goes on smoothly and levels beautifully. I finish with their High Temp Clear, which adds depth and gloss that photographs stunningly.
I’ve used the Eastwood system on three concours-level restorations. The finish quality rivals professional powder coating but with more color flexibility and the ability to do spot repairs. Under judges’ scrutiny, Eastwood-coated cases look like OEM fresh-from-the-factory finishes.
The downside is time and cost. The full system runs $80-120 depending on colors chosen, and the multi-stage process takes most of a day when you factor in prep and flash times between coats. You’re also committed to Eastwood’s products—mixing brands in the system rarely works well.
Application requires decent spray equipment. While Eastwood sells aerosol versions, I get better results with their gun-applied products through a quality HVLP sprayer. The learning curve is steeper than rattle-can paints, but the results speak for themselves.
For bikes that will be judged, photographed, or displayed, Eastwood justifies its premium pricing. For daily riders, it’s probably overkill. I save this system for special projects where appearance is paramount.
6. Krylon High Heat Max — Best for Quick Fixes
Every garage needs a can of Krylon High Heat Max for emergency repairs and quick touch-ups. It’s not my first choice for complete engine case refinishing, but it’s saved me multiple times when I needed fast results.
Krylon High Heat Max (rated to 1200°F) dries faster than any other product I’ve tested. I can apply it, wait 30 minutes, and carefully reinstall components. While I still recommend proper curing through heat cycles, the aggressive solvent system allows for much quicker handling than traditional engine paints.
I keep Krylon on hand for covering small damaged areas, addressing scratches before they rust, and quickly refinishing brackets or small parts that don’t justify breaking out premium paint. The finish is acceptable—not beautiful, but functional and reasonably durable.
The fast-dry chemistry has tradeoffs. Krylon runs more easily than slower-drying paints if you apply heavy coats. The finish also feels slightly more brittle than ceramic or POR-15 formulas after curing. I’ve had occasional chipping in high-impact areas where rocks or tools have hit the cases.
At $8-12 per can and available at virtually every hardware store, Krylon’s accessibility is its greatest strength. When you need paint today and can’t wait for specialty products to ship, Krylon gets you back on the road. I’ve used it successfully on valve covers, timing covers, and similar parts where perfect isn’t necessary.
7. G2 High Temperature Epoxy Coating — Best for Extreme Conditions
G2 High Temperature Epoxy Coating represents the nuclear option for engine case finishing. This two-part epoxy system creates an incredibly hard, chemical-resistant coating that’s virtually indestructible once cured. I reserve it for problem cases and extreme-duty applications.
I discovered G2 while working on a dual-sport bike that saw serious off-road abuse. Previous paint jobs—including Dupli-Color and VHT—had chipped away from rock impacts and constant mud and water exposure. The G2 epoxy has survived two years of brutal trail riding without significant damage.
The application process is involved. G2 is a true two-part epoxy that must be mixed precisely and applied within a limited working window. I use disposable brushes and work in small sections, as the epoxy becomes too thick to spread smoothly after 20-30 minutes. The coating self-levels reasonably well but requires more skill than spray paints.
Curing takes patience. G2 needs 72 hours of room-temperature curing before the engine can be assembled, followed by careful heat cycling. The full cure takes about two weeks, during which the coating hardens to its final rock-hard state. But once cured, it’s tougher than anything else I’ve used.
Cost is significant at $40-50 for enough material to coat a typical motorcycle engine case set. But for bikes used in harsh conditions—adventure bikes, off-road machines, or working motorcycles exposed to chemicals—G2’s extreme durability pays dividends. I wouldn’t use it on a street-only cruiser, but for anything seeing serious abuse, it’s worth every penny.
Critical Prep Work That Makes or Breaks Paint Jobs
I’ve learned the hard way that the best paint in the world fails if the surface isn’t properly prepared. Every failed paint job I’ve done traced back to rushed or inadequate prep work, not paint quality.
Start by thoroughly degreasing the engine cases. I use a strong degreaser, followed by a wipe with acetone or lacquer thinner. Even fingerprint oils will cause adhesion problems. For aluminum engine cases, I always use a dedicated best paint for aluminum motorcycle engine approach with proper etching primers.
Next comes mechanical abrasion. I use 320-grit sandpaper to scuff the entire surface, creating microscopic scratches that give paint something to grip. This is tedious on complex engine cases with fins and curves, but there are no shortcuts. After sanding, I clean again with solvent to remove aluminum dust.
The Self-Etching Primer Step
Self-etching primer is non-negotiable on aluminum. I learned this lesson on my second restoration project when I skipped primer to save time. The paint looked perfect for three weeks, then started peeling in sheets. Primer chemically bonds to aluminum in ways that paint alone cannot.
I apply two light coats of self-etching primer, allowing 15 minutes flash time between coats. After the primer has dried for an hour, I can apply the color coats. Some paints like Dupli-Color and VHT include primers in their product lines formulated to work with their paints—I use matched systems when available.
Heat Curing Makes the Difference
Every engine paint label says it can air-dry, and technically that’s true. But I’ve found that proper heat curing dramatically improves durability and chemical resistance. The difference is night and day.
My curing process starts with 24-48 hours of air drying in a well-ventilated space. Then I reassemble the engine and run it for 10 minutes, let it cool completely (20-30 minutes), and repeat. I do this three times minimum before considering the paint fully cured.
During the first heat cycle, you’ll smell solvents burning off—this is normal. The paint may also darken slightly as it cures. By the third cycle, there should be no smell and no color change. Some paints like POR-15 benefit from even longer cure times with multiple riding sessions before reaching full hardness.
What About Powder Coating?
I’m frequently asked whether powder coating beats paint for engine cases. The answer is complicated. Powder coating is incredibly durable and looks fantastic, but it requires full engine disassembly and professional equipment. I can paint engine cases on the bike with proper masking; powder coating requires complete teardown.
Powder coating also costs significantly more—$150-300 for a typical set of motorcycle cases compared to $20-80 for quality paint. For show bikes or complete restorations where the engine is already apart, powder coating makes sense. For maintenance refinishing or budget builds, paint delivers 80% of the durability at 20% of the cost.
The other consideration is repairability. If powder coating chips, you’re either living with it or paying for complete re-coating. With paint, I can spot-repair small chips or damaged areas relatively easily. For bikes that will see regular use, this flexibility matters.
Mistakes I’ve Made So You Don’t Have To
I’ve learned expensive lessons over the years. Painting in humid weather causes blushing and extended cure times—I now check weather forecasts and use a dehumidifier in my workspace when humidity exceeds 60%.
I once tried speeding up cure times with a heat gun. The result was uneven curing, runs from paint that melted before hardening, and a complete do-over. Heat curing must happen gradually through natural engine operation, not forced with external heat.
Another mistake was ignoring compatibility between products. I once used a generic primer with VHT top coat—the primer never fully hardened and remained tacky under the top coat. Now I stick to matched systems or thoroughly tested combinations.
The biggest lesson? Patience pays off. Every time I’ve rushed a paint job—skipped prep steps, applied coats too quickly, didn’t wait for proper cure times—I’ve regretted it. A weekend of careful work beats redoing failed jobs multiple times.
Maintenance and Longevity
Properly applied engine paint should last years with minimal maintenance. I’ve had bikes with VHT and Dupli-Color finishes that still look fresh after 40,000+ miles. The key is gentle treatment during maintenance.
When washing the bike, I avoid pressure washers on freshly painted cases for the first few months. High-pressure water can force its way under paint edges before it’s fully cured. After the cure period, normal washing is fine, but I still keep pressure washer tips at least 18 inches away.
Oil drips happen, but I clean them promptly. While cured high-temp paints resist petroleum products reasonably well, letting oil sit for weeks will eventually soften even the best finishes. A quick wipe with a rag after oil changes prevents problems.
Touch-ups are inevitable on bikes that see real use. I keep leftover paint for addressing small chips before they grow. Cleaning the damaged area, light sanding, and applying 1-2 coats of matching paint keeps cases looking good between major refinishing.
Similar Painting Projects Worth Considering
Once you’ve mastered engine case painting, similar techniques apply to other motorcycle components. I’ve used these same paints successfully on oil pans, alternator covers, and transmission cases. The prep work, priming, and curing processes remain identical.
Cooling system components require slightly different approaches—check specific recommendations for best paint for motorcycle radiators if you’re tackling that project. Radiators need paints that won’t insulate or reduce heat transfer efficiency.
For internal engine work, proper lubrication matters as much as external appearance. After refinishing engine cases, I always use quality best engine oil for motorcycle protection to keep everything running smoothly inside those freshly painted cases.
Final Thoughts on Engine Case Paint Selection
Choosing the right engine case paint depends on your specific situation. For show bikes and concours restorations, I reach for VHT metallics or Eastwood’s system. For daily riders and practical applications, Dupli-Color Ceramic delivers unbeatable value. When facing harsh conditions or problem cases, POR-15 or G2 epoxy provide maximum protection.
The common thread across all successful paint jobs isn’t the brand—it’s the process. Thorough degreasing, proper abrasion, quality self-etching primer, multiple thin coats, adequate flash times, and patient heat curing matter more than which $15 can you buy.
I’ve spent thousands of hours refinishing motorcycle engine cases over the past decade. The products in this guide represent the ones that have earned shelf space in my garage through proven performance. Whether you’re restoring a vintage bike or refreshing a modern machine, these paints will serve you well if you respect the process and take your time.
Frequently Asked Questions
What temperature rating do I need for motorcycle engine case paint?
I always look for paints rated to at least 500°F (260°C) for engine cases. The cases don’t get as hot as exhaust components, but they still reach 300-400°F during normal operation. Higher ratings provide a safety margin.
Do I need primer for painting aluminum engine cases?
Yes, I never skip primer on aluminum. A quality self-etching primer creates a chemical bond with the aluminum surface that mechanical prep alone can’t achieve. It’s the difference between paint that lasts years versus paint that flakes off in months.
How long should I wait before running the engine after painting?
I give fresh engine case paint at least 24-48 hours to air dry, then do a careful heat cure by running the engine for 10-minute intervals with 20-minute cool-downs. Full cure takes about a week of normal riding.
Can I use regular spray paint on motorcycle engine cases?
No. Regular paint will blister and peel within days. I learned this the hard way on my first restoration project. You need paint specifically formulated for high-temperature applications that can handle oil contact and thermal cycling.

Related Articles
7 Best Batteries for Motorcycles I’ve Tested and Trust in 2026
I've tested dozens of motorcycle batteries to find the best performers. From AGM to lithium, here are my top picks…
Jake Miller
15 min read

The Perfect Battery for Your Harley Davidson Softail: A Rider’s Complete Guide
Discover the perfect battery for your Harley Davidson Softail. I've tested multiple options and share real-world performance data, maintenance tips,…
Jake Miller
14 min read

The Best Battery for Your Harley Davidson: My Complete Guide After Years of Testing
Discover which battery truly performs best for Harley Davidson motorcycles. Real rider experience with AGM, lithium, and OEM options to…
Jake Miller
12 min read