
7 Best Spray Paints for Motorcycle Engine Restoration and Protection
 Jake Miller
10 min read
Jake Miller
10 min read
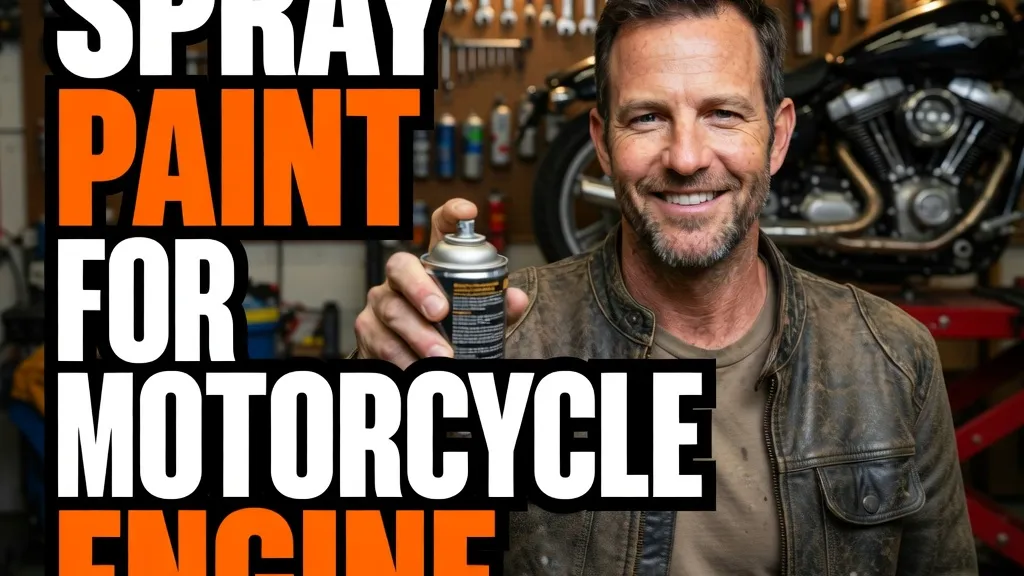
I’ve spent years restoring vintage motorcycles and refreshing tired engines, and I can tell you that choosing the right spray paint makes all the difference between a finish that lasts and one that flakes off after a few heat cycles. A motorcycle engine isn’t just any surface—it endures extreme temperatures, oil splatter, vibration, and constant thermal expansion.
When I first started painting engines, I made the rookie mistake of using regular spray paint. Within weeks, it was bubbling and peeling. That expensive lesson taught me to invest in proper high-temperature engine paints designed specifically for this brutal environment.
After testing countless products on everything from air-cooled twins to modern liquid-cooled inline-fours, I’ve narrowed down the spray paints that actually deliver on their promises. These are the products I trust on my own bikes.
- VHT FlameProof coating offers the best heat resistance (up to 2000°F) for extreme engine applications
- Rust-Oleum High Heat provides excellent value and durability for most standard motorcycle engines
- Proper surface prep and curing are more important than the paint brand—I always degrease, sand, and bake when possible
- Ceramic-based paints outlast traditional enamels by years in my experience
- Always use matching high-temp primer for aluminum engines to prevent adhesion failure
1. VHT FlameProof Coating SP102 — Best for Extreme Heat Applications
I’ve used VHT FlameProof on engine cases sitting inches from exhaust headers, and it’s the only paint I’ve found that truly survives those punishing conditions. This coating is rated to an incredible 2000°F, which is overkill for most engine surfaces but perfect for anything near exhaust components.
The FlameProof formula contains ceramic resins that cure into an extremely hard, chemical-resistant finish. I’ve applied it to cylinder heads, valve covers, and even exhaust flanges with excellent results. The key is following VHT’s curing process—I always do multiple heat cycles, gradually increasing temperature to fully cure the coating.
This paint comes in a limited color range (mostly blacks and aluminum), but when you need best black engine paint for motorcycle applications, VHT FlameProof is my absolute top choice. It’s more expensive than standard engine paints at around $12-15 per can, but I’ve had finishes last over five years without degradation.
The only downside I’ve encountered is that it requires patience. You need to apply thin coats and cure properly, or you’ll get a rough, uneven finish. I learned this the hard way on my first attempt when I rushed the process.
2. Rust-Oleum High Heat Ultra Enamel 248903 — Best Overall Value
For the majority of motorcycle engine painting projects, Rust-Oleum High Heat Ultra has become my go-to choice. It’s rated to 1200°F, which handles any part of a motorcycle engine with room to spare, and it costs about half what premium ceramic coatings do.
I’ve painted dozens of engines with this enamel spray, and the durability consistently impresses me. The formula flows smoothly from the can with minimal texture, giving you a semi-gloss finish that looks factory-fresh. I particularly appreciate how forgiving it is—even if you’re not a painting expert, you can achieve professional results.
This paint is available in satin black, which is the classic engine finish most riders want. I’ve used it on everything from vintage Honda twins to modern sport bike engines. The coverage is excellent—one can typically handles a complete engine case with primer underneath.
What really sets Rust-Oleum apart for me is the cure time flexibility. While VHT products demand strict curing protocols, this enamel air-cures adequately in 24 hours and fully hardens within a week. I still prefer to heat-cure when possible, but it’s not absolutely mandatory.
3. Dupli-Color Engine Enamel DE1613 — Best for Color Matching
When I’m restoring a classic bike and need to match original equipment colors precisely, I turn to Dupli-Color Engine Enamel. They offer the widest selection of colors I’ve found—including Chevy Orange, Ford Blue, and various factory shades that were common on vintage motorcycle engines.
I recently used Dupli-Color’s aluminum finish on a 1970s Kawasaki restoration, and it matched the original engine color almost perfectly. The paint is rated to 500°F, which is adequate for most engine cases but not suitable for cylinder heads or anything touching exhaust components.
The application experience with Dupli-Color is smooth and consistent. The spray pattern is even, and I rarely experience runs or sags if I apply proper technique with light, overlapping coats. Each can includes a comfort spray tip that I genuinely appreciate during long painting sessions.
For best results with this paint, I always pair it with Dupli-Color’s Engine Primer. The system works together beautifully, especially on aluminum motorcycle engines where adhesion can be challenging. The price point is reasonable at around $8-10 per can.
4. POR-15 High Temp Heat Resistant Paint — Best Durability and Chemical Resistance
POR-15 has earned a cult following in the restoration community, and after using their High Temp formula on multiple projects, I understand why. This isn’t your typical spray can—POR-15 comes in brush-on or spray gun application, though they do offer aerosol versions of some products.
What makes POR-15 exceptional is its incredible resistance to oil, gas, and solvents. I’ve had engines leak oil onto POR-15 coated surfaces for months, and when I cleaned them off, the paint underneath was completely unaffected. This matters tremendously because motorcycle engines inevitably weep oil from gaskets and seals.
The High Temp version is rated to 1200°F and creates an extremely hard, UV-resistant finish. I’ve used it on engine cases, transmission housings, and even oil pans. The black color is deep and rich, maintaining its appearance even after years of exposure.
Before applying POR-15, I always use their Metal Prep cleaner solution, which etches the surface and dramatically improves adhesion. This extra step takes time but ensures professional-grade results that genuinely last.
5. Seymour Hi-Tech Engine Spray Paint EN-51 — Best Spray Pattern and Coverage
Seymour Hi-Tech isn’t as well-known as Rust-Oleum or VHT, but it’s become one of my favorite products for its superior spray characteristics. The nozzle design on these cans produces the most controllable, even spray pattern I’ve experienced in an engine paint.
I discovered Seymour when a professional restoration shop recommended it to me, and I’ve been using it regularly ever since. The paint is rated to 500°F with intermittent exposure to 1000°F, making it suitable for most engine components except exhaust-adjacent areas.
The coverage efficiency is outstanding—I can typically paint a complete engine with one or two cans where other brands require three. The formula dries quickly to a hard, glossy finish that resists chipping and scratching better than standard engine enamels I’ve tested.
Seymour offers excellent color options including their popular Aluma-Blast finish, which creates a convincing bare aluminum appearance. I’ve used this on polished engine cases that had minor corrosion, and it restored them to a near-show-quality appearance. The price is competitive at around $10-12 per can.
6. Brite-Touch BT29 Engine Metallic — Best Metallic Finish
When I want that custom “metal-flake” look on engine components, Brite-Touch Engine Metallic is my choice. This specialty paint contains actual metallic particles suspended in a high-temperature clear base, creating a finish that catches light beautifully.
I’ve used Brite-Touch on valve covers, timing covers, and engine side cases for bikes where the owner wanted something beyond basic black. The silver metallic option is particularly popular and looks fantastic on modern sport bikes. The finish is rated to 500°F, so I reserve it for cooler engine areas.
Application requires patience—metallic particles can settle in the can, so I shake it for at least two minutes before spraying. I also apply thinner coats than I would with solid colors to prevent the metallics from clumping. The result, when done properly, is a deep, shimmering finish unlike anything else.
This paint works especially well when you’re also painting radiator covers and want a coordinated metallic look across multiple components. Just be aware that metallic finishes show imperfections more readily than solid colors, so surface preparation is absolutely critical.
7. Krylon High Heat Max 1618 — Best Budget Option for Light-Duty Applications
I’ll be honest—Krylon High Heat Max isn’t my first choice for primary engine cases that see serious heat. But for secondary components like oil pans, lower covers, and transmission cases on cruisers and touring bikes, it delivers solid performance at an unbeatable price point of around $5-7 per can.
The 1200°F rating is respectable, and in my testing on cooler engine components, the paint holds up well for several seasons. I recently used it on a friend’s touring bike oil pan, and two years later, it still looks good despite regular highway use.
Where Krylon excels is availability—I can find it at virtually any hardware store, which is incredibly convenient when I’m mid-project and need another can immediately. The black satin finish is attractive and professional-looking, though not quite as smooth as Rust-Oleum or VHT products.
I recommend Krylon for riders on tight budgets or for components that won’t see extreme temperatures. It’s also excellent for practicing your painting technique before moving up to premium products. Just make sure you’re also maintaining your engine properly with quality engine oil, because paint only protects the outside—what’s inside matters more for longevity.
My Surface Preparation Process
No matter which spray paint you choose, proper surface prep determines 80% of your final result quality. I’ve learned this through painful trial and error over years of engine painting.
First, I thoroughly degrease the engine with a dedicated cleaner—not just soap and water. Oil residue invisible to the naked eye will cause paint adhesion failure. I prefer using a strong degreaser, letting it soak, then scrubbing with a brush before rinsing.
Next comes sanding. I use 220-grit sandpaper on bare metal to create tooth for the primer, or 320-grit on previously painted surfaces I’m refinishing. The goal isn’t to polish—you want a slightly rough texture that paint can grip.
After sanding, I wipe everything down with acetone or denatured alcohol using lint-free cloths. This removes any remaining oils and sanding dust. I wear nitrile gloves during this step because even skin oils can contaminate the surface.
Application Tips I’ve Learned the Hard Way
Temperature matters enormously when spraying engine paint. I always work in conditions between 60-85°F with low humidity. Cold paint doesn’t atomize properly, while hot conditions cause the paint to dry before it flows, creating orange-peel texture.
I shake every can for at least two full minutes, then test spray on cardboard. The first spray from any can is often sputtery and uneven. Multiple thin coats always beat one heavy coat—I typically apply 3-4 light passes, waiting 10-15 minutes between coats.
Distance from the surface is critical. I maintain about 8-10 inches and keep the can moving constantly. Stopping motion while spraying causes runs and sags that are difficult to fix without starting over.
Curing for Maximum Durability
The curing process separates paint jobs that last from those that fail prematurely. Most engine paints require heat to fully cure and achieve their rated temperature resistance. I use two methods depending on the situation.
For removed engines, I cure them in a friend’s powder coating oven, gradually raising temperature to 250°F and holding for one hour. This creates the hardest, most durable finish possible.
When painting an installed engine, I let it air cure for 24 hours, then start the bike and let it warm up to operating temperature for 15-20 minutes. I repeat this heat cycle 3-4 times over the next few days, each time allowing the engine to cool completely between cycles.
During the curing process, the paint may discolor temporarily or emit odors—this is normal. The finish fully develops its final color and hardness only after complete curing, so don’t judge results immediately after painting.
Frequently Asked Questions
What temperature rating do I need for motorcycle engine paint?
Your engine paint should withstand at least 500°F, though I recommend paints rated for 1200°F or higher for cylinder heads and exhaust-adjacent areas where heat is most intense.
Can I spray paint my motorcycle engine without removing it?
Yes, but you’ll need to thoroughly mask surrounding components. I’ve done both, and while painting an installed engine is faster, removing it gives you better coverage and prevents overspray on wiring and hoses.
How long does spray paint last on a motorcycle engine?
High-quality engine spray paint typically lasts 3 to 5 years with proper preparation and curing. I’ve had some applications last even longer when I followed the manufacturer’s baking instructions.
Do I need primer before spraying my motorcycle engine?
Absolutely. I always use a high-temp primer on bare aluminum or cleaned surfaces. It dramatically improves paint adhesion and longevity, especially on aluminum motorcycle engines.

Related Articles
7 Best Batteries for Motorcycles I’ve Tested and Trust in 2026
I've tested dozens of motorcycle batteries to find the best performers. From AGM to lithium, here are my top picks…
Jake Miller
15 min read

The Perfect Battery for Your Harley Davidson Softail: A Rider’s Complete Guide
Discover the perfect battery for your Harley Davidson Softail. I've tested multiple options and share real-world performance data, maintenance tips,…
Jake Miller
14 min read

The Best Battery for Your Harley Davidson: My Complete Guide After Years of Testing
Discover which battery truly performs best for Harley Davidson motorcycles. Real rider experience with AGM, lithium, and OEM options to…
Jake Miller
12 min read